Ma in t e nan c e | Exch a ng i ng t h e c h ain a nd c h ai n s p r o ck e t
57
INSTALLING THE C-LINK
ONLY FOR GM2, GM4 AND GM8
C-link
Tensioner sleeve
Use the outside end of the chain to install
the C-link.
Turn the C-link so that the opening, when
installed, points in the direction of the inner
fall (the fall under load).
Push the C-link onto the second-last or
third-last chain link (depending on the
orientation from the previous step).
Hammer the tensioner sleeve into the C-
link.
Place the chain in the chain box.
Check whether the chain completely fits in
the chain box. If the chain box is too small,
contact ABUS Service. See “ABUS Service”
page 90.
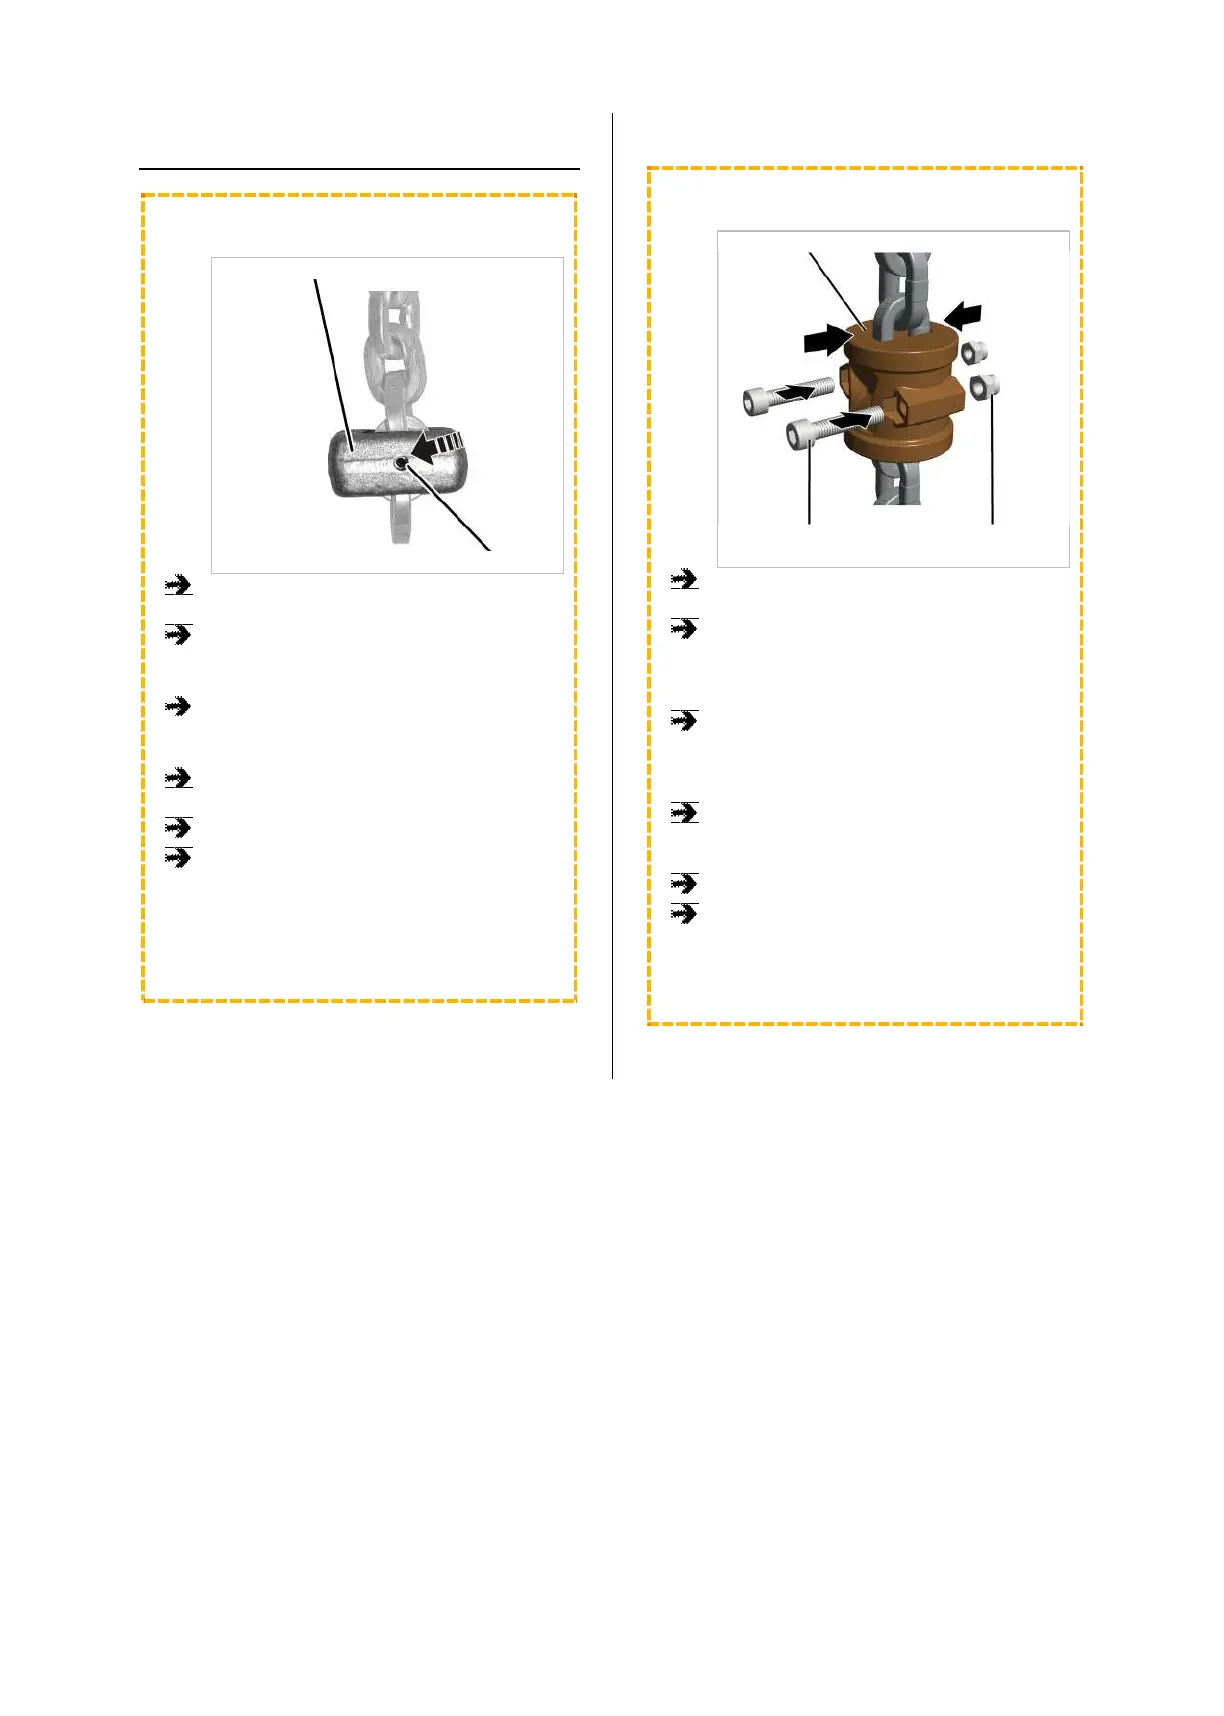
ONLY FOR GM6
C-link
Fillister-head screw
M6x30
Self-locking nut
Use the outside end of the chain to install
the C-link.
Turn the C-link so that the heads of the
fillister-head screws point in the direction of
the inner fall (the fall under load) when
installed.
Place the halves of the C-link on the
second-last or third-last chain link
(depending on the orientation from the
previous step).
Tighten the C-link with the fillister-head
screws M6x30 (2x) and self-locking nuts M6
(2x). 10 Nm.
Place the chain in the chain box.
Check whether the chain completely fits in
the chain box. If the chain box is too small,
contact ABUS Service. See “ABUS Service”
page 90.