User Manual Tags 3-7
Attaching BR42 Tags
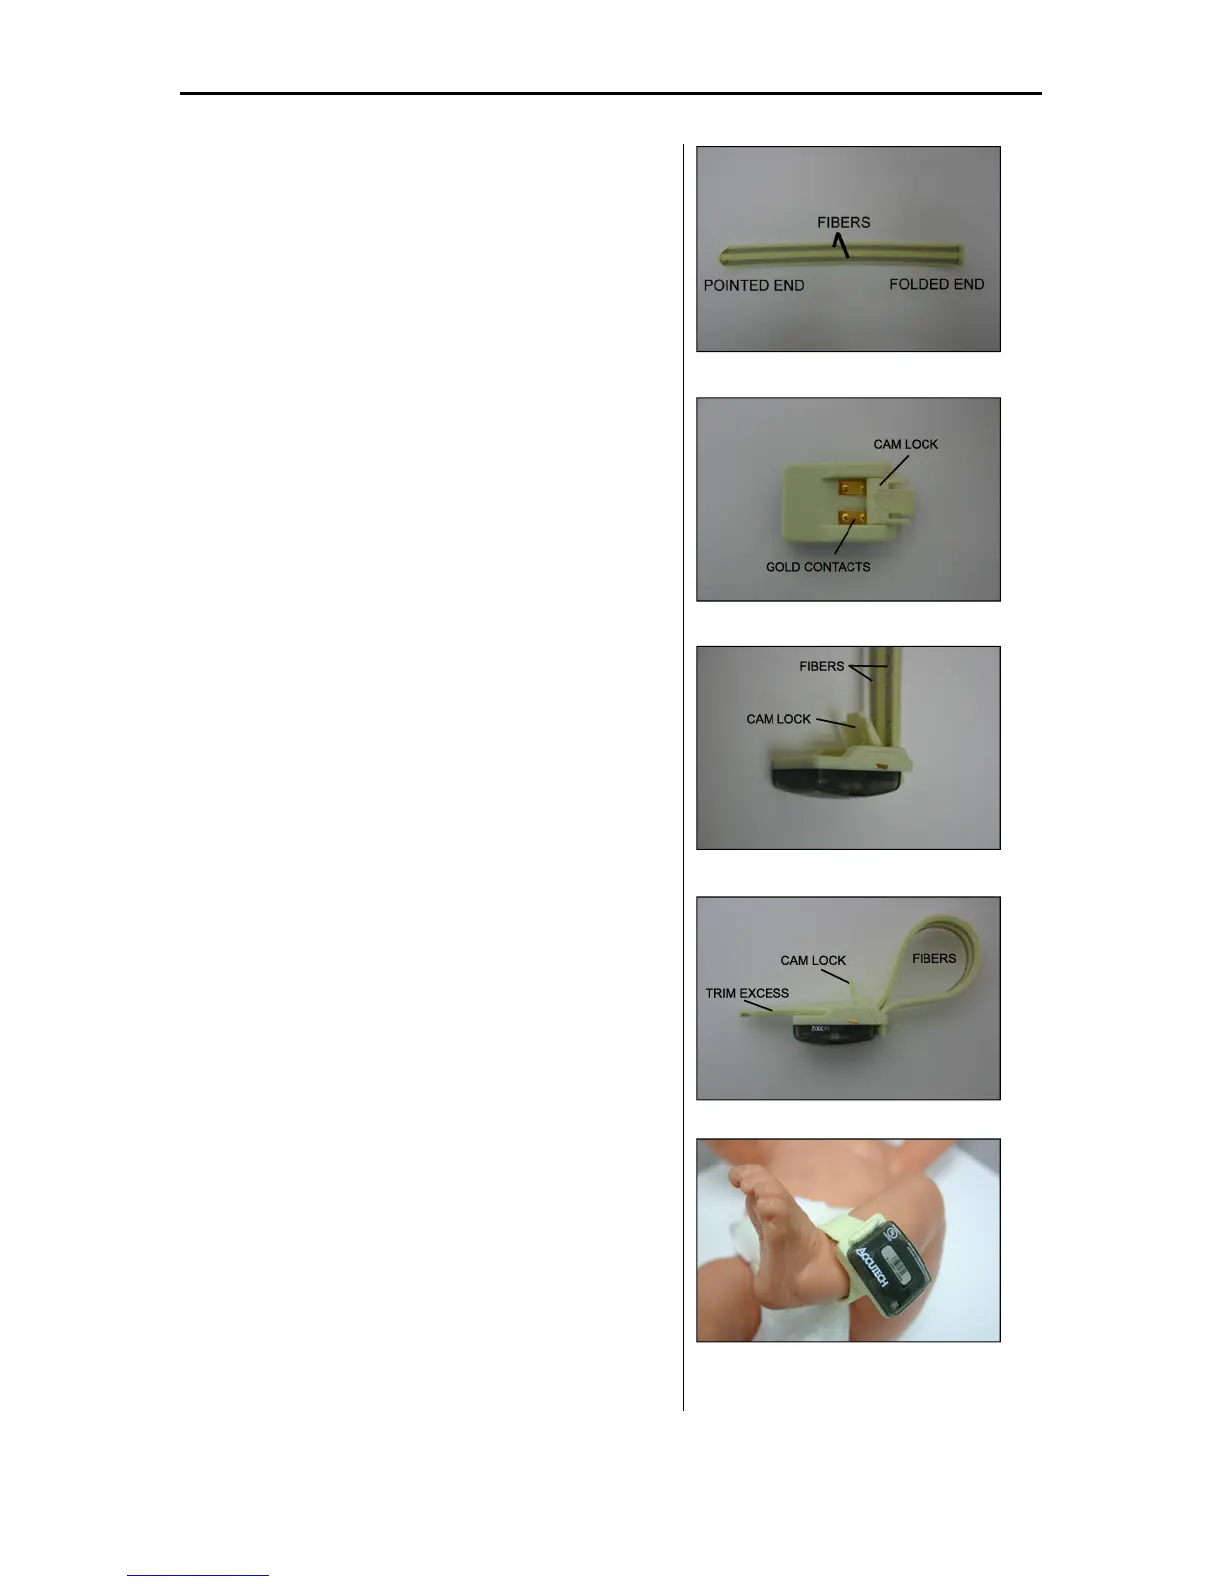
NOTE: The Soft Bracelet has conductive fiber stripes (Figure 3.13)
that must be in contact with both the infant’s skin and the gold
contacts on the Tag (Figure 3.14). The band must be routed
properly through the Tag case for the system to function properly.
Tags are typically attached to a wrist or ankle. For smaller infants,
placing the Tag around the thigh is also acceptable.
All Tag bands are for one-time use only. For cleanliness and
sanitary reasons, Accutech recommends replacing applied bands on
a semi-monthly basis with a maximum of one month between
changes.
1. Unsnap the Cam Lock (Figure 3.14).
2. Hold the Tag in your left hand with the Slot to
the right and the Cam facing up.
3. With the conductive fiber stripes facing the
Tag, slide the pointed end of the band up
through the Slot from underneath until the
folded end is snug next to the Slot (Figure
3.15).
4. Push the pointed end of the band (with the
conductive fiber stripes facing the gold
contacts on the Tag) through the Cam Lock
opening and form a 2-inch loop with the band
(Figure 3.16).
5. Slip the 2-inch loop over the infant’s extremity
and cinch the band until it is snug around the
infant’s extremity.
6. Make sure the conductive fiber stripes are in
good contact with the infant’s skin.
7. Snap the Cam Lock closed.
NOTE: Make sure the band is still snug
around the infant’s extremity. If necessary,
gently pull the band snug while the Cam Lock
is closed. Be careful not to overtighten; the
Cam Lock must be opened to loosen the band.
8. Using scissors, carefully trim any excess band
material so that the band does not protrude
beyond the end of the Tag case (Figure 3.17).
9. Using an S-TAD, activate the Tag.
Figure 3.13 The Soft Bracelet
Figure 3.14 Tag with Cam Lock open
Figure 3.15 BR42 Tag with band inserted
Figure 3.16 BR42 Tag with band in place
Figure 3.17 BR42 Tag with band in place