3-8 Tags User Manual
Attaching Cut Band Tags with Pod
Note: All Tag bands are for one-time use only. For
cleanliness and sanitary reasons, Accutech recommends
replacing applied bands on a semi-monthly basis with a
maximum of one month between changes.
1. OPTIONAL: Write the date when the band was
applied on the provided date lines __/__/__
located next to the Accutech logo on the Cut
Band. For cleanliness and sanitary reasons,
Accutech recommends replacing applied bands
on a semi-monthly basis with a maximum of one
month between changes. Writing the date will aid
in this schedule.
2. Using safety scissors, remove the coupon from
the snap band along the perforated line. Retain
the coupon (Figure 3.18).
3. With the Accutech name facing up, slide the 3-
hole tab section of the snap band through the Tag
slot until the Tag is against the Tag stops (Figure
3.19).
If not using a Pod, skip steps 3 & 4 and proceed
to Step 5.
4. OPTIONAL: Remove the top pod cover (the
large cover) from the cover strip and align it with
the top of the Tag (the side of the Tag that has the
Accutech logo) so that the two arrows on the top
pod cover point in the direction of the 3-hole tab
section. Being careful not to touch the adhesive
on the gasket, push the Tag into the cover until
the Tag is completely inside the cover and the
snap band is touching the adhesive gasket.
5. OPTIONAL: Remove the bottom pod cover (the
smaller cover) from the cover strip and place it
over the bottom side of the Tag so that the two
arrows on the bottom cover point in the direction
of the 3-hole tab section. Using your thumb and
forefinger, squeeze and run them along all fours
sides of the two pod pieces to ensure a tight
gasket seal.
6. Using the coupon, thread the male snaps through
the selected snap band holes (with pod or no pod)
of the 3-hole tab section from the bottom side up
(Figure 3.20).
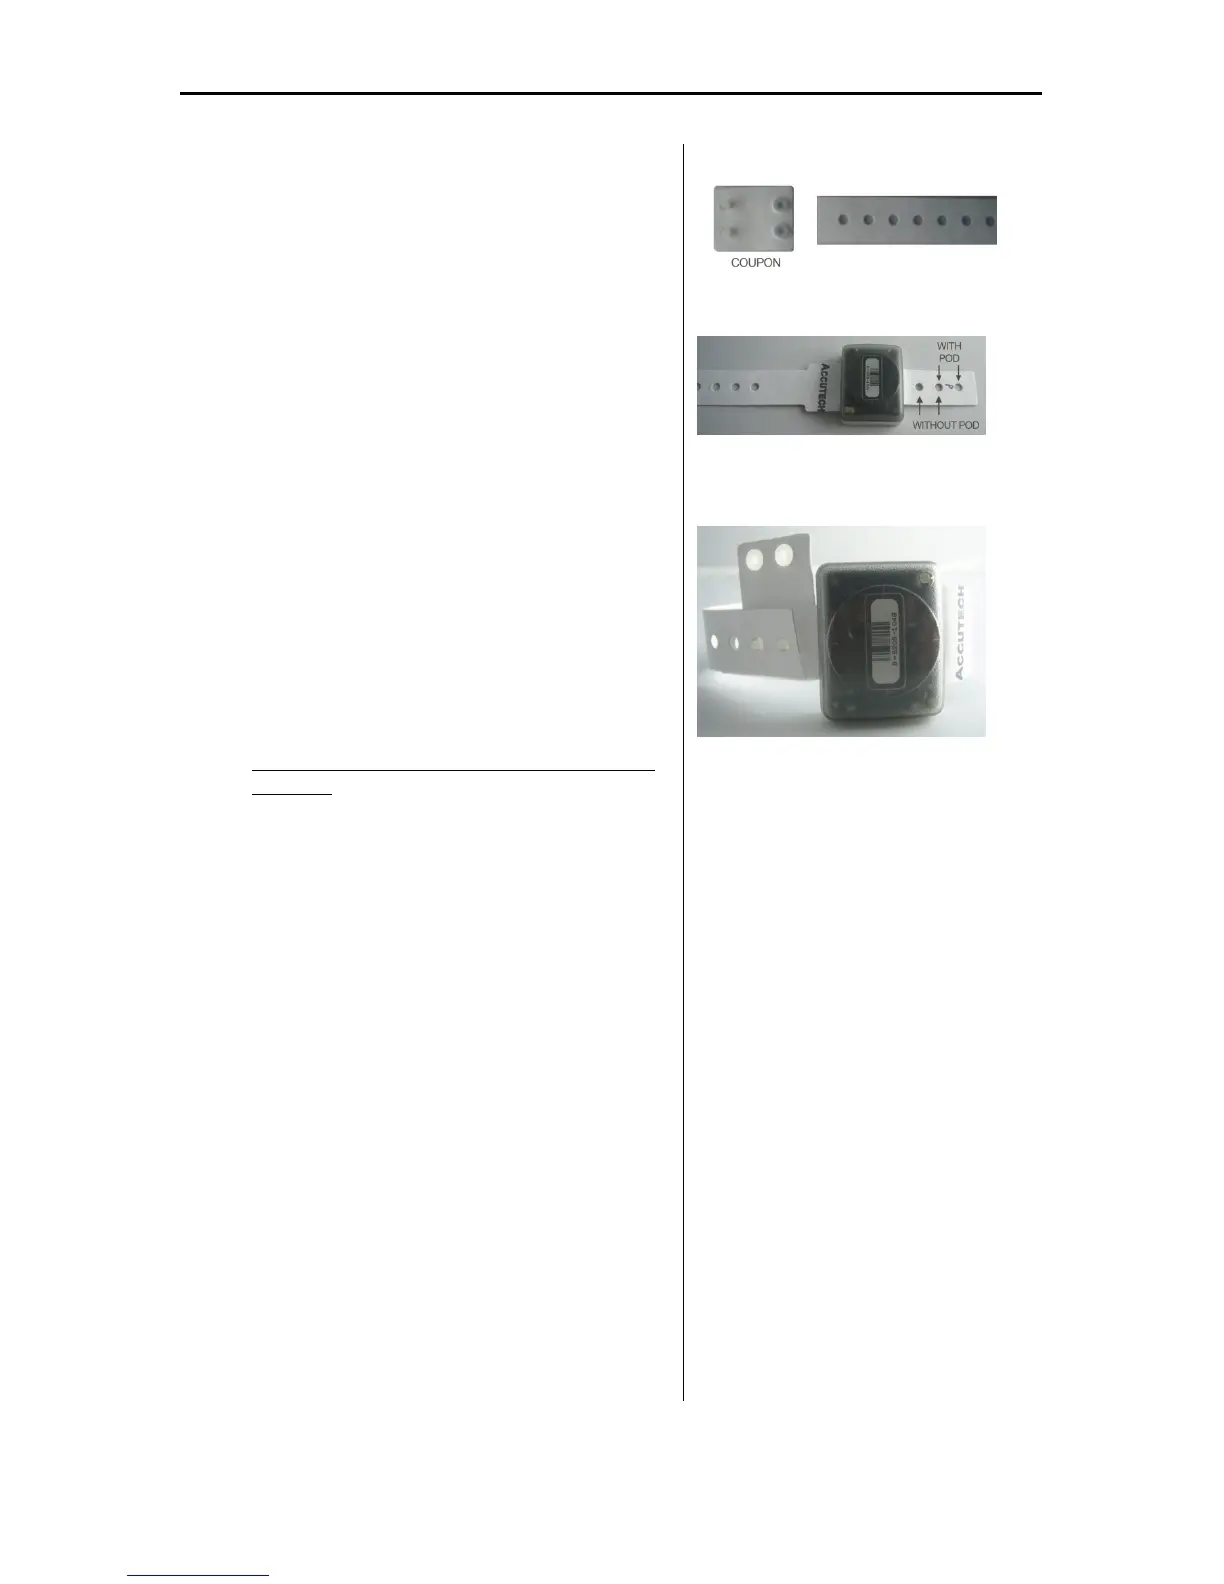
Figure 3.18 Remove the coupon along the
perforated line and save for later use.
Figure 3.19 Slide the snap band through
the Tag slot. Determine which holes to use
(with or without pod)
Figure 3.20 Determine band length needed
and select holes. Position the coupon.
 Loading...