Operation
65
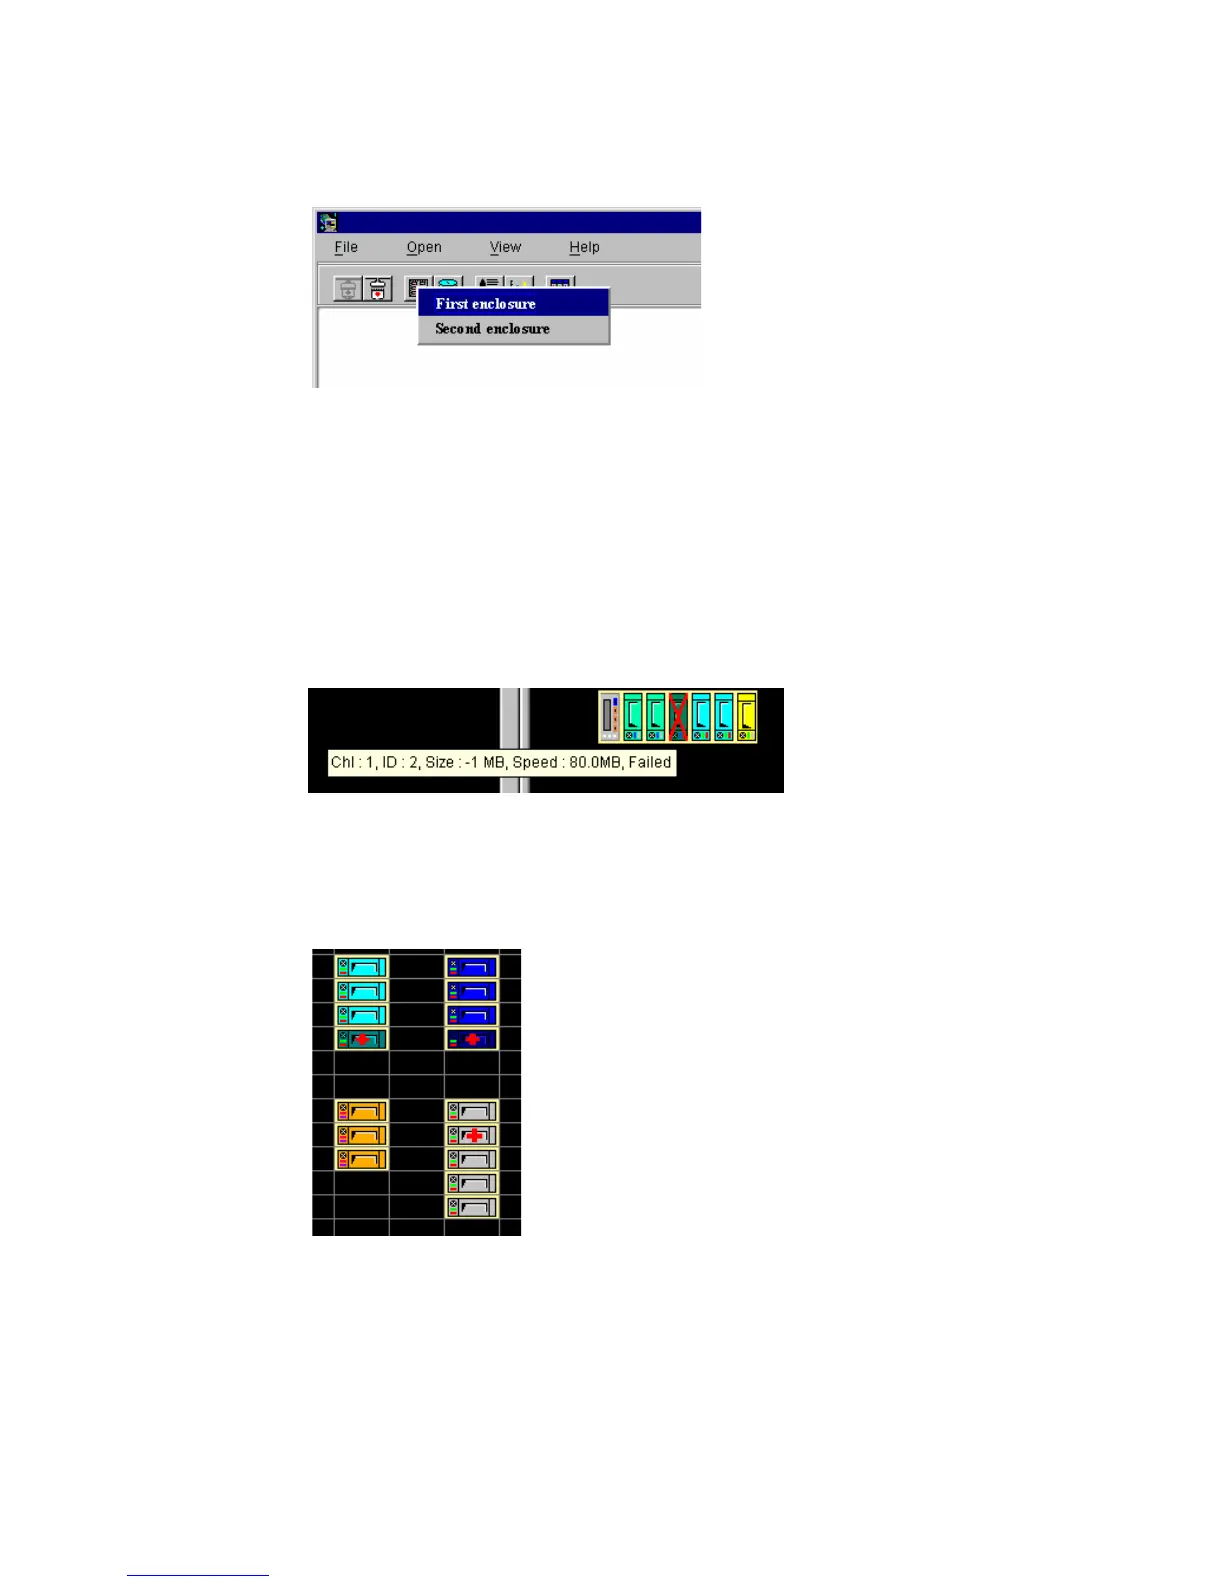
Figure 4–26 Enclosure Selection Box
Select your enclosure and start adding devices into the empty spaces in the enclosure window.
4.7.2 Using the Enclosure Window
Both enclosure windows allow you to assign locations for different components. The Enclosure
window is particularly useful in monitoring the status of the physical drives. It provides you with a
real-time report on the drive status, using symbols and colors to represent various conditions. The
following figures exemplify how Altos RAIDWatch Manager represents various drive conditions:
Figure 4–27 Identifying Spare Drives
Spare drives appear with their colors darker (shaded) than normal drives and have a red cross
superimposed on them (see Figure 4–27).
Figure 4–28 Identifying Failed Drives
The red cross is larger on Global spares and smaller on Local spares. When you remove a drive from
the drive bay, its corresponding icon on the Enclosure window disappears. The system places a large
red “X” mark on the icon of a failed drive.
Note Physical View under the RAID View window also provides a real-time report on drive status, using
the same symbols and colors to represent various conditions. What you see in the Enclosure window