9
Getting Started
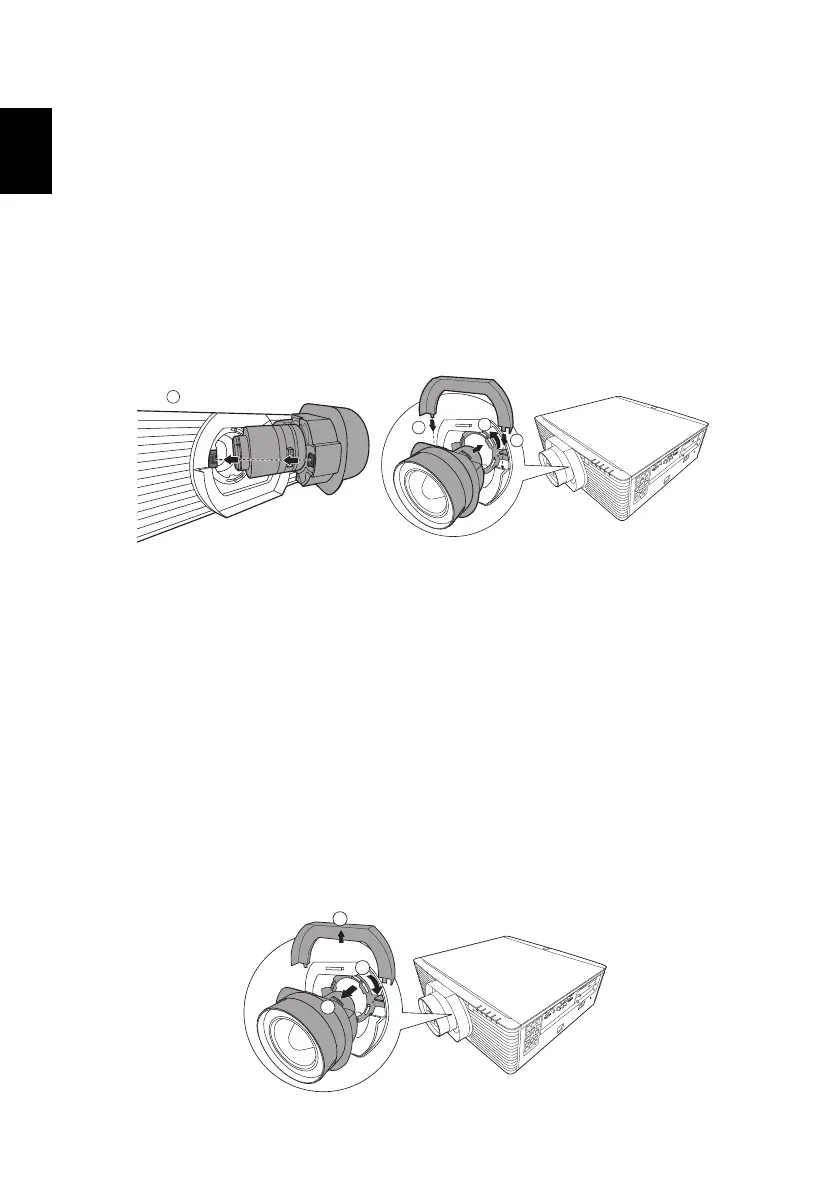
Installing the Projection Lens
1 Remove the dust cap and upper lens cover.
2 Align the slot on the projection lens with the one on the projector to
insert the projection lens. (
Illustration #1)
3 Turn the lever counterclockwise until you feel it click into place to lock
the lens in position. (
Illustration #2)
4 Install the upper lens cover back. (
Illustration #3)
Compatible projection lens
• Acer FL8 series Standard Zoom Lens (MC.JNN11.001)
• Acer FL8 series Ultra Short Throw Lens (MC.JNN11.00A)
• Acer FL8 series Ultra Short Throw Zoom Lens (MC.JNN11.002)
• Acer FL8 series Short Throw Zoom Lens (MC.JNN11.003)
• Acer FL8 series Middle Throw Zoom Lens (MC.JNN11.004)
• Acer FL8 series Long Throw Zoom Lens (MC.JNN11.005)
• Acer FL8 series Ultra Long Throw Zoom Lens (MC.JNN11.006)
Removing the Projection Lens
1 Remove the upper lens cover. (Illustration #1)
2 Turn the lever clockwise to release the lens. (
Illustration #2)
3 Pull out the projection lens. (Illustration #3)