13
Section 4 Initial Setup
Before testing, ensure the following procedures are followed.
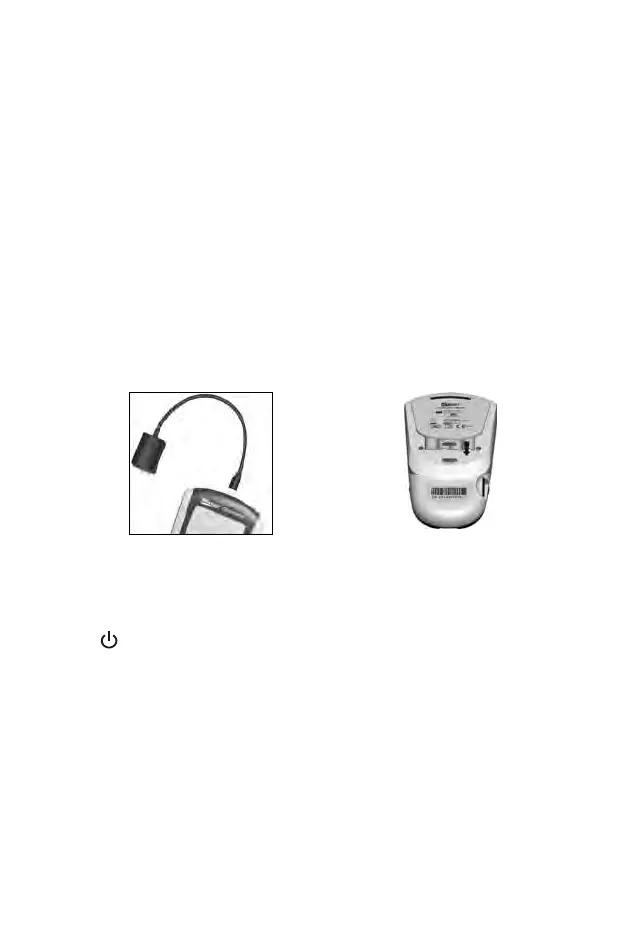
Turn on Meter
The meter can be operated using the certified AC Adapter or 4 AAA batteries
(1.5V).
To use the meter with batteries, insert 4 AAA batteries (1.5V) into the battery
compartment on the back of the meter.
To use the meter with a power adapter, use a USB cable to connect the Mini USB
port of the power adapter to the USB port on the top of the meter. Then plug the
adapter into a 100-240V ac, 50-60 Hz primary power outlet.
The meter can also be powered from a personal computer with a USB cable.
The meter will automatically turn on after the batteries are inserted. The
meter will display the date and time setup screen. Refer to Meter Setup and
Options for details. After the date and time have been set, the meter will
automatically turn off.
Press
to turn the meter on. The screen will briefly display all of the LCD
symbols. Observe the LCD at startup to ensure all segments and display
elements are turned on. There should not be missing icons or elements. After
startup, ensure that there are no permanently turned on segments or icons.
After the power-on diagnostic check, the Initial Screen will be displayed.
The meter will automatically turn off after 5 minutes of inactivity.
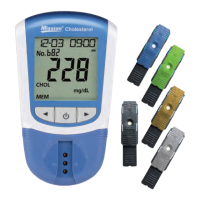
Coding the Meter
Each time a new box of test devices is used, the new code chip included in
the box must be inserted into the meter. Compare the code number on the
OR