- 40 -
Acoustical Parameters (cont.) - Input Labeling
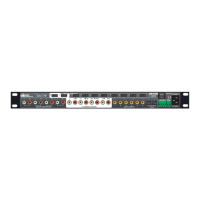
The SSD-66 (5.1) has a total of fourteen Input Labels with corresponding Input Label num-
bers 1-14. While the Input Label numbers are fixed, the nine character Input Label names are
fully variable. Thus you can customize your SSD-66 (5.1) to read Input Label names that
correspond to your source component system configuration. Furthermore, since the SSD-66
(5.1) has a total of seven audio inputs and fourteen Input Labels, you can use more than one
Input Label name to access the same source. This feature is especially useful if you wish to
listen/view a particular component with different acoustical parameters. This becomes espe-
cially useful if your home theater system is controlled by a computer based touch screen
system, since all fourteen Input Label names can be directly accessed with the touch of one
button.
Example
If you will be listening to your CD player in both a Stereo Bypass mode and a Quad Bypass
mode, depending on your pleasure, you can setup the SSD-66 (5.1) with two Input Labels
assigned to the same CD player. One Input Label might read "CD STEREO" and the other
"CD QUAD", where each Input Label would have its own default mode, active speaker setup,
bass redirect setting, and PCM scale.
To change an Input Label, follow these steps.
Step 1 Repeatedly press the INPUT SELECT button until the SSD-66 (5.1)'s display reads the Input
Label you wish to alter.
Step 2 Repeatedly press the SETUP MODE button until the SSD-66 (5.1)'s display reads "LABEL
INPUTS". Note, the SSD-66 (5.1) is designed to time-out automatically from the "Setup Mode".
If this should happen, the LED on the SETUP MODE button will turn off. To pickup where you
left off, press the SETUP MODE button again.
Step 3 Press the "ALL" button to engage the character cursor. The words "LABEL INPUTS" will be
replaced by the Input Label currently selected. Furthermore, the first letter of the displayed
Input Label name will begin to flash letting you know that this letter is ready to be changed.
Step 4 Use the RIGHT or LEFT button to scroll up and down (respectively) through alphanumeric
characters, symbols, and numbers until the letter for the first character you wish to change to is
displayed.
Step 5 Press the CENTER button to advance to the cursor to the next letter.
Step 6 Again, use the RIGHT or LEFT button to change this next letter. If you pass the correct letter in
the character generator when pressing the LEFT button, pressing the RIGHT button will scroll
back to it.
Step 7 Repeat this process of using the CENTER button to move the cursor and the RIGHT or LEFT
buttons to change the letters until you spelled out the Input Label name as you wish it to read.
Step 8 Press the INPUT SELECT button again. This will exit the "Setup Mode" and save the changes
to the Input Label.
Step 9 You can now proceed to advance to the next Input Label name you wish to change (if any) by
pressing the Input Select button. Once on the desired Input Label name is displayed, proceed
by repeating steps 2-8.