AM Series Boiler Heat Exchanger Maintenance & Replacement
Technical Instruction Document
Removing the Heat Exchanger
Removing the Heat Exchanger
NOTE
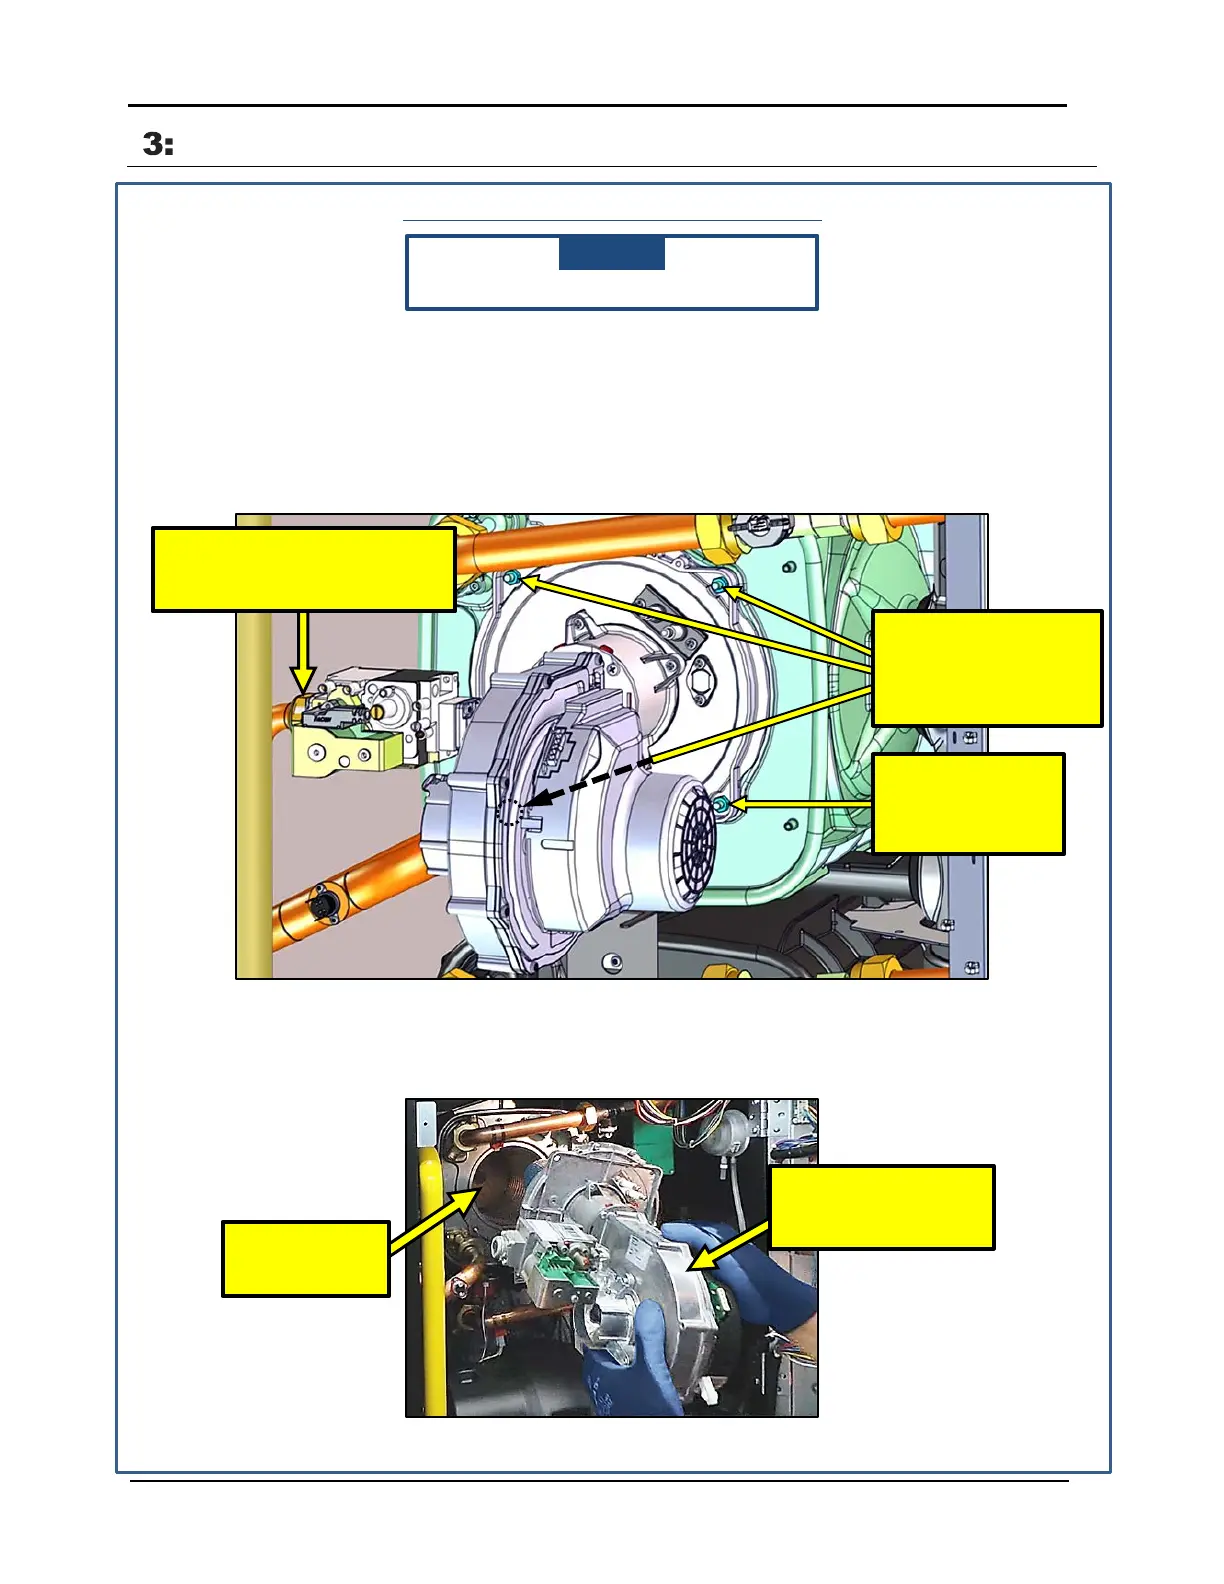
Refer to Figure 3-1 for Steps 1-3.
1. Remove nut on left side of the gas valve with the 46mm wrench. Ensure that the gasket
located between pipe and gas well is retained for later reassembly.
2. Remove nut at lower right position on burner flange with short 10mm wrench, as shown in
Figure 3-1.
3. Remove the other three nuts, as indicated in Figure 3-1, with the 19” long 10mm socket
wrench.
Figure 3-1: Disconnections to Remove Burner/Blower Assembly
4. Carefully remove the entire blower/burner assembly from the heat exchanger, as shown in
Figure 3-2.
Figure 3-2: Removing the Blower/Burner Assembly from the Heat Exchanger
NUT w/30mm PIPE WRENCH &
THIS BURNER
NUT with SHORT
BURNER/BLOWER
ASSEMBLY
HEAT
EXCHANGER
STEP 3: REMOVE THE
OTHER THREE
BURNER NUTS w/19”
LONG 10mm WRENCH
Page 12 of 36 AERCO International, Inc. • 100 Oritani Dr. • Blauvelt, NY 10913 TID-0137_0A
02/02/2015 Ph.: 800-526-0288
 Loading...