AM Series Heat Exchanger Replacement
Technical Instruction Document
Installing the Heat Exchanger
Installing of the Heat Exchanger
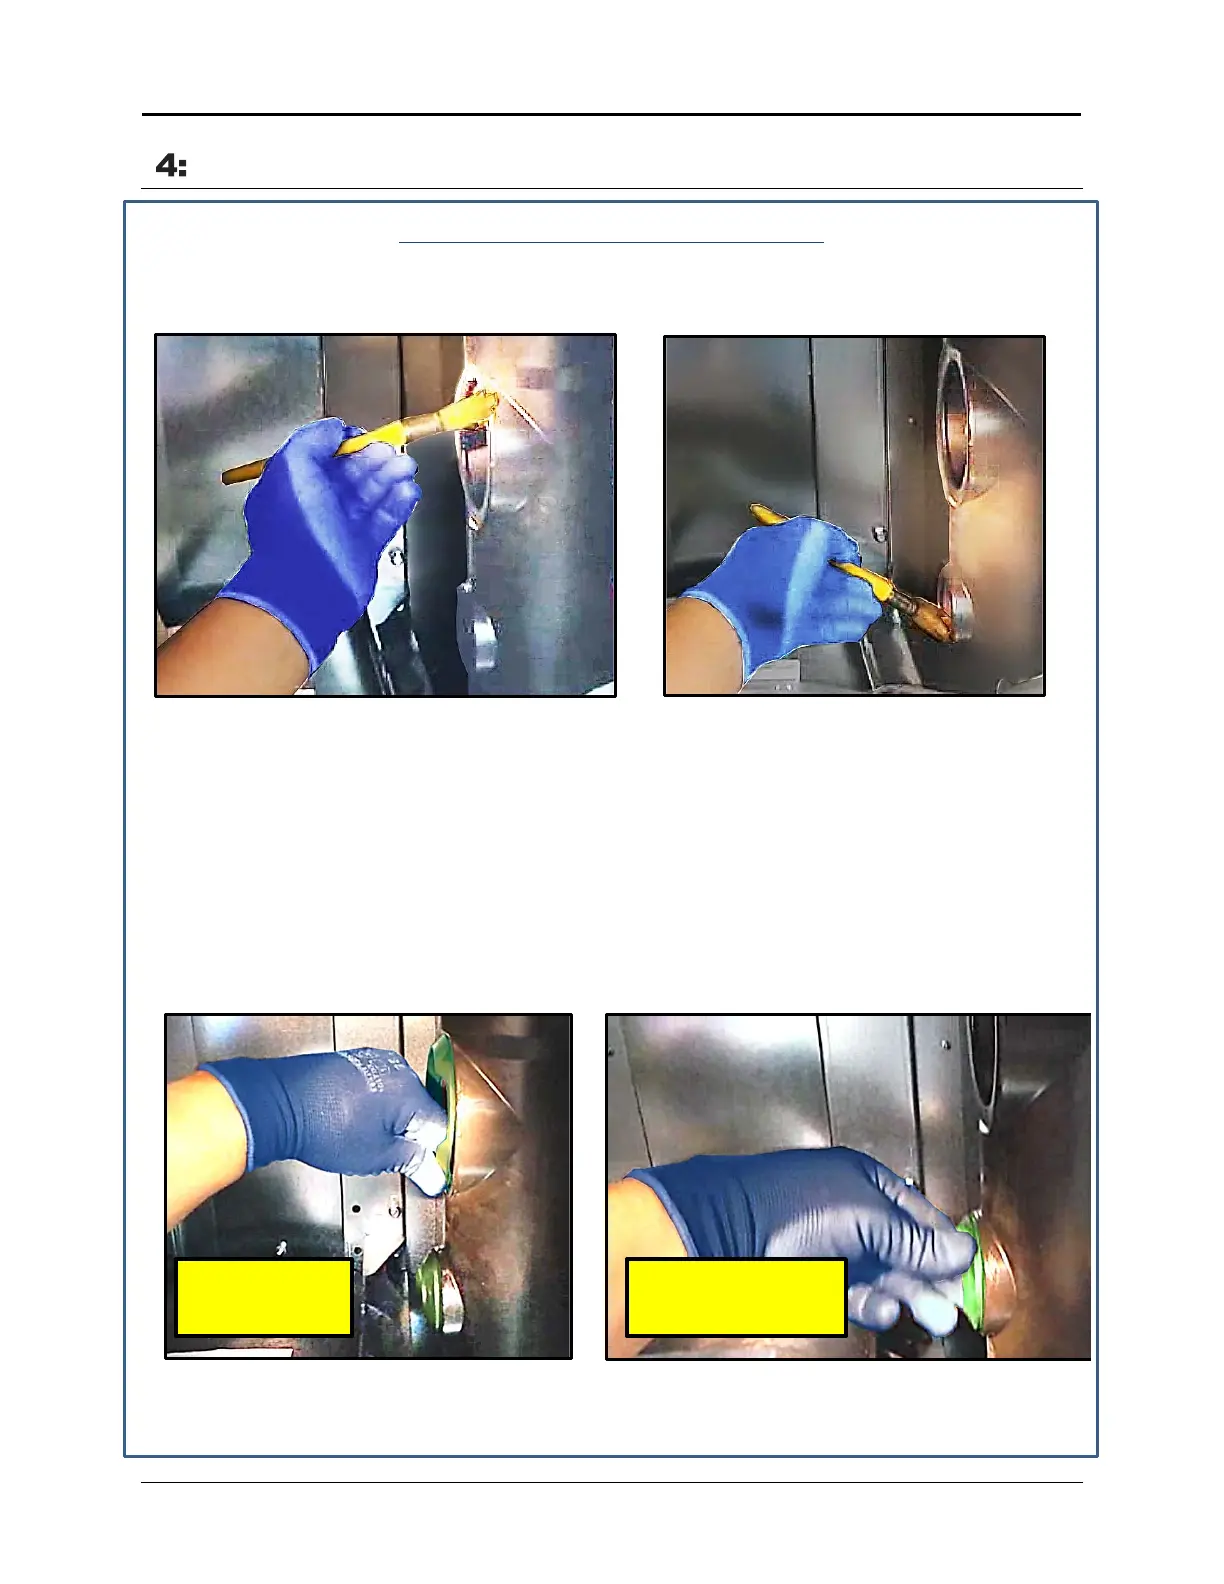
1. If the flue and/or condensate gaskets are being replaced, use a brush to liberally apply a
silicone lubricant to the flanges of the affected inlet(s), as shown in Figure 4-1.
Figure 4-1: Applying Silicone Lubricant to Upper and Lower Flue Openings
2. Retrieve the two replacement flue gaskets (P/N 60702097 & 60702096) from the heat
exchanger maintenance kit.
3. Install the upper larger gasket (P/N 60702097), ensuring that seals inside and outside the
opening are correctly mated to the flue inlet flange. Orient with the “notch” in the gasket
facing toward you, and match the arrow on the gasket to the square mark on the flue inlet
flange (Figure 4-2).
4. Install the lower smaller gasket (P/N 60702096), ensuring that seals inside and outside the
opening are correctly mated to the flue inlet flange.
Figure 4-2: Fitting the Gaskets Securely Inside and Outside the Flange
INSTALL FLUE
CONDENSATE DRAIN
TID-0132_99 AERCO International, Inc. • 100 Oritani Dr. • Blauvelt, NY 10913 Page 19 of 36
Ph.: 800-526-0288 12/09/2014
 Loading...