AM Series Boiler Heat Exchanger Maintenance & Replacement
Technical Instruction Document
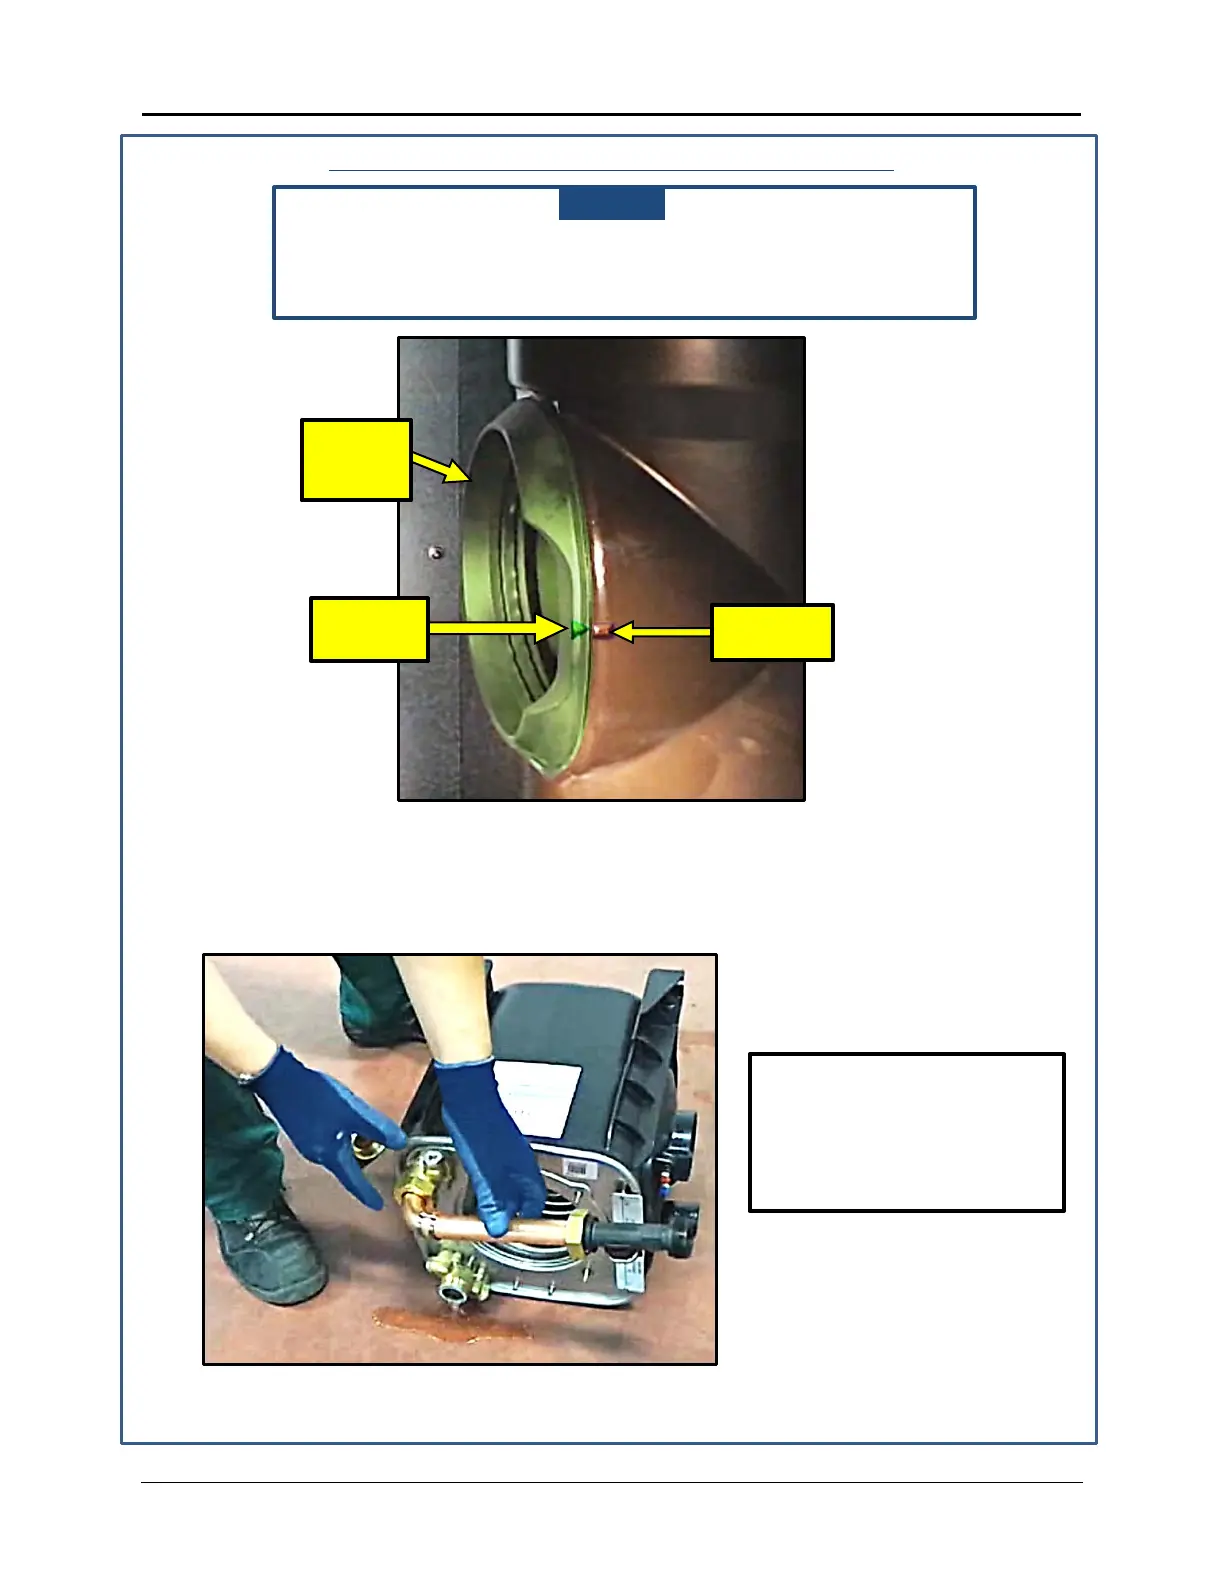
Installing of the Heat Exchanger - Continued
NOTE
Ensure that the upper flue gasket is oriented so that the arrow
mark on the rim of the gasket is lined up with the square mark on
the flue inlet flange. See Figure 4-3).
Figure 4-3: Upper Flue Inlet Gasket Orientation Marks
5. If the heat exchanger is NOT being replaced, but just receiving maintenance, then carefully
tip over the heat exchanger letting the excess water drain from the water supply outlet, as
shown in Figure 4-4.
Figure 4-4: Draining Excess Water from the Heat Exchanger
INLET
NOTE!
Step 5 only applies if the
heat exchanger is being
serviced but NOT replaced.
TID-0132_99 AERCO International, Inc. • 100 Oritani Dr. • Blauvelt, NY 10913 Page 20 of 36
Ph.: 800-526-0288 01/18/2015
 Loading...