AM Series Boiler Heat Exchanger Maintenance & Replacement
Technical Instruction Document
Final Reassembly
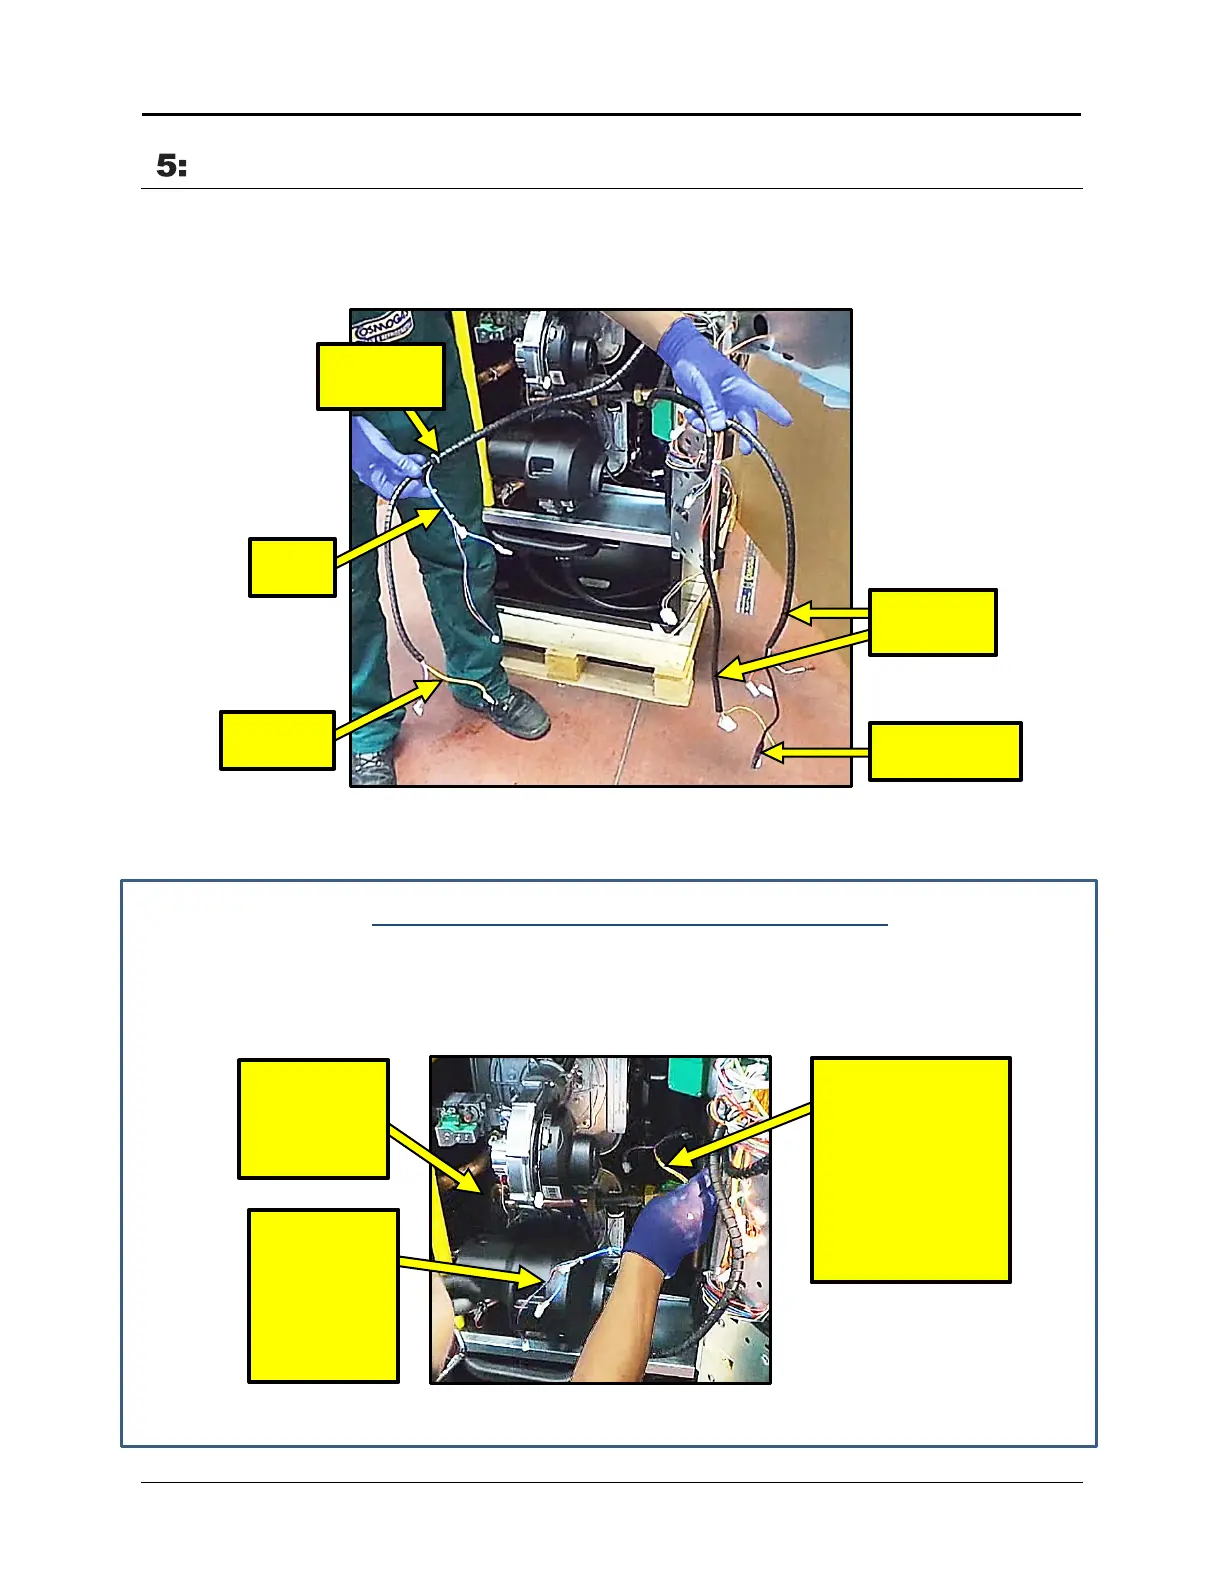
5.1: Connecting Cables and Wiring Connections
Refer to Figure 5-1 to distinguish between the smaller and larger wiring harnesses that were
draped over the unit door during disassembly.
Figure 5-1: Smaller and Larger Harnesses
5.2: Installing the Smaller Wiring Harness
Installing the Smaller Wiring Harness
1. Take the part of the harness with the yellow wire and pass it around the rear between the
two heat exchangers until yellow wire part is coming from the left of the blower assembly,
leaving the harness with blue wire part on the right side of the blower assembly. See Figure
5-2.
Figure 5-2: Initial Arrangement and Routing of Smaller Harness
HARNESS
YELLOW CABLE
OF SMALLER
CABLE THROUGH
HERE AND
AROUND THE
BACK BETWEEN
THE HEAT
EXCHANGERS
…. IT COMES
OUT HERE.
HARNESS
WITH BLUE
WIRE
REMAINS ON
RIGHT SIDE
OF HEAT
EXCHANGER
TID-0132_99 AERCO International, Inc. • 100 Oritani Dr. • Blauvelt, NY 10913 Page 29 of 36
Ph.: 800-526-0288 01/18/2015
 Loading...