AM Series Boiler Heat Exchanger Maintenance & Replacement
Technical Instruction Document
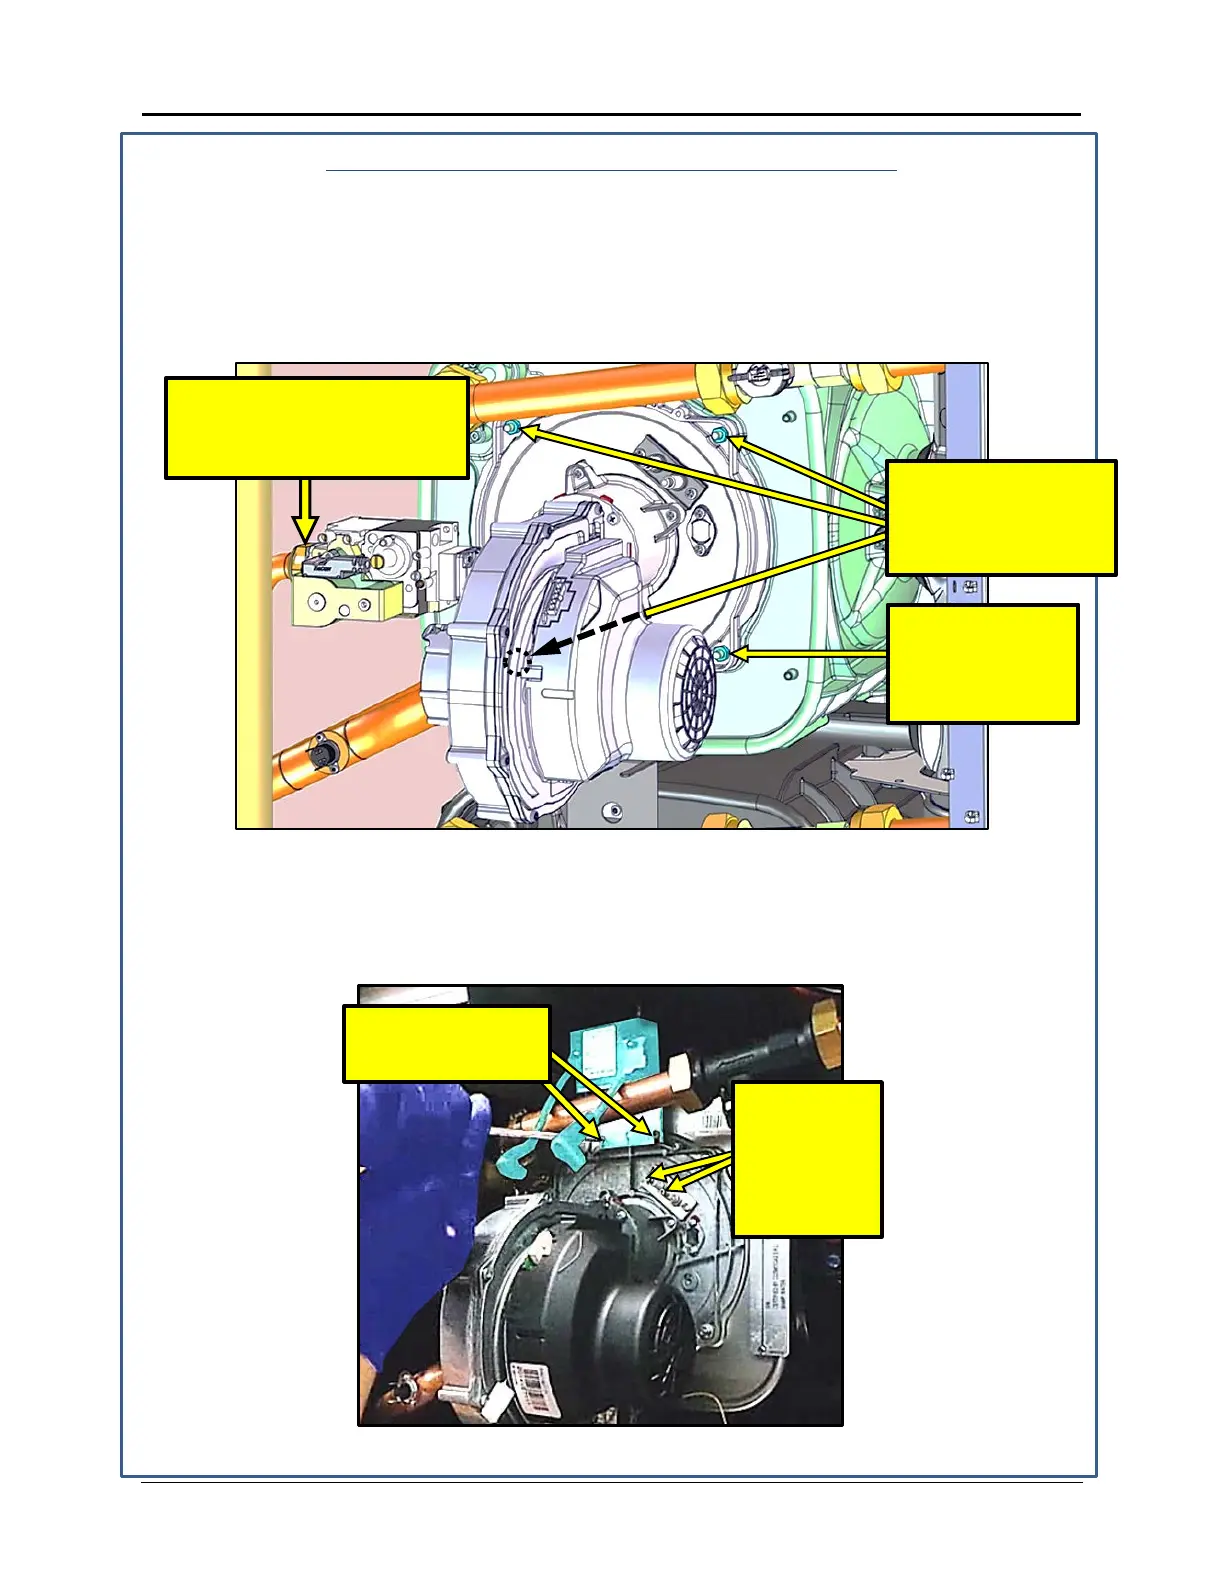
Installing of the Heat Exchanger – Continued
28. Install the burner/fan assembly into the heat exchanger cavity. See Figure 4-19.
29. Affix the three bolts with the 19” long 10mm socket driver. See Figure 4-19.
30. Affix the one 10mm bolt (lower right side) with the small 10mm wrench. See Figure 4-19.
31. Connect the gas pipe to the gas valve, ensuring to include the gasket removed during
disassembly, and tighten the nut using the 46mm wrench. See Figure 4-19.
Figure 4-19: Reassembly of Burner/Blower to Heat Exchanger
32. Install the upper igniter with the two screws removed at disassembly. See Figure 4-20.
33. Attach the two igniter cables to the igniter terminals on the burner flange. See Figure 4-
20.
Figure 4-20: Install Upper Igniter and Connect Igniter Cables to Terminals
TIGHTEN NUT w/30mm PIPE
WRENCH AFTER INSTALLING
AND TIGHTEN
THIS BURNER
NUT with SHORT
STEP 29: INSTALL
AND TIGHTEN THREE
BURNER NUTS w/19”
LONG 10mm WRENCH
STEP 33:
CONNECT
IGNITER
CABLES TO
IGNITER
TERMINALS
STEP 32: INSTALL
UPPER IGNITER
TID-0132_99 AERCO International, Inc. • 100 Oritani Dr. • Blauvelt, NY 10913 Page 28 of 36
Ph.: 800-526-0288 01/18/2015
 Loading...