AM Series Boiler Heat Exchanger Maintenance & Replacement
Technical Instruction Document
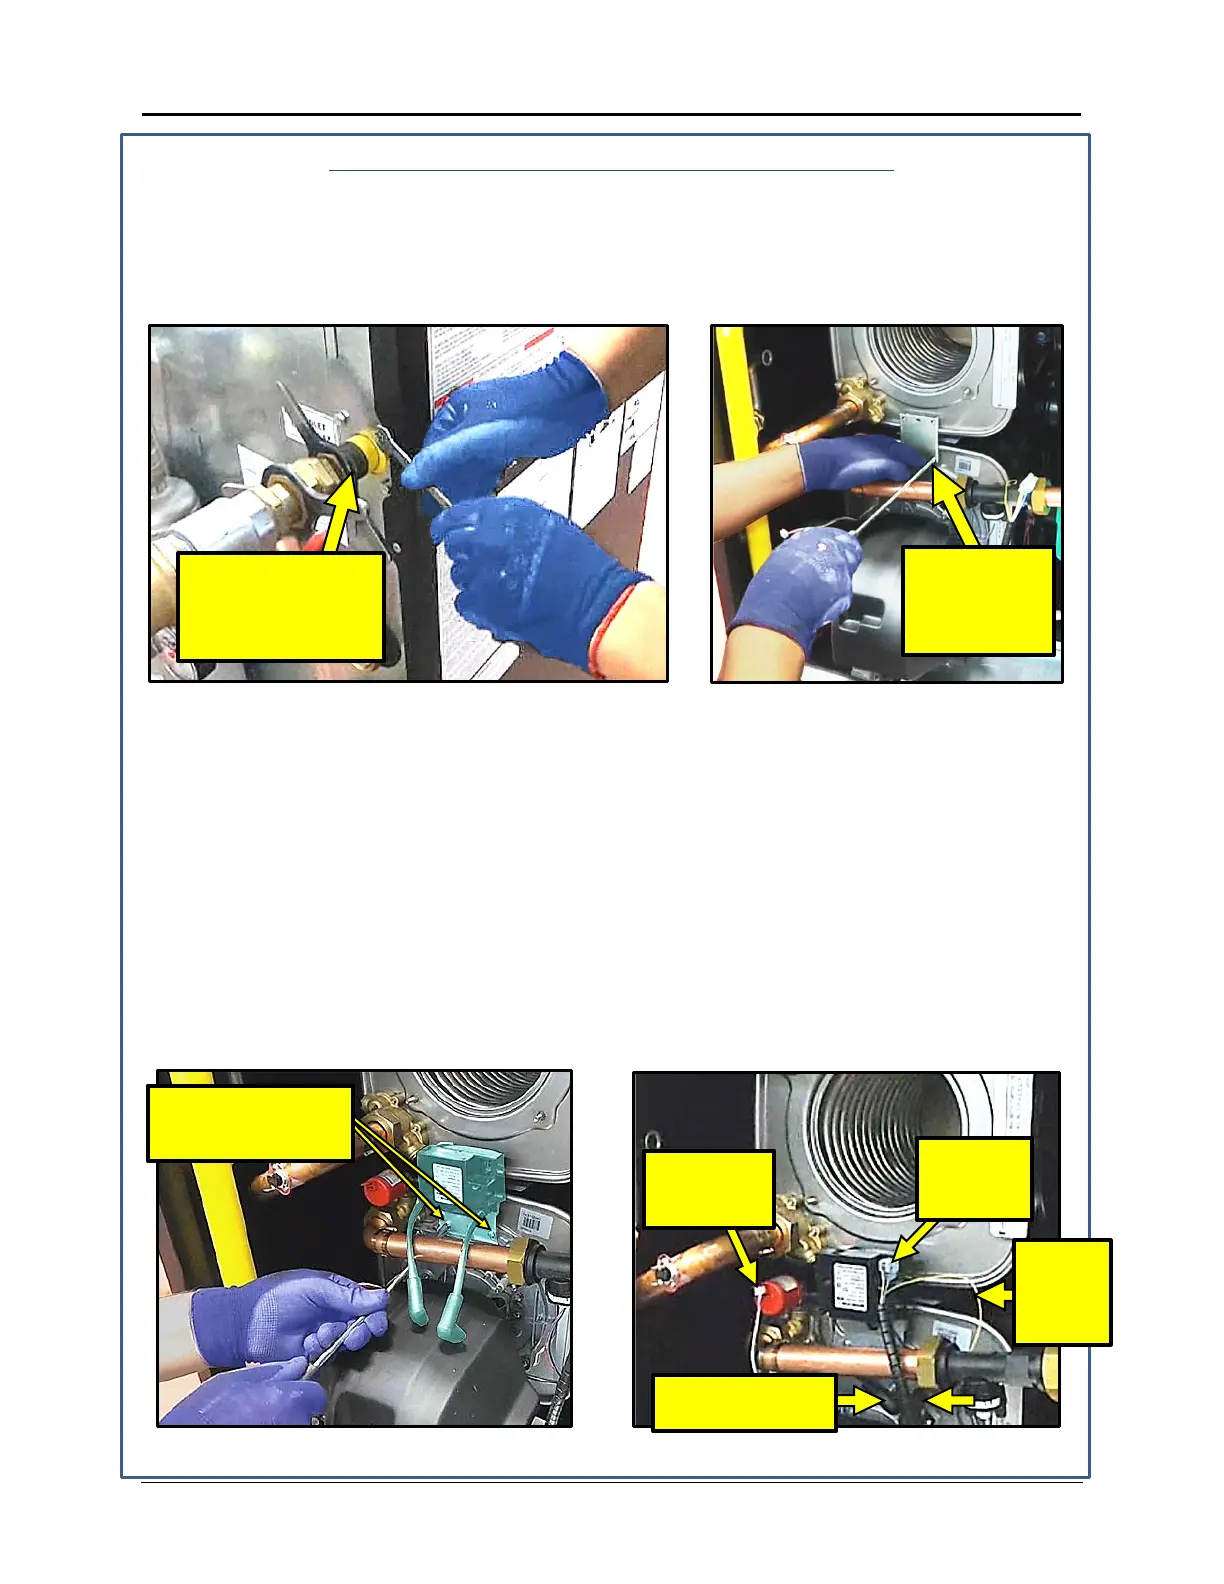
Installing of the Heat Exchanger - Continued
21. Install and tighten the four 10mm bolts connecting the gas supply piping to the rear of the
unit per Figure 4-17.
22. Reinstall the bracket(s) below and/or above (depending on which heat exchanger is being
reinstalled). See Figure 4-17.
Figure 4-17: Tighten 10mm Bolts for Gas Connection and Install Spacer Bracket(s)
NOTE
If servicing the bottom heat exchanger, ignore steps 23 - 26.
23. Install the igniter belonging to the heat exchanger below with the two screws removed at
disassembly. See Figure 4-18.
24. Connect the two igniter cables to the two igniter terminals. See Figure 4-18.
25. Connect the igniter power cable to the igniter. See Figure 4-18.
26. Attach the igniter ground wire to the screw on the lower heat exchanger. See Figure 4-18.
27. If the pressure sensor is located on the heat exchanger below, attach the lead from the
lower harness. See Figure 4-18. If located on the heat exchanger being serviced, do not
attach anything to it at this point.
Figure 4-18: Install Lower Igniter and Make Connections
FOUR 10MM BOLTS
OF GAS
STEP 22:
INSTALL
SPACER
POWER
26:
GRND
PESSURE
STEP 23: INSTALL
LOWER IGNITER
TID-0132_99 AERCO International, Inc. • 100 Oritani Dr. • Blauvelt, NY 10913 Page 27 of 36
Ph.: 800-526-0288 01/18/2015
 Loading...