AM Series Boiler Heat Exchanger Maintenance & Replacement
Technical Instruction Document
Removing the Heat Exchanger - Continued
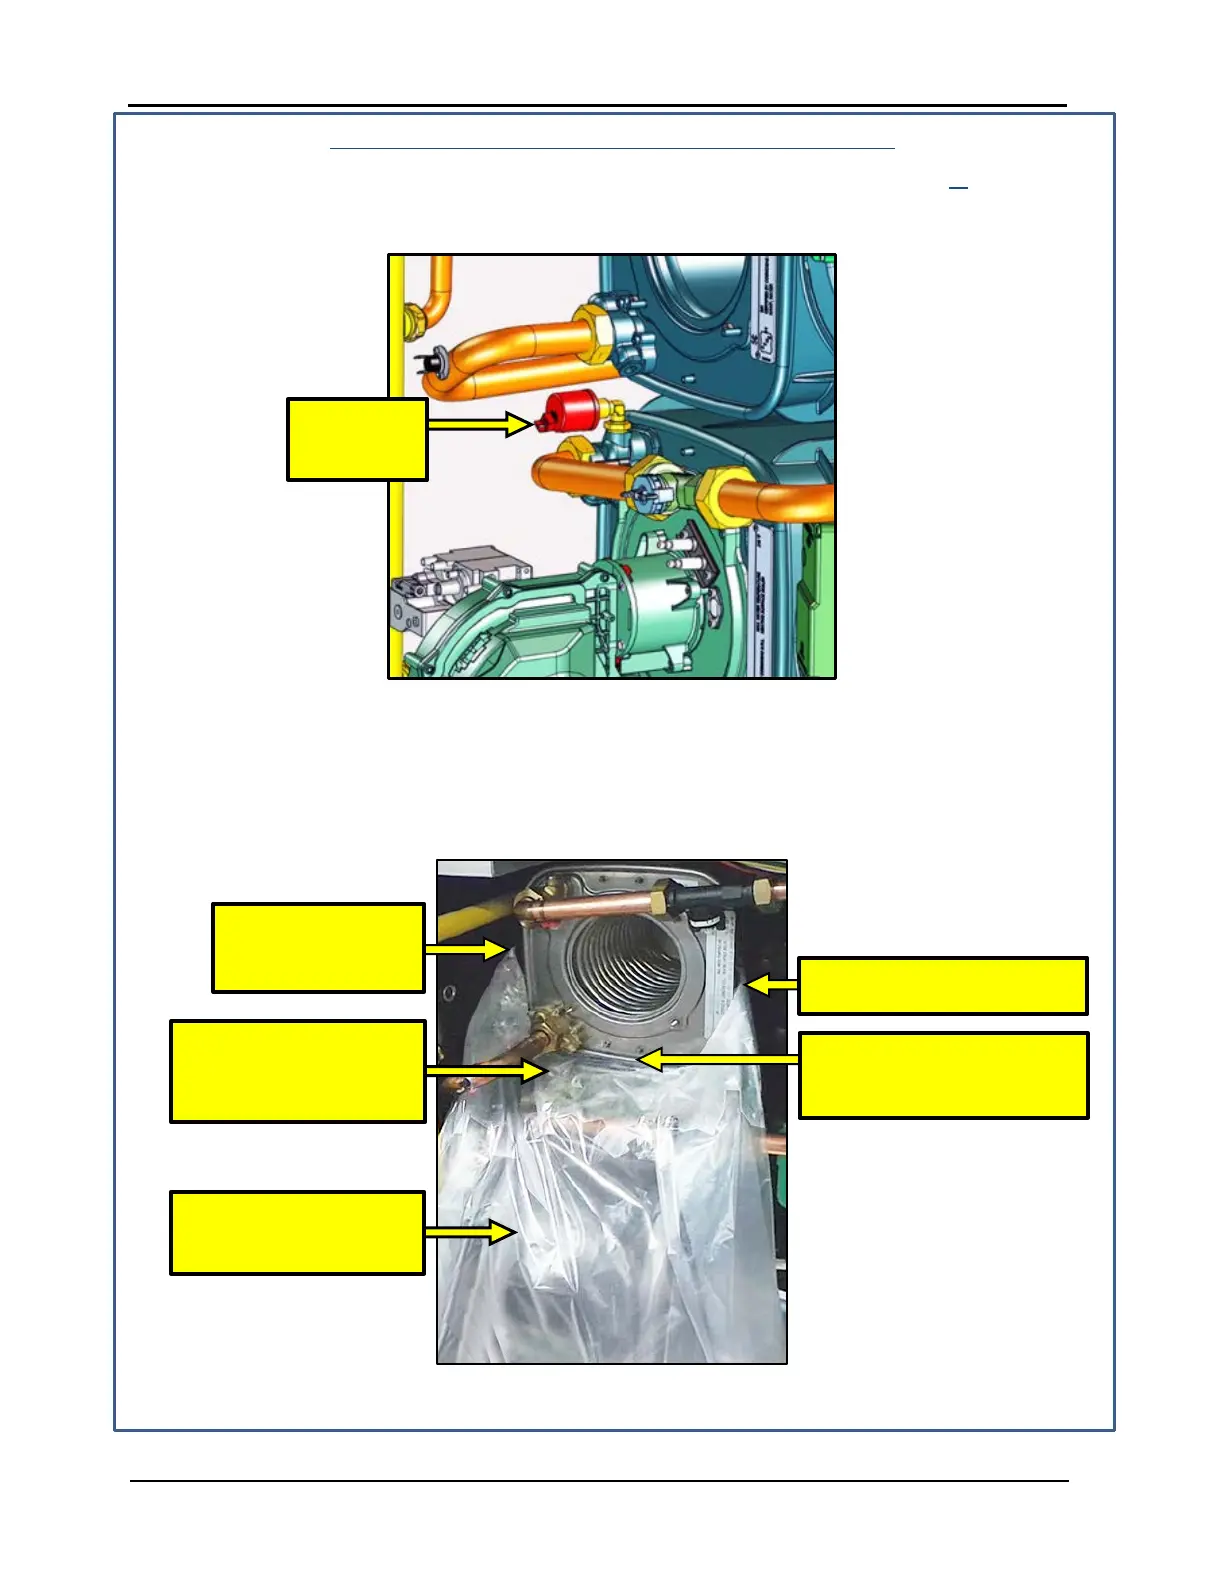
8. If the pressure sensor is installed on the heat exchanger being maintenance or on the heat
exchanger below it, unscrew it and set aside for later reassembly. Figure 3-4 shows the
location of the pressure sensor as being on the heat exchanger below the one being serviced.
Figure 3-4: removal of the Pressure Sensor
9. Use a large plastic bag to cover the all the other heat exchanger assemblies below the one
being removed, as shown in Figure 3-5. This is to prevent unit components from contamination
by possible residual leakage when disconnecting the water connections to the heat exchanger.
Ensure that if the pressure sensor opening is below, it is covered
Figure 3-5: Placing Protective Plastic over Lower Components
TAPE BAG AGAINST SIDE OF
HEAT EXCHANGER HERE
TAPE BAG HIGH
AGAINST INSIDE OF
THE UNIT HERE
TUCK BAG UNDER THE HEAT
EXCHANGER LOWER EDGE
COMPONETS ARE
PRESSURE
SENSOR WAS REMOVED
FROM HERE, BE SURE
Page 14 of 36 AERCO International, Inc. • 100 Oritani Dr. • Blauvelt, NY 10913 TID-0137_0A
02/02/2015 Ph.: 800-526-0288
 Loading...