AM Series Boiler Heat Exchanger Maintenance & Replacement
Technical Instruction Document
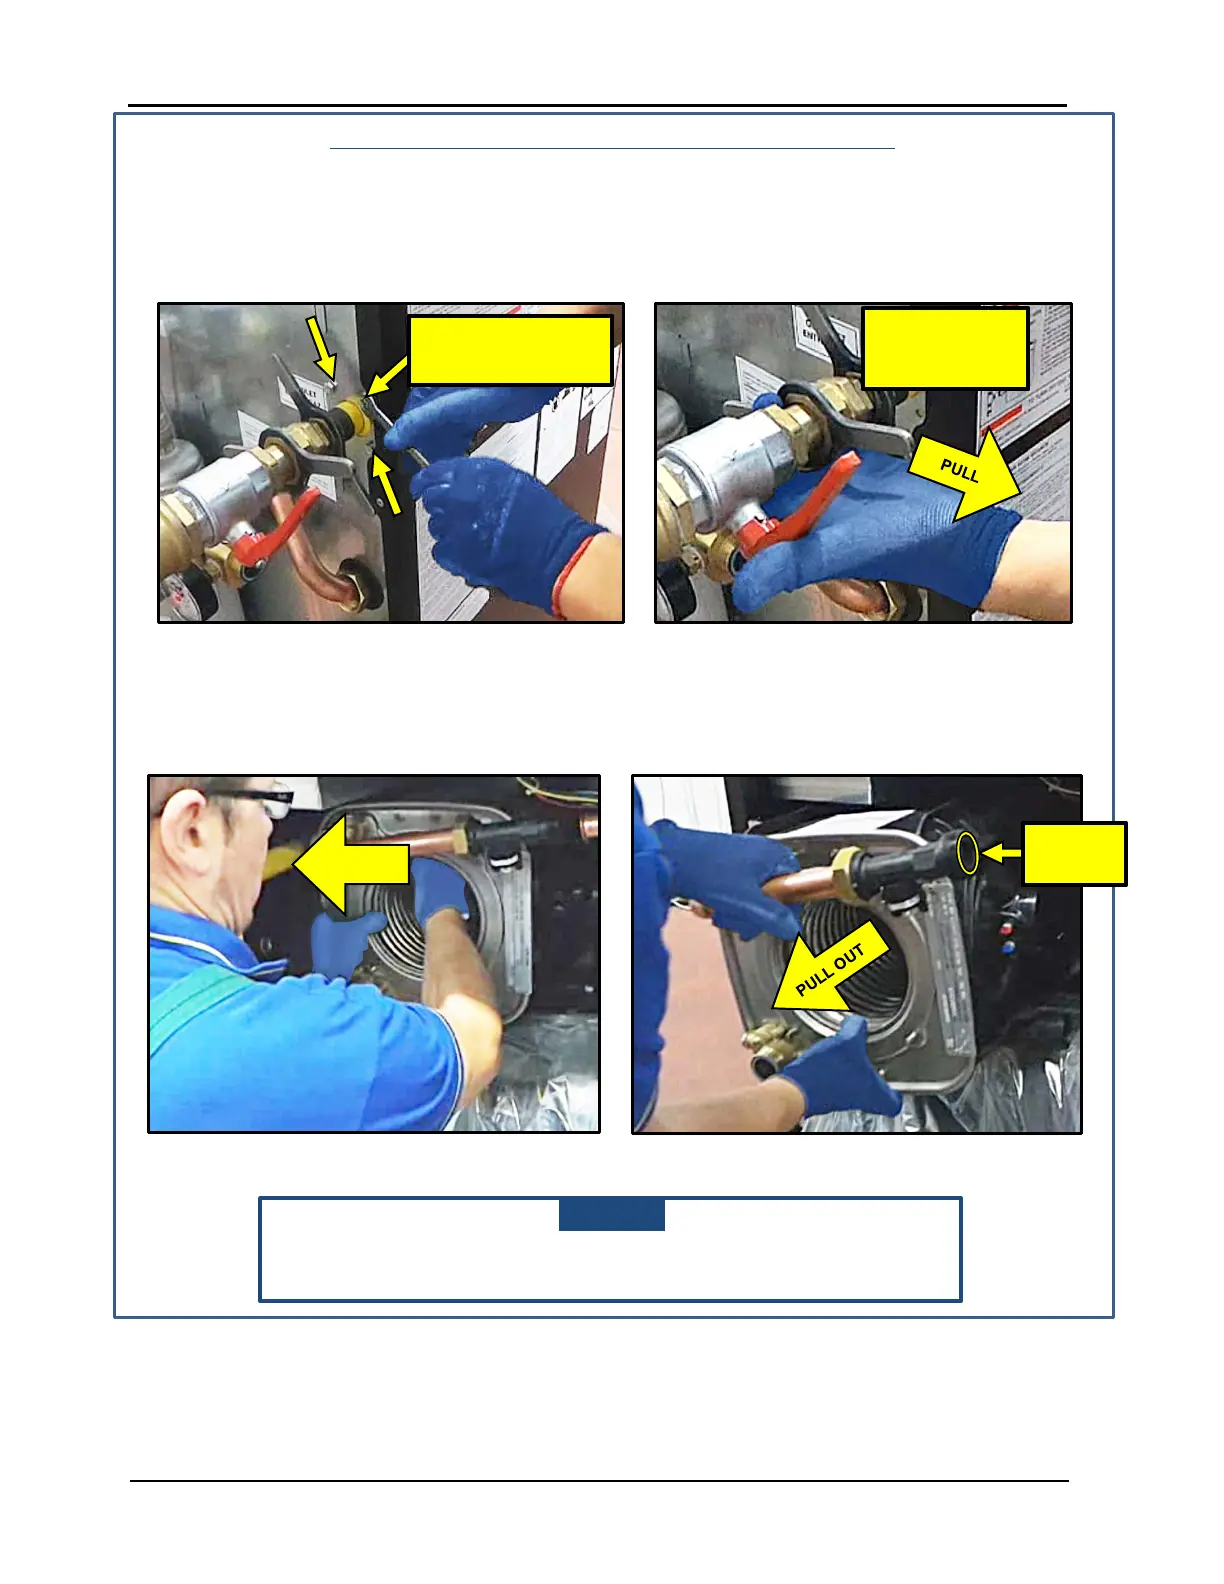
Removing the Heat Exchanger - Continued
16. Remove the four 10mm bolts affixing gas inlet to the gas piping, as shown in the left image of
Figure 3-10.
17. After removing the bolts, pull the entire gas inlet piping to the right (as you are facing the rear of
the unit), as indicated in right image of Figure 3-10.
Figure 3-10: Disconnecting 10mm Bolts from Gas Connection at Rear Panel
18. The heat exchanger may now be removed by first pushing to the left to disengage from the two
loosened bolts and flue connections on the right, and then pulling it straight out from the unit.
See Figure 3-11.
Figure 3-11: Removing Heat Exchanger from the Unit
NOTE
Retain the O-Ring (Figure 3-12) from the flow meter connection, for
later reassembly, during removal of the heat exchanger.
PUSH LEFT
STEP 16: REMOVE
FOUR 10mm BOLTS
GAS TRAIN
Page 17 of 36 AERCO International, Inc. • 100 Oritani Dr. • Blauvelt, NY 10913 TID-0137_0A
02/02/2015 Ph.: 800-526-0288
 Loading...