AM Series Boiler Heat Exchanger Maintenance & Replacement
Technical Instruction Document
Removing the Heat Exchanger - Continued
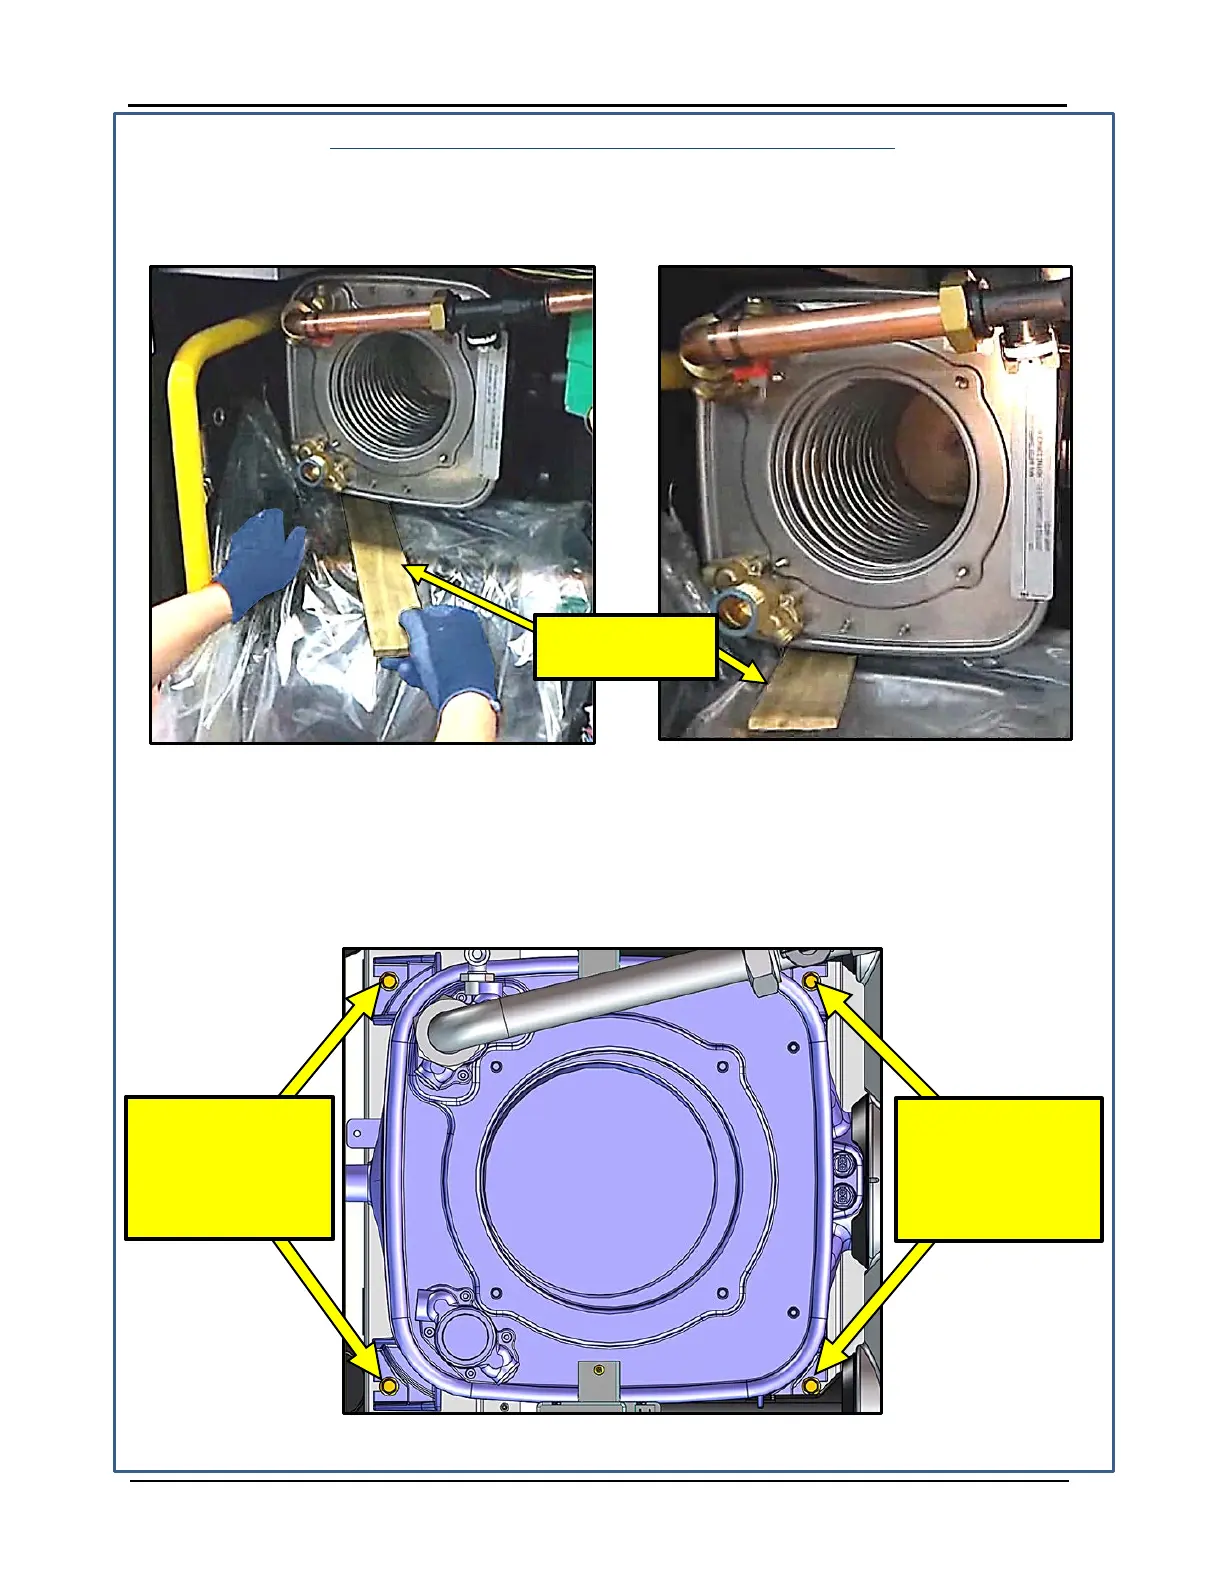
13. Place the piece of wood under the left side of the heat exchanger as shown in Figure 3-8. It
should be placed precisely as shown in the right side image to prevent damage to the module
below when removing the heat exchanger.
Figure 3-8: Placing Piece of Wood under Left-Side of Heat Exchanger
14. There are four 10mm bolts affixing the heat exchanger module to the inside rear panel of the
unit. Completely remove the two bolts on the left side, as indicated in Figure 3-9, using the 19”
long 10mm nut driver.
15. Loosen (but do not remove) the two bolts on the right side, as indicated in Figure 3-9, using the
19” long 10mm nut driver.
Figure 3-9: Removing and Loosening Bolts Affixing Heat Exchanger to Rear Panel
PIECE
COMPLETELY
REMOVE THE TWO
BOLTS ON LEFT
WITH 19” LONG
(DO NOT REMOVE)
THE TWO BOLTS
ON RIGHT WITH 19”
LONG 10mm NUT
Page 16 of 36 AERCO International, Inc. • 100 Oritani Dr. • Blauvelt, NY 10913 TID-0137_0A
02/02/2015 Ph.: 800-526-0288
 Loading...