28 Aeroworks 30cc Freestyle Extra 260 Assembly Manual
THROTTLE SERVO INSTALLATION
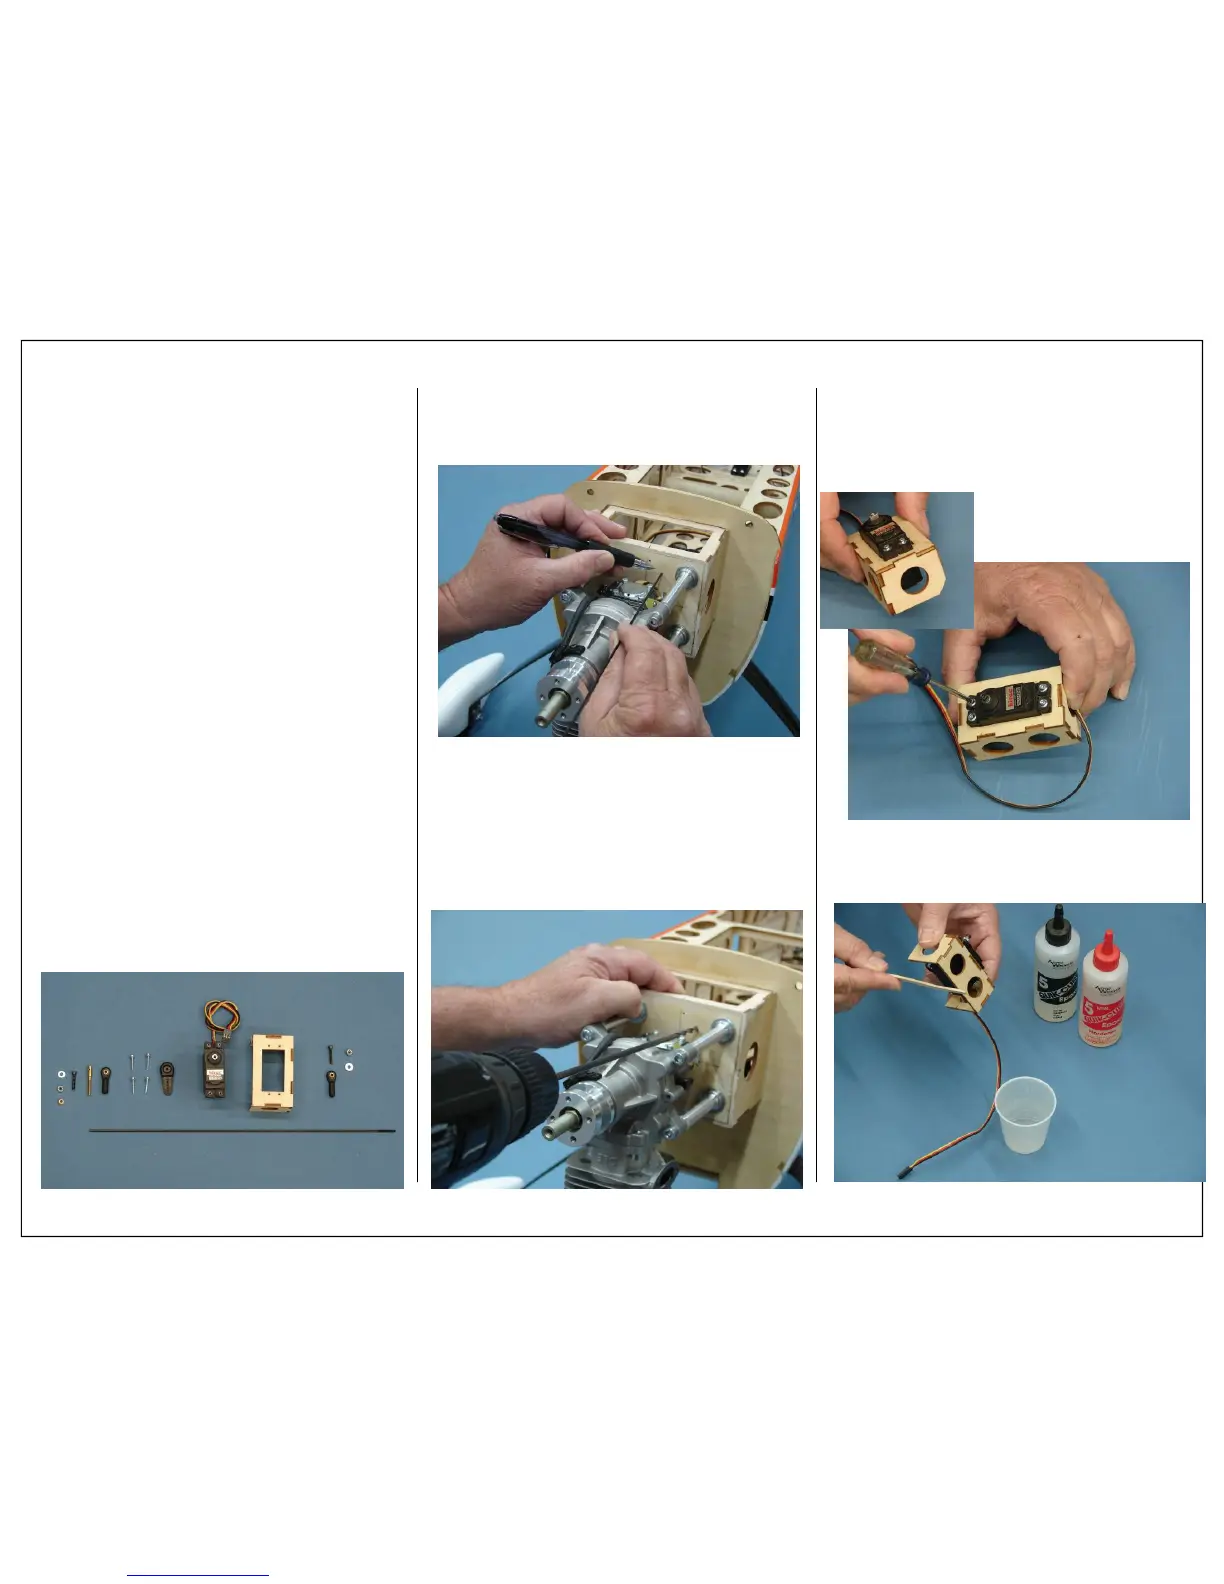
1. Gather the throttle items as shown below:
Required Parts
◊ 1 - Prebuilt Plywood Servo Mount
◊ 1 - 4-40x300mm Threaded Pushrod
◊ 1 - 4-40 Threaded Solder Coupler
◊ 2 - 4-40 Ball Links
◊ 2 - 4-40x16mm Hex Head Bolts
◊ 2 - 4-40 Lock Nuts
◊ 1 - Brass Spacer
◊ 2 - 3mm Flat Washer
Required Parts -Not Included
◊ 1 - Throttle Servo
◊ 4 - Servo Mounting Screws (Micro Fastener
Part number STW0209 recommended)
◊ 1 - 3/4” Servo Arm
Required Tools and Adhesives
◊ 1 - Pencil/Felt Tip Pen
◊ 1 - Phillips Screw Driver
◊ 1 - 5/64” Ball Driver
◊ 1 - Electric Drill
◊ 1 - 1/16” Drill Bit
◊ 1 - 7/64” Drill Bit
◊ 1 - Rotary Cutting Tool with Cutting Disk
◊ 1 - Wire Cutter
◊ 1 - Soldering Iron
◊ 1 - Silver Solder “Sta-Brite Recommended”
◊ 1 - 80 Grit Sandpaper
◊ 1 - .34oz Bottle Blue IC-Loc Thread Locker
2. Mark the location of the throttle pushrod on the
firewall as shown.
3. Use a drill bit to drill the holes for the throttle
pushrod.
4. Install the throttle servo in the preassembled la-
ser cut mounting tray as shown below.
Note: It may be necessary to remove the bottom
corner of the servo mounting tray as shown.
This will allow the mounting tray to fit over
the reinforcement tri-stock.
5. Apply 5 minute epoxy to the side of the servo
mount that will be in contact with the engine box
side.