11
Understanding OTDR Test Parameters
Parameter Description
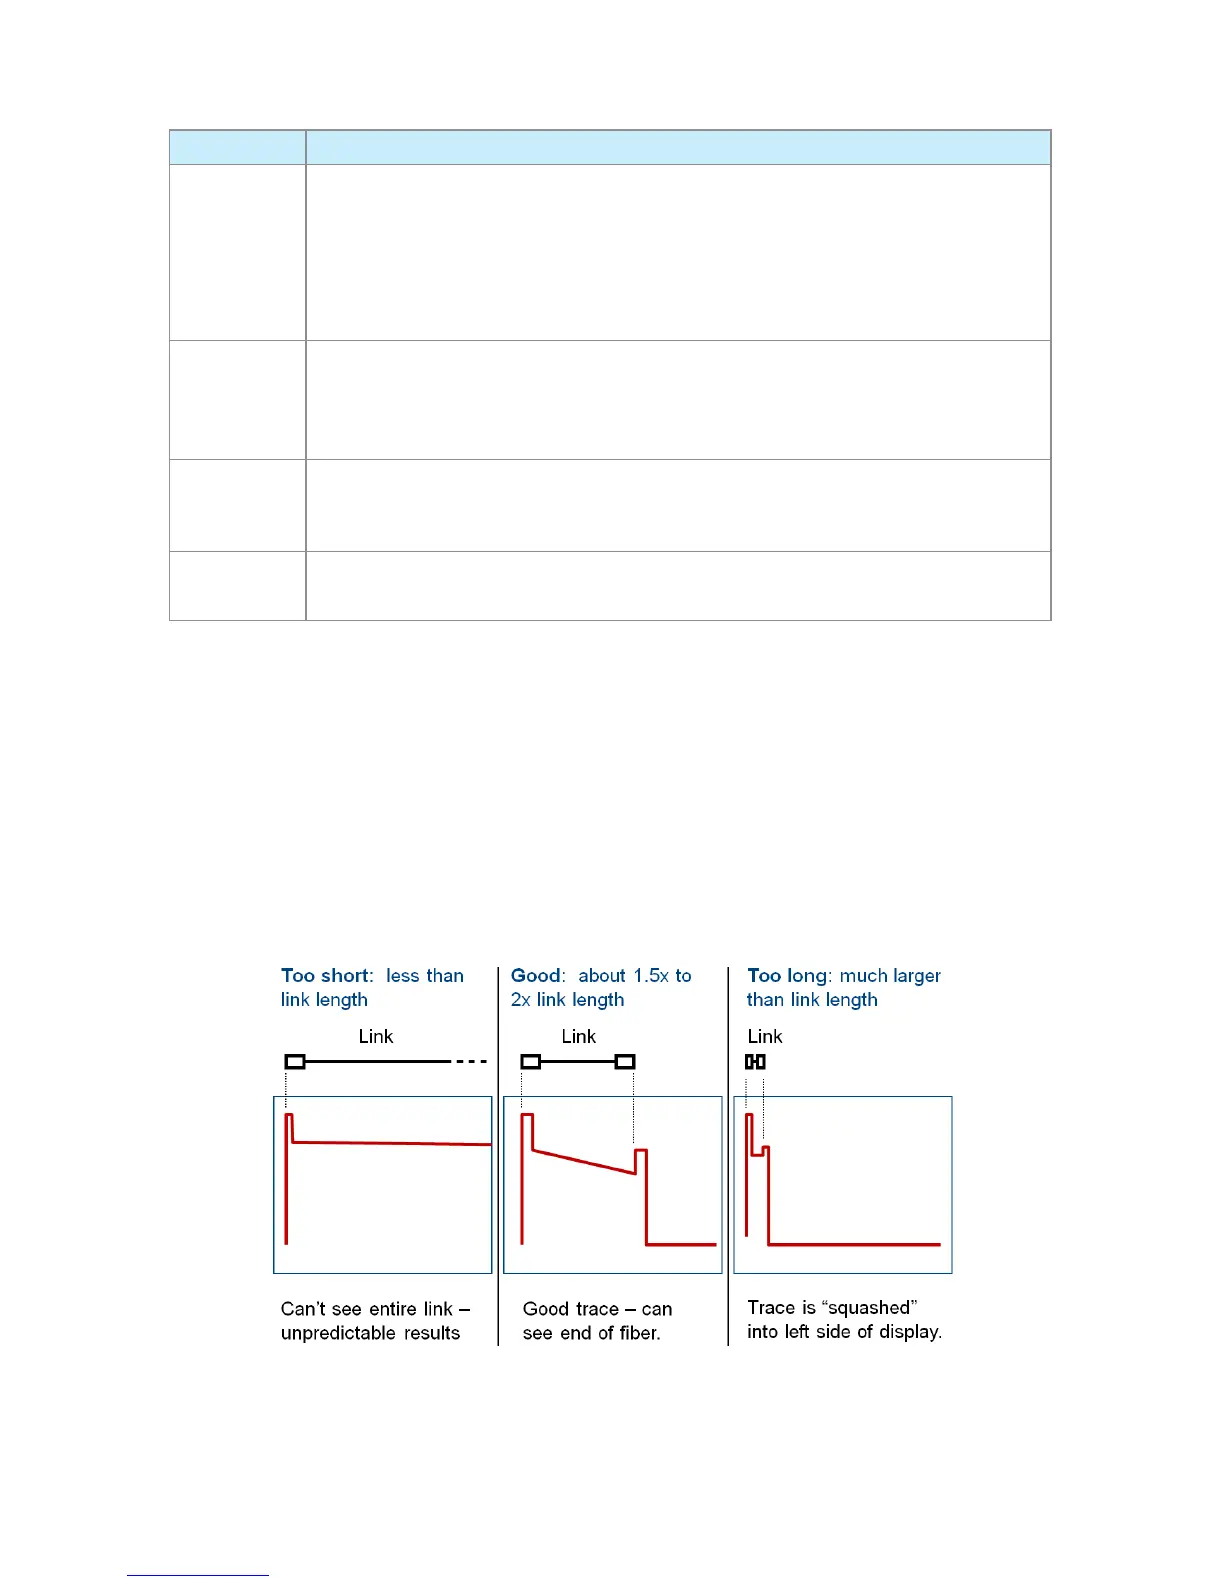
Range The [Range] parameter determines the distance range of the full (unzoomed) trace. It
also determines the distance between data points in the trace: the longer the range,
the wider the data point spacing. We recommend selecting the shortest distance
range that is longer than the ber under test. For example, to test a ber that is
1.5km long, select the 3 km range.
Available [Range] values: 250 m, 500 m, 1, 1.5, 3, 6, 15, 30, 60, 120, 240 km
Pulse The OFL280 can operate using different pulse widths. Short pulse widths provide
the shortest event and attenuation dead zones. Long pulse widths provide the range
needed to test long bers.
Available [Pulse] values: 5, 10, 30, 100, 300 ns, 1, 3, 10 µs.
Averaging The [Averaging] parameter determines the duration of a timed test and the number
of trace averages performed. The longer the test the smother the trace.
Available [Averaging] values: 5, 10, 15, 30, 60, 90, 180 sec.
Resolution Available: [Normal] or [High].
Set to [High] to see events that are close together; set to [Normal] for longer range.
Setting Test Parameters
Range
Range should normally be set to a value longer than the known length of the ber under test. Shorter
values may be used to obtain a higher resolution trace of the initial portion of the ber. If you do not
know the length of the ber, start with a quick scan using a long range to determine where the ber
end is, then re-scan with a more appropriate range setting.
Note: The OFL280 automatically determines the appropriate Range setting In Full Auto and FTTx – In
Service modes.