:Anapurna M4F - Operator Manual Stay ahead. With Agfa Global Services.
12 Operations-Makingyourrstprint
Adjust the negative pressure by turning the valve on the top of the shutlle. Make
sure that you reach a value of -.036. The value is displayed on the left side of
the shuttle;
Switch the ink valves back to the “I” position;
Lower the media set bar by turning the media set button;
Position the left side guide, using the scale
on the inside of the media set bar;
Load your media onto the conveyor belt and
position it against the media set bar;
Turn the vacuum on and raise the media set
bar (switch the media set button);
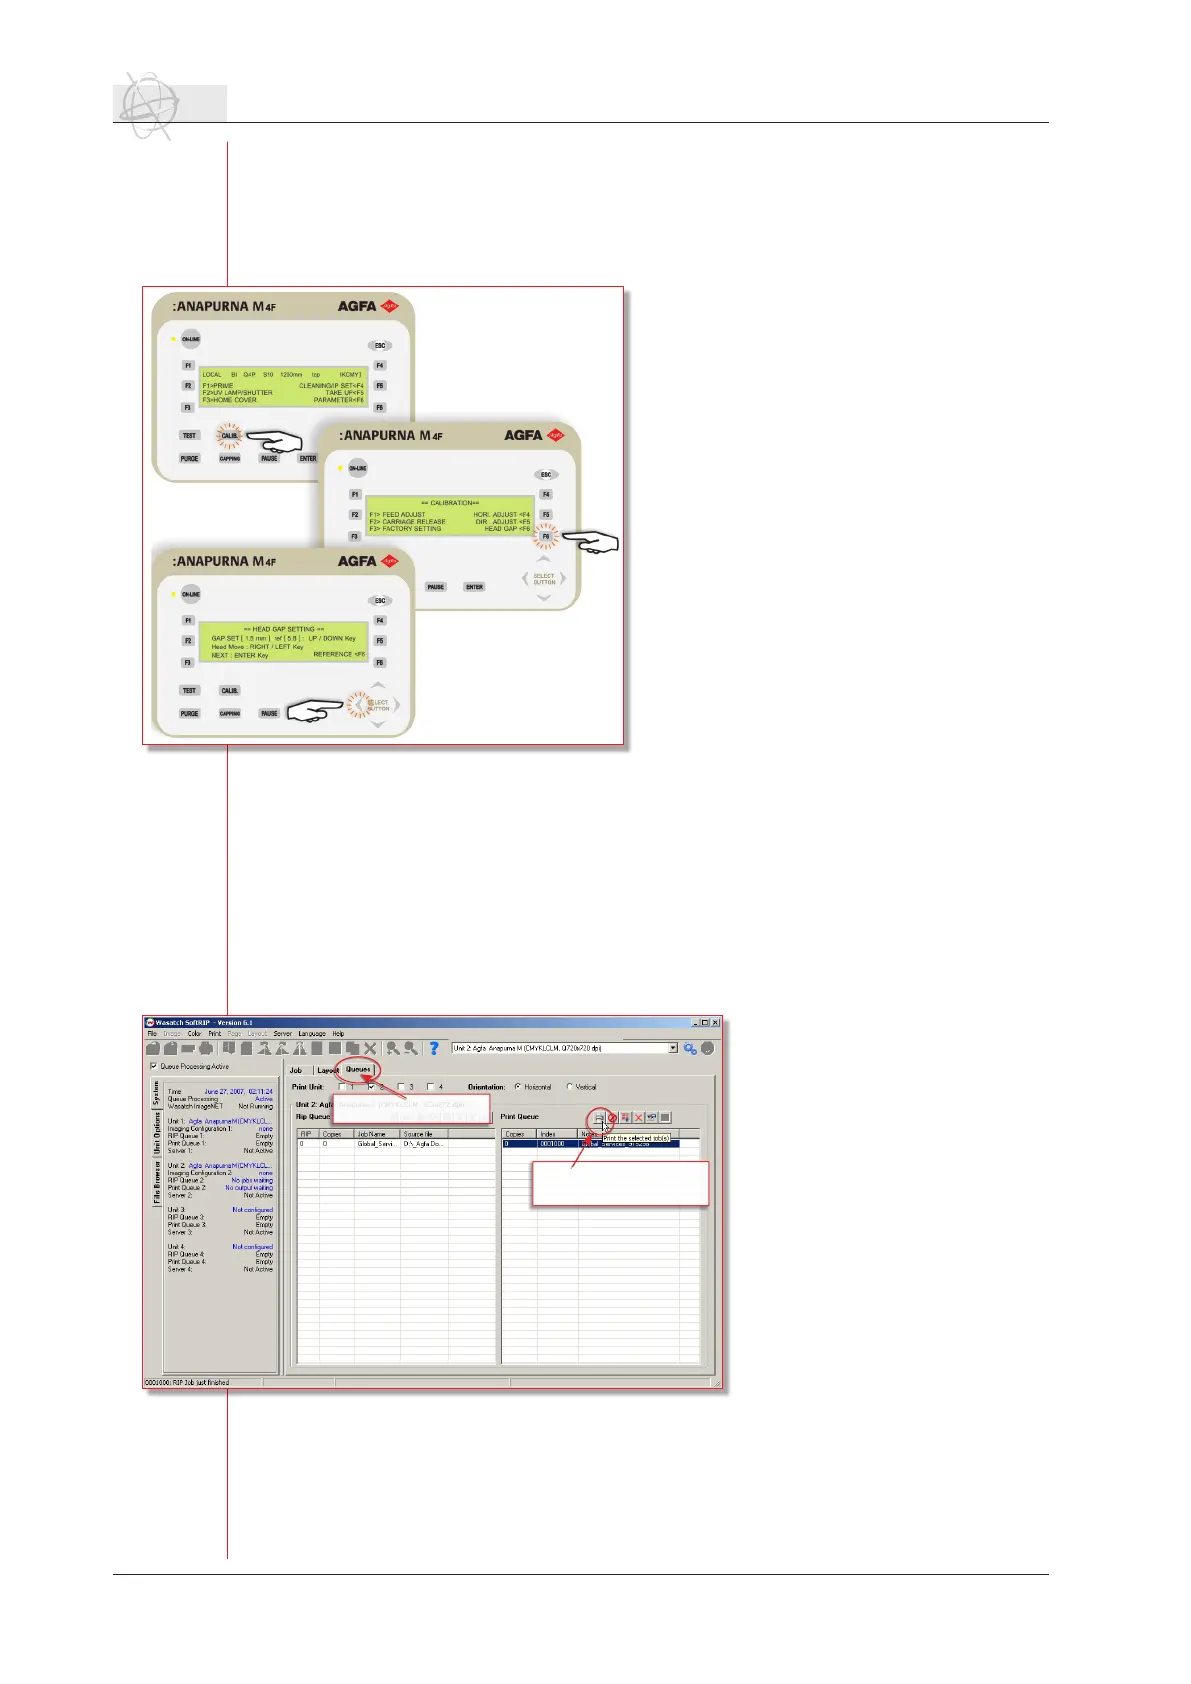
Press “Calibration” button and choose F6
“Head Gap” to set the shuttle to the correct
reference height as for the media. Press the
left arrow to move the shuttle to the de-
sired position. Make sure that you position
the shuttle so the height calibration will
be done between the two red dots on the
beam;
When the shuttle is in position, press “En-
ter” and the shuttle will lower itself to the
reference height. This is a default value and
is not the same as the actual head height.
Press “Enter” a second time to lower the
shuttle to the head gap distance;
Move the shuttle back to the home position
by pressing “Enter”. The “head gap” proce-
dure is now completed and the shuttle is
set to the desired distance;
Check the state of the print heads by performing a prime print. Turn on the U.V.
lamps and press “F1” in the main menu. The lamps start warming up and after
90 sec. the :Anapurna M4F will print a jet test;
Close the capping station by turning the switch to “close”;
The :Anapurna M4F is ready to print when the temperature of the head base
plate and the inks have reached the desired values;
Pressthe“Online”buttonandmakesurethatthegreenLEDis‘ON’.
1.3 Making your rst print.
If the :Anapurna M4F is online
and all nozzles are clear, the en-
gine is ready to print. Make sure
that your media is loaded and the
vacuum is on. Set the U.V. lamps
to the desired strength (half or
full power).
Choose the queue tab in Wa-
satch. You nd it at the top of
the preview window. Select the
job that you want to print in
the print queue and click on the
print icon in the top of the print
queue.
Astheenigeisin‘online’-mode,
the :Anapurna M4F will start
printing the job if the uv lamps
are ready.
Select the queue tab.
Select your print job and
click on the print icon.
 Loading...