:Anapurna M4F - Operator Manual Stay ahead. With Agfa Global Services.
16 Operations - The Wasatch SoftRIP
marquee, which will open a popup menu (the other selections on this menu are de-
scribed below). Selecting Constrain Proportions On corresponds to the proportional
mode, and automatically places check marks in the boxes.
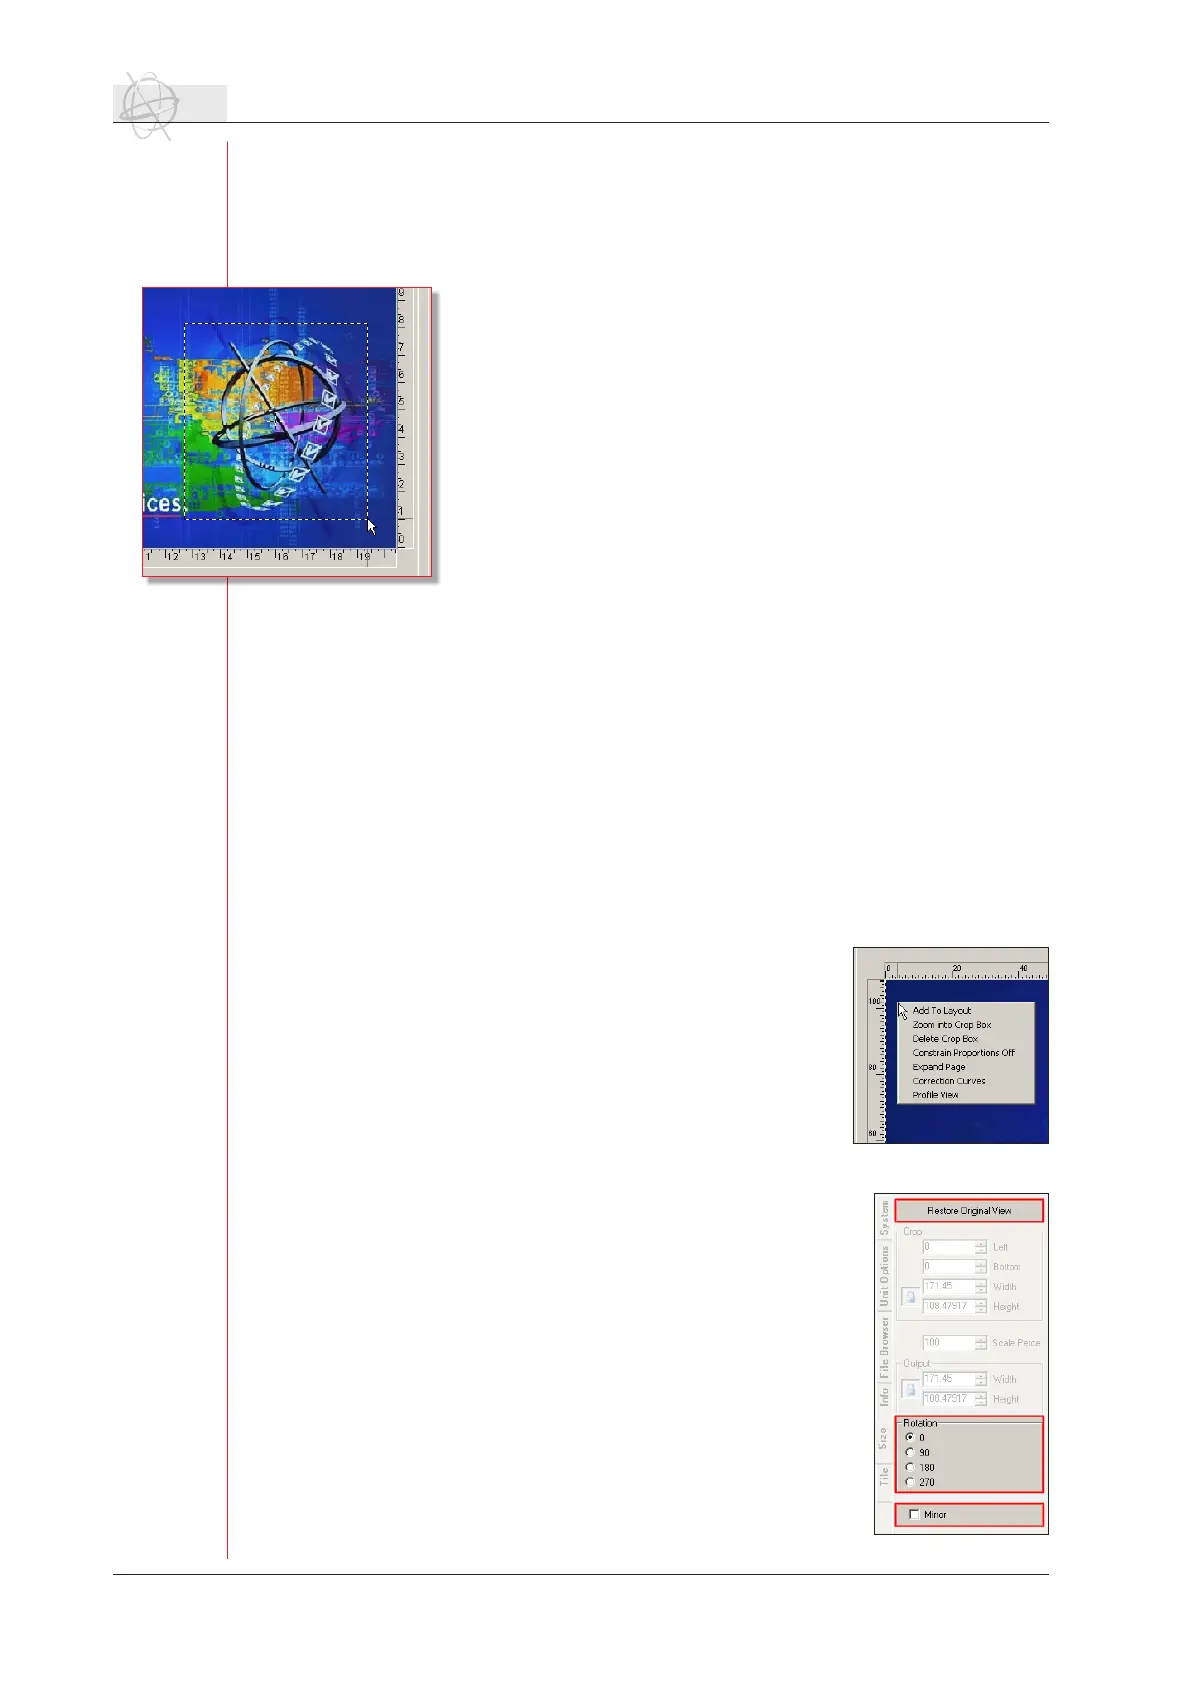
Left-click on the preview image: activate crop area.
Activate the crop area by left-clicking anywhere in the image and
dragging your mouse to create a dotted line “marquee” box. The mar-
queedenestheareatoprint,oranareatozoominto.Re-position
the borders of the cropping marquee by holding down the left mouse
key and dragging. The Width and Height windows in the Crop area
display the size of the marquee dimensions on the original image.
The Width and Height windows in the Output area display the size
of the crop marquee dimensions. Only the area inside the marquee
will print.
Matchingspecicdisplaydimensionrequirements:Formoreprecise
adjustments, enter new dimensions in either the Width or Height
windows in the Output area. This must be done in the Free mode
(Constrain Proportions turned off). The dimensions of the marquee
will not change until you press ENTER or TAB.
Changing marquee position manually and numerically: The entire
marquee area can be re-positioned by clicking in the centre of the
marquee and dragging the marquee box. The position of the marquee’s left and
bottom edges are displayed in the windows labeled Left and Bottom in the Crop
area. The numbers shown represent the distance in inches or centimeters, mea-
sured from the respective edge of the original image to the outside border of the
marquee.
Change the marquee position more precisely by hand-entering new values in
these windows. When you enter new numbers to position the marquee, the mar-
quee will not move until the ENTER or TAB key is pressed.
When a crop marquee is “live” on an image preview, right clicking within the
marquee launches the popup menu.
Right-click on the preview image: pop up menu.
Right-clicking on the image, will open a pop up menu which offers you the next
options:
Zoom Into Crop Box: eliminates areas outside the
marqueeandallowsyoutozeroinonspecicele-
ments of the image. Especially useful for color cor-
rection and spot color replacement.
Delete Crop Box: makes the marquee go away and
resets the Crop and Output dimensions.
Constrain Proportions On or Constrain Proportions
Off: toggles between free and proportional reposi-
tioning of the marquee borders.
Expand Page: places a white border around the edg-
es of the image.
Replace Spot Color: launches the Special Colors
menu and spot color management features.
Correction Curves: launches the Correction Curves
menu.
ProleView:launchestheProleViewUtility.
c. Restore Original View.
This option takes you back to the original view of the im-
age.
d. Rotating.
Rotating a landscape image 90° into a portrait format may
allow you to print the image in a larger size without tiling.
The other rotation degrees allow you to re-position an im-
age that is upside down or otherwise incorrectly oriented.
 Loading...