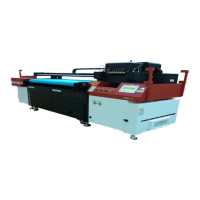
:Anapurna M4F - Operator Manual Stay ahead. With Agfa Global Services.
20 Operations - Start up & Shutdown Procedures
4. Start up & Shutdown Procedures.
4.1 Start up Procedure
Turn the compressorON.Waitforthecompressortanktollupandcompressor
motor to cut-off.
Turn the Air Drier ON (Air drier is used to take the moisture out of the com-
pressed air).
Check the input air pressure on the rear right side of the engine (the gauge
should read 0.6 MPa/6 Bar/87 PSI).
Clear the table of the Anapurna Engine.
Check if the Mains are ON (electrical circuit at the premises).
TurntheMainpowerSwitch‘ON’fromtheAnapurnaEngine(RearSide-Left).
MakesurethattheEmergencySwitchesare‘OUT’.
Push the ON/OFF Switch; the engine will start booting up
At this moment, the carriage will start moving up. The carriage will then
move towards the Home Side & move down
If the Safety Sensors were not activated; you will get a message on the Con-
trolPanelinformingthat‘TheSafetyisOFF’(thesafetysensorsareOFF).You
will have two options, Press F2 & the sensors will stay OFF or Press F5 & the
Sensors will activate.
Press F5 (the sensors will get activated) & the carriage will start moving up.
The carriage will then move towards the Home Side & move down
Agfa recommends that Safety Sensors should stay ‘ON’
Afterthebootup,theenginewillgointo‘OFF-LINE’Mode.
Press F3 to push the Home Cover in.
Clean the Capping Station (if required) & close the Capping Cover.
Check:
The Vacuum : Should be around: – .036
The Sub Ink Tank & Head Base Temperature: Approx. 45 degrees & 49 de-
grees respect.
4.2 Making the engine ready for Printing.
Turnallthe (ink)2-wayvalves backto‘I’Position(ink position);(theextreme
right hand side valve should already be at ‘I’ position). Make sure the Home
Cover is in (open).
Press the PURGE button 2 – 3 times and check the ink coming out of the print
heads. If you see any Air Bubbles or Cleaning Solution, do some more purges
(Quick Purge or Long Purge).
Take anewlint-freeclothand ‘Tap’theprintheads (NoWipingorScratching)
making sure :
There are no ink drops left on the print heads.
Do not clean with dirty lint free cloth.
Put some media on the bed and turn the Vacuum ON (make sure the media sits
atonthebed.
Do a Head Gap:
Press‘Calib’andthenpressF6(forHeadGap).
Press the Left Cursor Key (the carriage will move UP and then left wards).
Press 1 or 2 times the left arrow to position the carriage above your media.
Press Enter 3 times (with intervals) to complete the Head Gap
WhenEnterispressedthersttime,doavisualcheckiftheHeadGapSen-
sor has come down.
Also make sure that the media is under the Head Gap Sensor (otherwise the
media height will be recorded incorrectly).
Press ESC to go back to OFF LINE MODE screen.
Check & adjust the Parameters (margins):
Put the Media Set Bar to down position.
Press F6 (for Parameters).
Godownto‘Margins’&putinthecorrectvalues(speciallyforLeftMargin)
AlsoadjustN-pointto‘N’&TopMarginto‘zero’
Press‘Enter’&movetheMediaSetBarbackto‘up’position
 Loading...