:Anapurna M4F - Operator Manual Stay ahead. With Agfa Global Services.
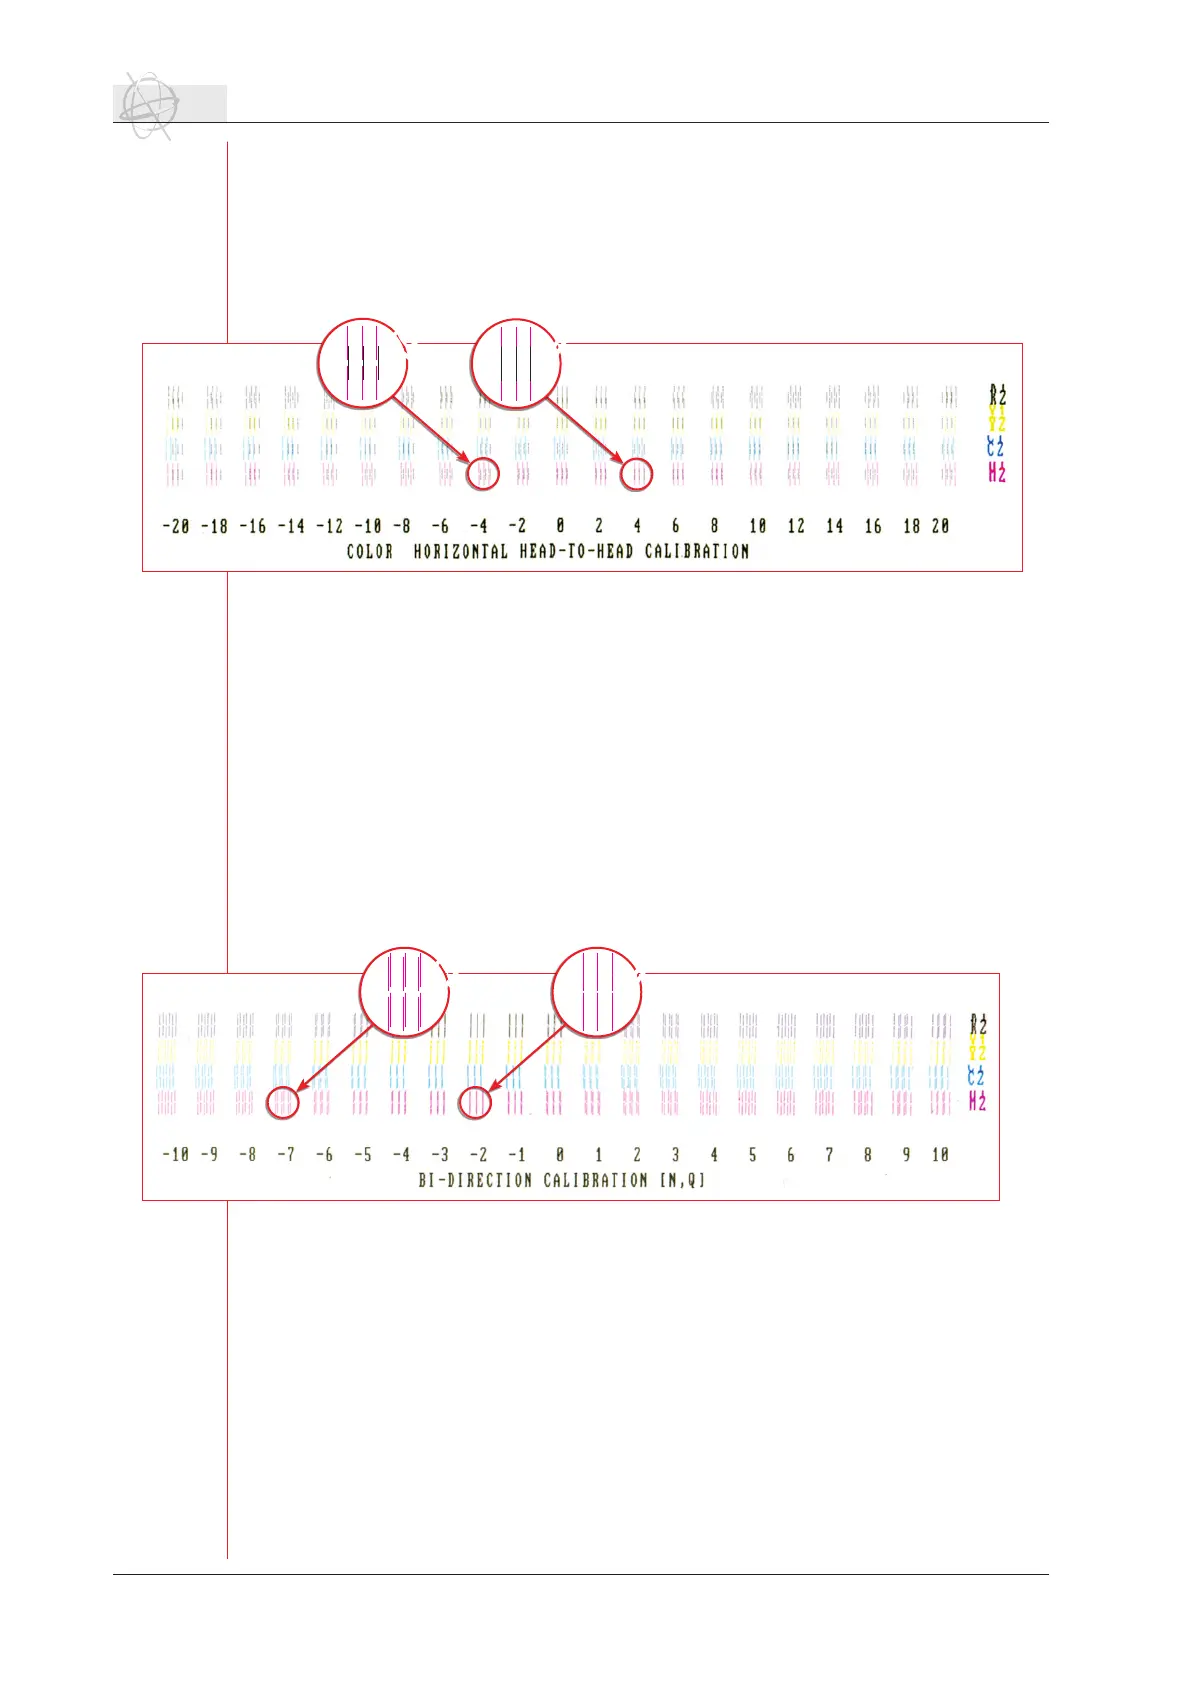
Every printhead is an assembly of two nozzle rows which are steered seperatly. Every
nozzle row has its own timing. The testchart is made up of different blocks, containing
threelinesforeverynozzlerow.Foreverycolor,21blocksareprintedwithdifferentr-
ing timings, going form -20 to +20 in steps of 2.
Between the colored lines of the different nozzle rows, black lines are printed. Choose
the value per color and per nozzle row (f.e. M1 & M2), where the black and colored
lines are perfectly aligned.
5.5 Dir. Adjust (F4).
Thebi-directioncalbirationchartisatooltodeterminetheringtimefromtheshuttle
when it prints bi-directional. Because of the head gap and the speed of the shuttle, ink
dropswillberedwithadifferentangleiftheshuttlegoesfromlefttorightorfrom
righttoleft(ringtimedelay).
Like in the horizontal head-to-head calibration, blocks of three lines are printed per
color and per nozzle row. This chart is printed bi-directional and only the block with
the correct setting will show three lines. In all the other blocks and values, you will
see6linespercolorandperringrow.3linesareprintedfromlefttoright,3linesare
printed from right to left.
Choose the correct value for every color and every nozzle row and enter these values
into the dir. adjust window.
Make sure that you always check the bi-directional alignment when you change the
head gap (for e.g. 1,6 mm instead of 1,3 mm) of the shuttle.
5.6 Head Gap (F6).
By pressing F6, the head gap setting procedure opens. It allows you to set the gap
between the base plate and the media which you are using. Make sure that you follow
this procedure every time you use a different media and after every start up procedure.
The head gap setting window allows you to enter a value for the head gap. Default
setting is 1,3 mm. Increasing this value will also increase the risk of printing artefacts.
Printinginabi-directionalmodealsoinuencesartefactsinanegativeway.Soifyou
want to print with a bigger head gap, it would be advisable to print uni-directional.
Make sure that you never use a head gap >2,5 mm.
24 Operations - Setting up the :Anapurna M
size test chart: 15 x 3 cm
size test chart: 15 x 3 cm
 Loading...