Stay ahead. With Agfa Global Services. :Anapurna M4F - Operator Manual
Operations - Setting up the :Anapurna M 23
5. Setting up the :Anapurna M4F. (the calibration menu)
Beforeyoucanaccessthedifferentsettings,makesurethattheprinterisofine.Ifnot,press
the‘ESC’buttontoswiththe:AnapurnaM4Fofine.
Whenyoupressthe‘CALIB.’button(controlpaneln°7),thedifferentcalibrationsettingswill
pop up on the screen. By choosing a corresponding function key (F1, F2, F3,...), you can change
that parameter.
F1 : FEED ADJUST
F2 : CARRIAGE RELEASE
F3 : FACTORY SETTING
F4 : HORI. ADJUST
F5 : DIR ADJUST
F6 : HEAD GAP
In order to achieve the best quality, you have to make sure that these parameters are carefully
set. A deviation in one of these paramters, can cause loss of quality. Make sure the head gap
procedure has been followed before conducting any calibrations.
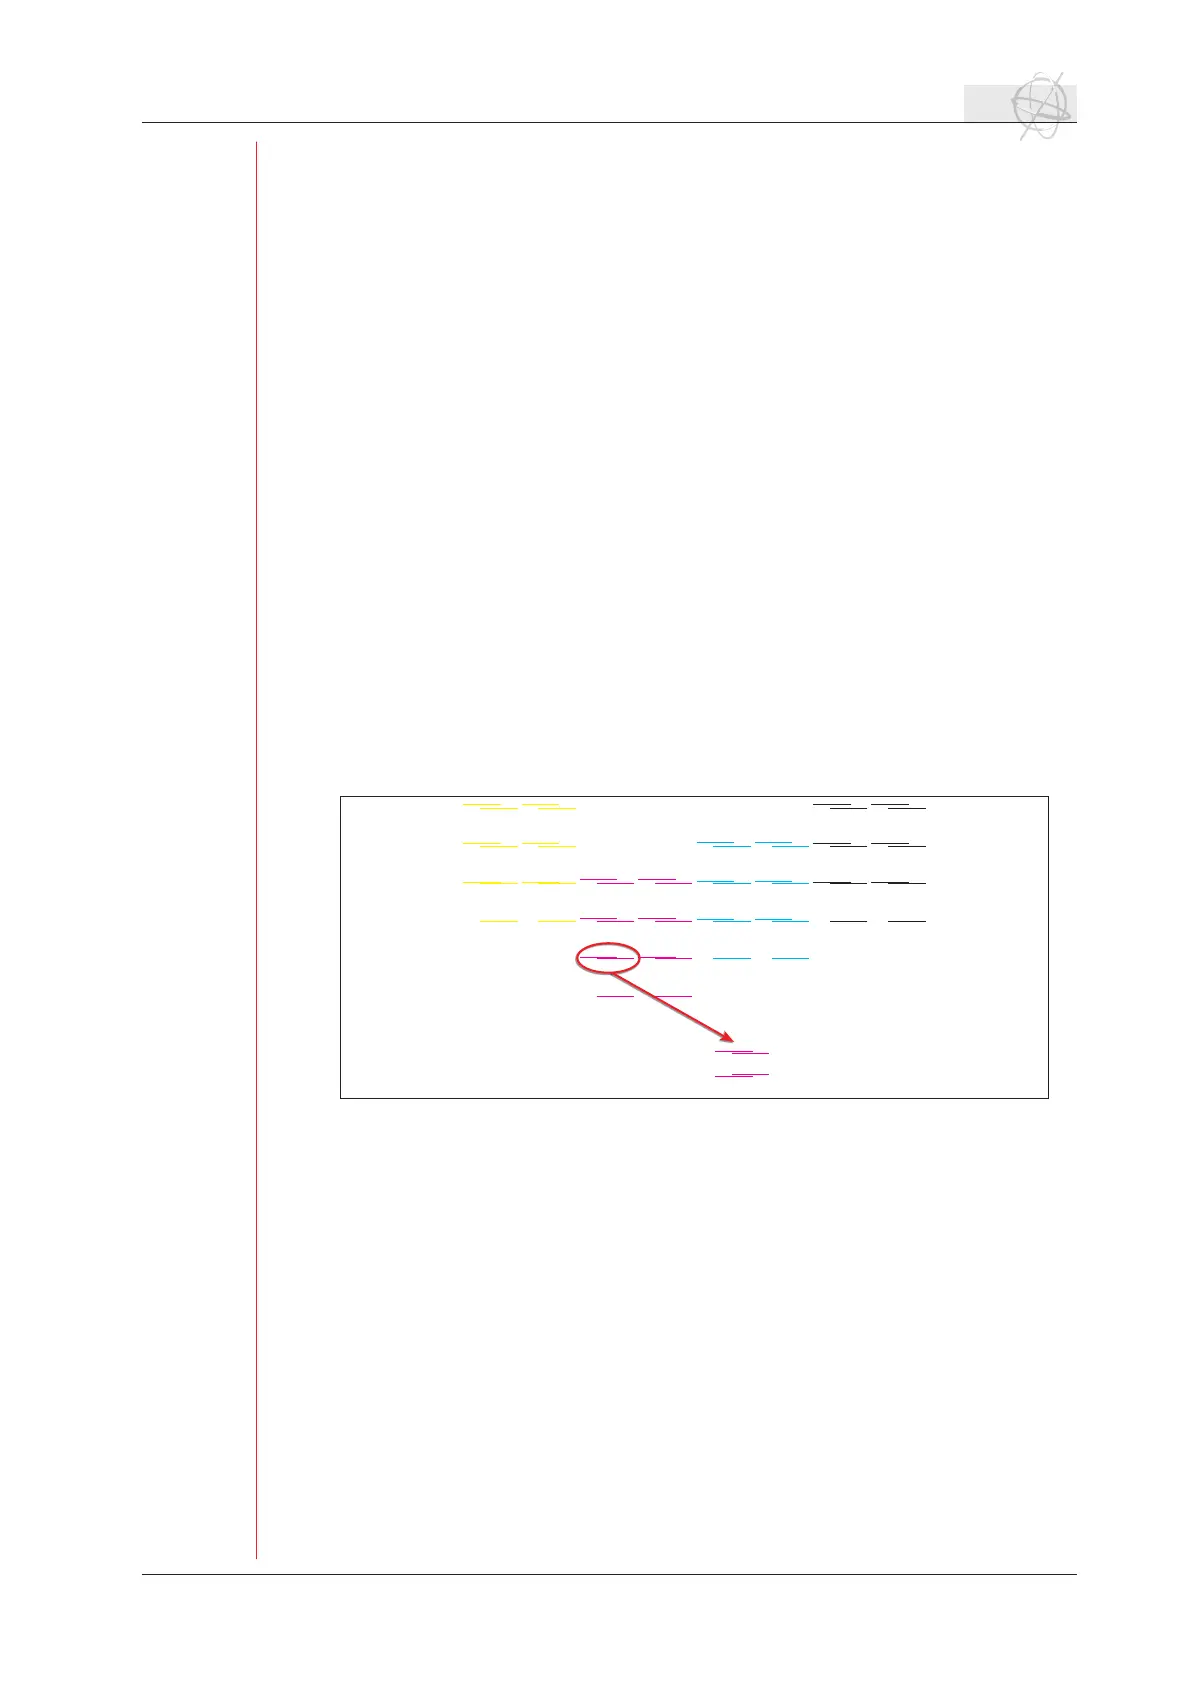
5.1 Feed Adjust (F1).
The feed adjust is the parameter which controls the size of each step the conveyor belt
will move between different print passes. If this settings is too high, white lines will
start to appear between every printing pass. Entering a vaule that is too low, will make
different passes overlap each other. This results in dark lines in your print.
If you want to check the feed adjust, press F1 to enter the feed calibration menu. Select
F2tostarttheprint.Intherstpasstheprinterwillprint2x4linesofeverycolor.Every
passthatfollows,anewlinewillbeprintedbesidesoneoftherst4.Incasethatthe
printed lines are not aligned as one line, you need to adjust the feed value.
5.2 Carriage Release (F2).
You can unlock the shuttle by pressing F2. The servo motor will be turned off and you
can move the shuttle by hand. If you want to switch the servo motor back on, choose
F1‘servoonandhomecheck’.Theshuttlewillrepositionitselfinthehomeposition.
5.3 Factory setting (F3).
In this menu the head voltage, etc. are managed. This setting is protected with a pass-
word and can only be accessed by a service engineer.
5.4 Hori. Adjust (F4).
The horizontal head-to-head calibration is a tool to align the colored printheads in ref-
erencetotheblackhead.Itisasoftwareparameterthatcontrolsthetimingofther-
ing of the heads.
If the left line is printed higher then the right line: decrease the feed value.
If the left line is printed lower then the right line: increase the feed value.
size test chart: 13 x 8 cm
 Loading...