Chapter 3 Calibration Procedures
General Calibration/Adjustment Procedure
69
3
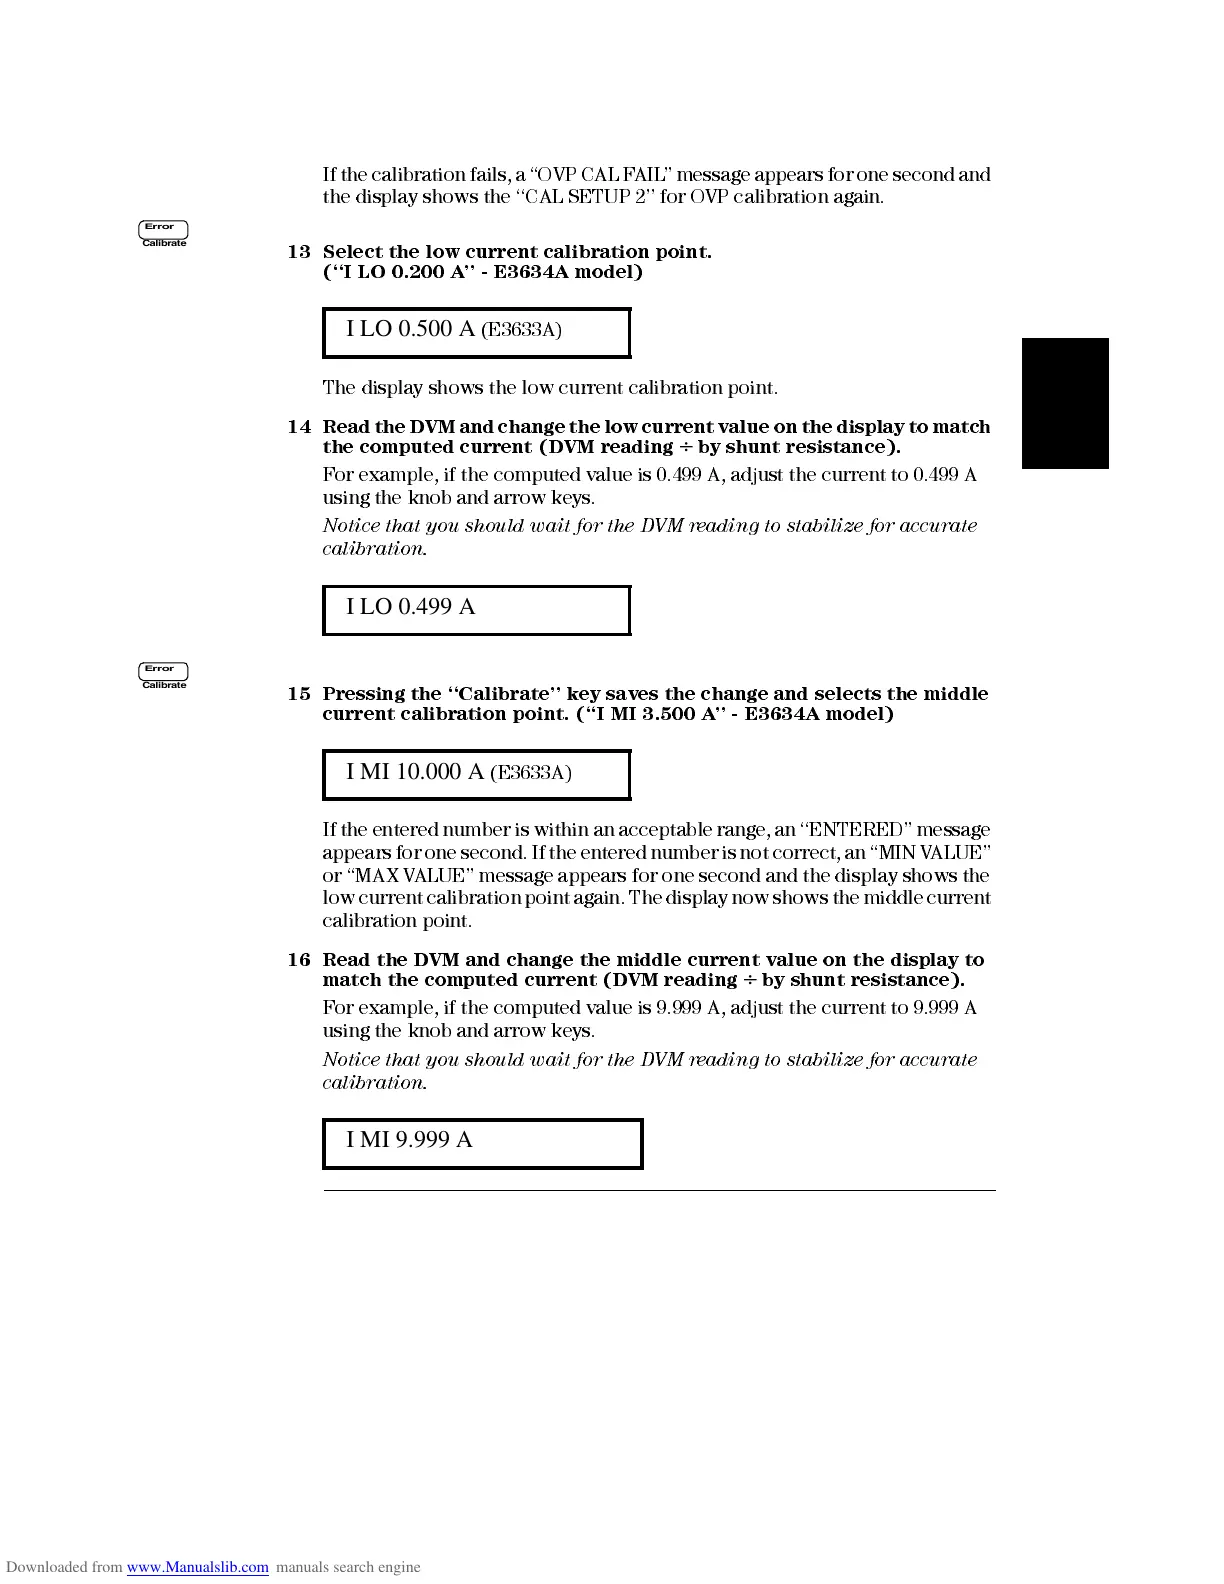
If the calibration fails, a ‘‘OVP CAL F AIL ’’ message appears for one second and
the display shows the ‘‘C A L SETUP 2’’ for OVP calibration again.
13 Select the low current calibration point.
(‘‘I LO 0.200 A’’ - E3634A model)
The displ ay shows the low current calibrati on point.
14 Read the DVM and change the low current value on the display to match
the computed current (DVM reading
÷
by shunt resistance).
For example, if the computed value is 0.499 A, adjust the current to 0.499 A
using the knob and arrow keys.
Notice that you should wait for the DV M reading to stabilize for accurate
calibration.
15 Pressing the ‘‘Calibrate’’ key saves the change and selects the middle
current calibration point. (‘‘I MI 3.500 A’’ - E3634A model)
If the e ntered number is within an accepta ble range, an ‘‘ENTERED’’ message
appears for one second. If the entered number is not correct, an ‘‘MIN VALUE’’
or ‘‘MAX VALUE’’ message appears for one sec ond and the display shows the
low current calibration point again. The display now shows the middle current
calibration point.
16 Read the DVM and change the middle current value on the display to
match the computed current (DVM reading
÷
by shunt resistance).
For example, if the computed value is 9.999 A, adjust the current to 9.999 A
using the knob and arrow keys.
Notice that you should wait for the DV M reading to stabilize for accurate
calibration.
I LO 0.500 A
(E3633A)
I LO 0.499 A
I MI 10.000 A
(E3633A)
I MI 9.999 A
Error
Calibrate
Error
Calibrate
 Loading...