1-79
Troubleshooting
Troubleshooting the RF Path
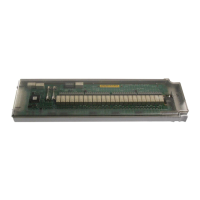
Troubleshooting AT1 Attenuator
Starting from +25 dBm, the attenuator steps when the power is changed from between +5.1 dBm
and +5.0 dBm. Continuing to lower the power level, the next switch occurs between –4.99 dBm and
–5.0 dBm. The next change is between –14.99 dBm and –15.0 dBm and so on. The last change
occurs between –104.99 dBm and –105.0 dBm.
1. If the attenuator switches at the switch points but the power does not change or the power
changes more or less than expected, replace the attenuator.
2. If the attenuator does not switch, press: Utility > more 1 of 2 > Instrument Info > Options Info
An Option 1E1 should be listed.
3. If Option 1E1 is not listed, the option is either not installed or the configuration file is bad. The
signal generator will need to be returned to Agilent for service.
4. If Option 1E1 is listed, turn the signal generator off and remove W36 from J13 on the A26 MID.
5. Turn the signal generator on and probe the following pins on J13.
• Pin 1 +15 Vdc ±0.75 Vdc
• Pin 2 +5.2 Vdc ±0.5 Vdc
Table1-21 shows the amplitude ranges and the corresponding attenuator switch control line
voltages. Attenuation is switched in at +3 Vdc ±.75 Vdc and switched out at 0 Vdc.
6. If the voltages are correct, replace the attenuator.
7. If the voltages are not correct, replace the A26 MID.
Table 1-21
Pin Numbers and Voltages
Amplitude
Levels
J13-5 40B dB
Atten. Step
J13-6 20 dB
Atten. Step
J13-7 40C dB
Atten. Step
J13-9 10 dB
Atten. Step
J13-10 5 dB
Atten. Step
+25 to +5.1 dBm00000
+5.0 to -4 99 dBm0000+3
-5.0 to -14.99 dBm 0 0 0 +3 +3
-15.0 to -24.99 dBm 0 +3 0 0 +3
-25.0 to -34.99 dBm 0 +3 0 +3 +3
-35.0 to -44.99 dBm +3 0 0 0 +3
-45.0 to -54.99 dBm +3 0 0 +3 +3
-55.0 to -64.99 dBm +3 +3 0 0 +3
-65.0 to -74.99 dBm +3 +3 0 +3 +3
-75.0 to -84.99 dBm +3 0 +3 0 +3
-85.0 to -94.99 dBm +3 0 +3 +3 +3
-95.0 to -104.99 dBm +3 +3 +3 0 +3
>-105.0 dBm +3 +3 +3 +3 +3
 Loading...


