103
Order online at www.agilent.com/chem/store
Detectors
Attaching a Capillary Column to the FPD
What you need:
• Column measuring tool,
p/n 19256-80640
• Column cutter
• 1/4 in. and 7/16 in. wrenches
• Column nut
• Ferrule
• Capillary column
• Lint-free gloves
1. Gather the required supplies and tools.
2. Load the GC maintenance method and wait for the GC to become ready.
3. Assemble a septum, column nut, and ferrule on the end of the column.
4. Insert the end of the column through the column measuring tool so that the end
protrudes beyond the tool.
5. Tighten the column nut until it grips the column. Tighten the nut an additional
1/8 to 1/4 turn with a pair of wrenches. Snug the septum against the base of
the column nut.
6. Use a wafer cutter at 45° to score the column.
7. Snap off the column end. The column may protrude about 1 mm beyond the end of
the tool. Inspect the end with a magnifying loupe to make certain that there are no
burrs or jagged edges.
8. Remove the column, nut, and swaged ferrule from the tool.
9. Wipe the column walls with a tissue dampened with isopropanol to remove
fingerprints and dust.
10. Verify that a capillary adapter is installed in the detector fitting.
11. Carefully thread the swaged column up into the adapter. Finger-tighten the column
nut, then use a wrench to tighten an additional 1/8 turn.
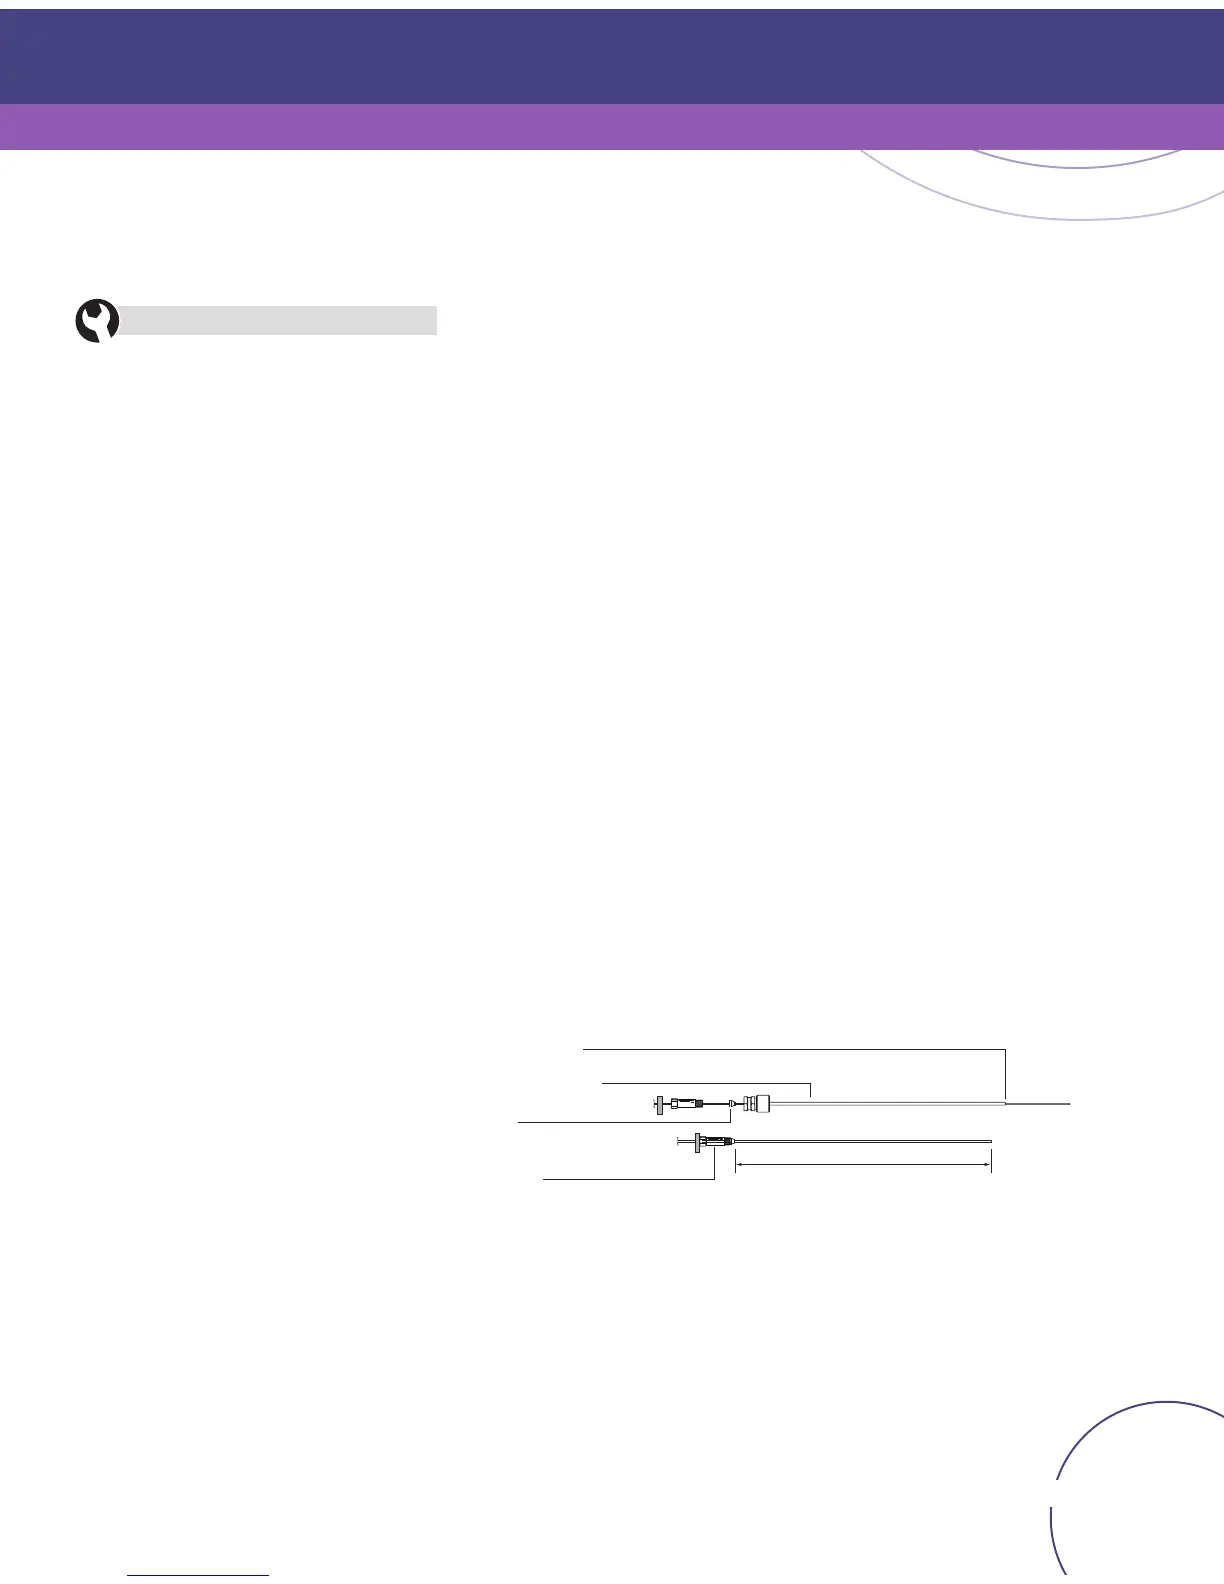
If you are using a capillary column, the tip of the column must be at least 1 mm below the
surface of the jet. When you install the column, measure the distance from the sealing
surface of the ferrule to the tip of the column. This measurement is 153 mm for the
original FPD and 145 mm for the new FPD. For the new design, Agilent recommends
using the column measuring tool, part number 19256-80640.
Score column here
Column measuring tool
Ferrule
Column nut
145 mm

 Loading...


