CHAPTER 5
16 17
MXm
n
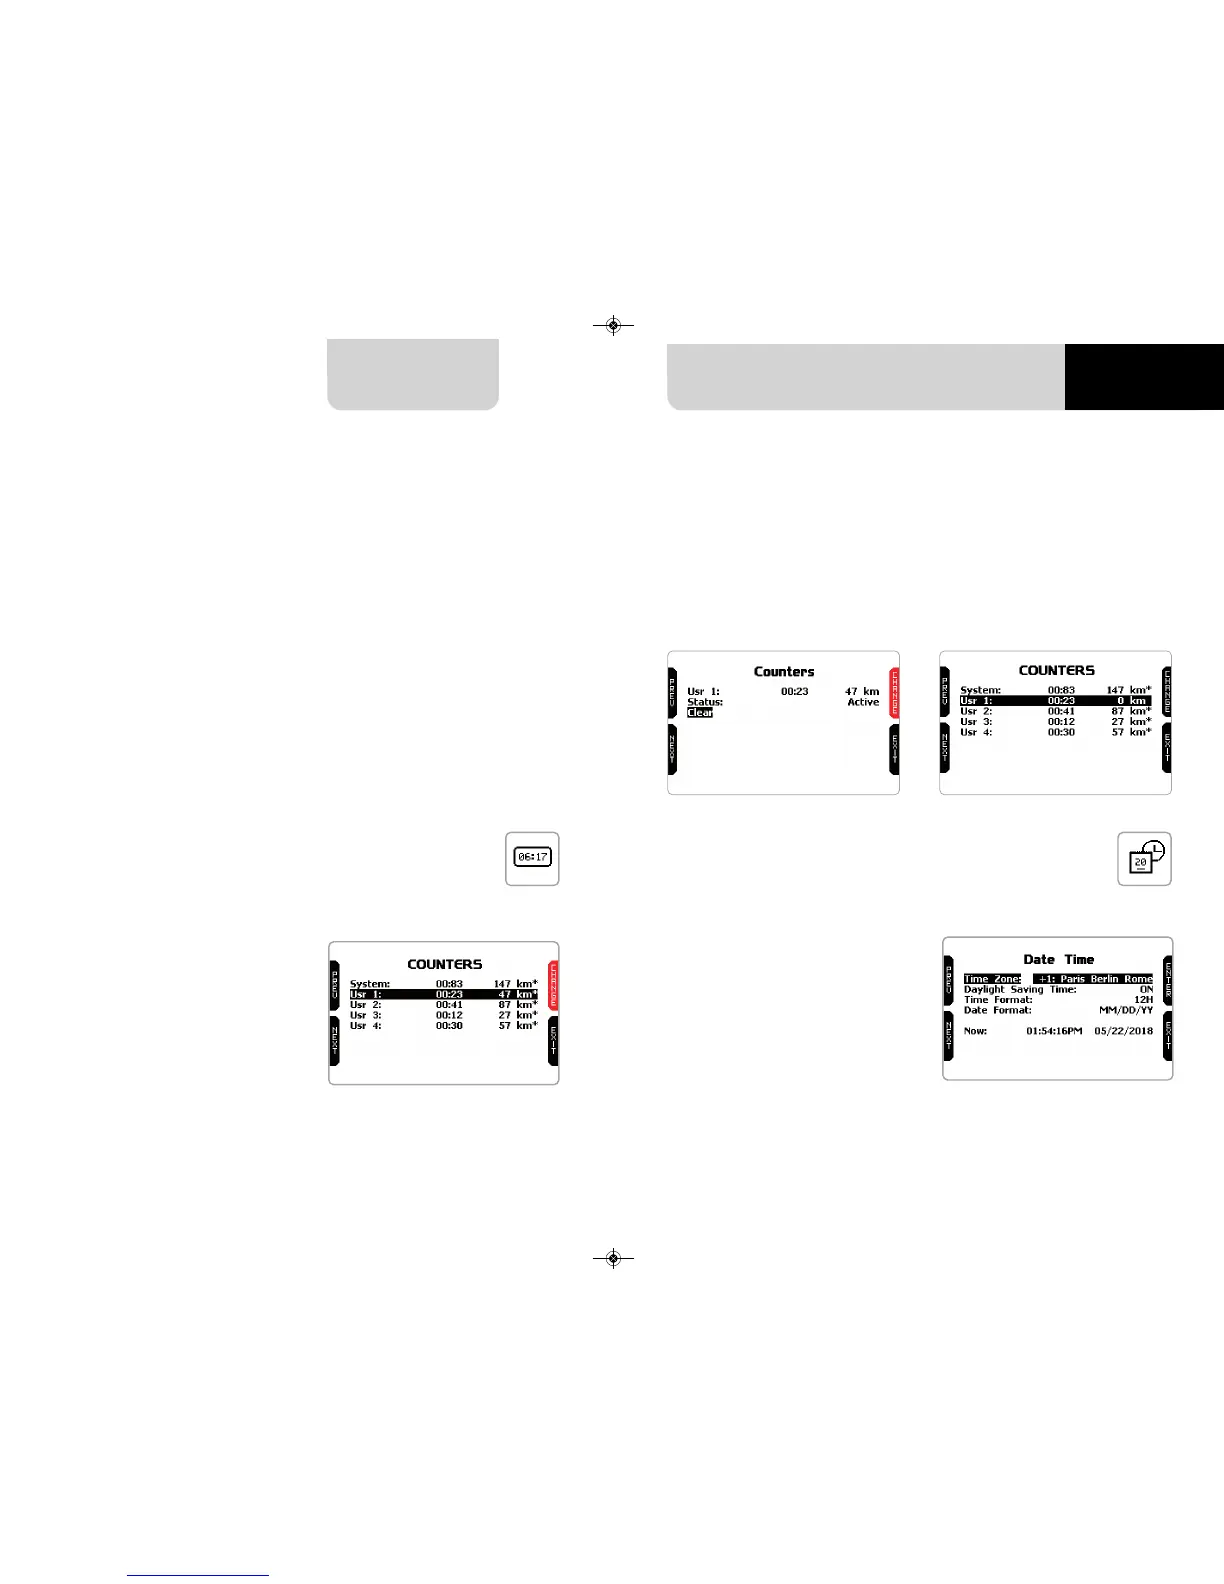
scroll to Status and press “CHANGE” to switch from “Active” to “Stop” and vice-versa
n
scroll to clear and press “CHANGE” to reset an odometer (left image below)
n
pressing “EXIT” you come back to odometer page and the odometer you
stopped/reset will not show the asterisk and will show “0” km (in the example
below both operations have been performed on odometer 1 (right image below).
5.4.1 Creating a track with MXm
5.5 Counters 5.6 Date and Time
If you are running in a track NOT included in MXm database the device switches to
“learning” mode and behave this way:
n
it starts sampling all track points
n
when detects that it is crossing the same points for the second time it realizes that
the track is closed and sets a temporary start/finish line showing lap time each
time it crosses that point;
n
at the end of the session the system shows the track map with start/finish line:
you can move start/finish line using MXm side buttons;
n
you can add this new map to MXm database, modify start/finish line coordinates,
name the track and transmit it to the PC at first PC-MXm connection
You find a deeper explanation of track management with Race Studio 3 in the related
chapter and a “Track manager” user manual is available in documentation area, fir-
mware/ software of www.aim-sportline.com.
This page manages the 4 resettable
odometers of MXm.
The system odometer is not resettable.
All odometers are shown on Race Stu-
dio 3 too (see chapter about MXm and
the PC).
Each odometer can be activated/deac-
tivated and/or reset. To select the odo-
meter you want to manage press
“CHANGE”.
Here you can set the time zone of your
MXm as well as enable/disable Day-
light Saving Time” option. Time zone is
always set manually. Date and time can
be shown in different format.
Time is automatically synchronized as
MXm receives the GPS signal.