Page 17 of 80
Section 4: Chassis Assembly and Power Wiring
We’ll take a detour from PCB assembly to do some of the chassis assembly. This will
give you a safe way to power up and test the power supply.
Protect your PR-102
Spread a towel over your work surface before you begin the steps outlined in this section.
That towel will prevent you from scratching the finish of your PR-102 during these
assembly steps.
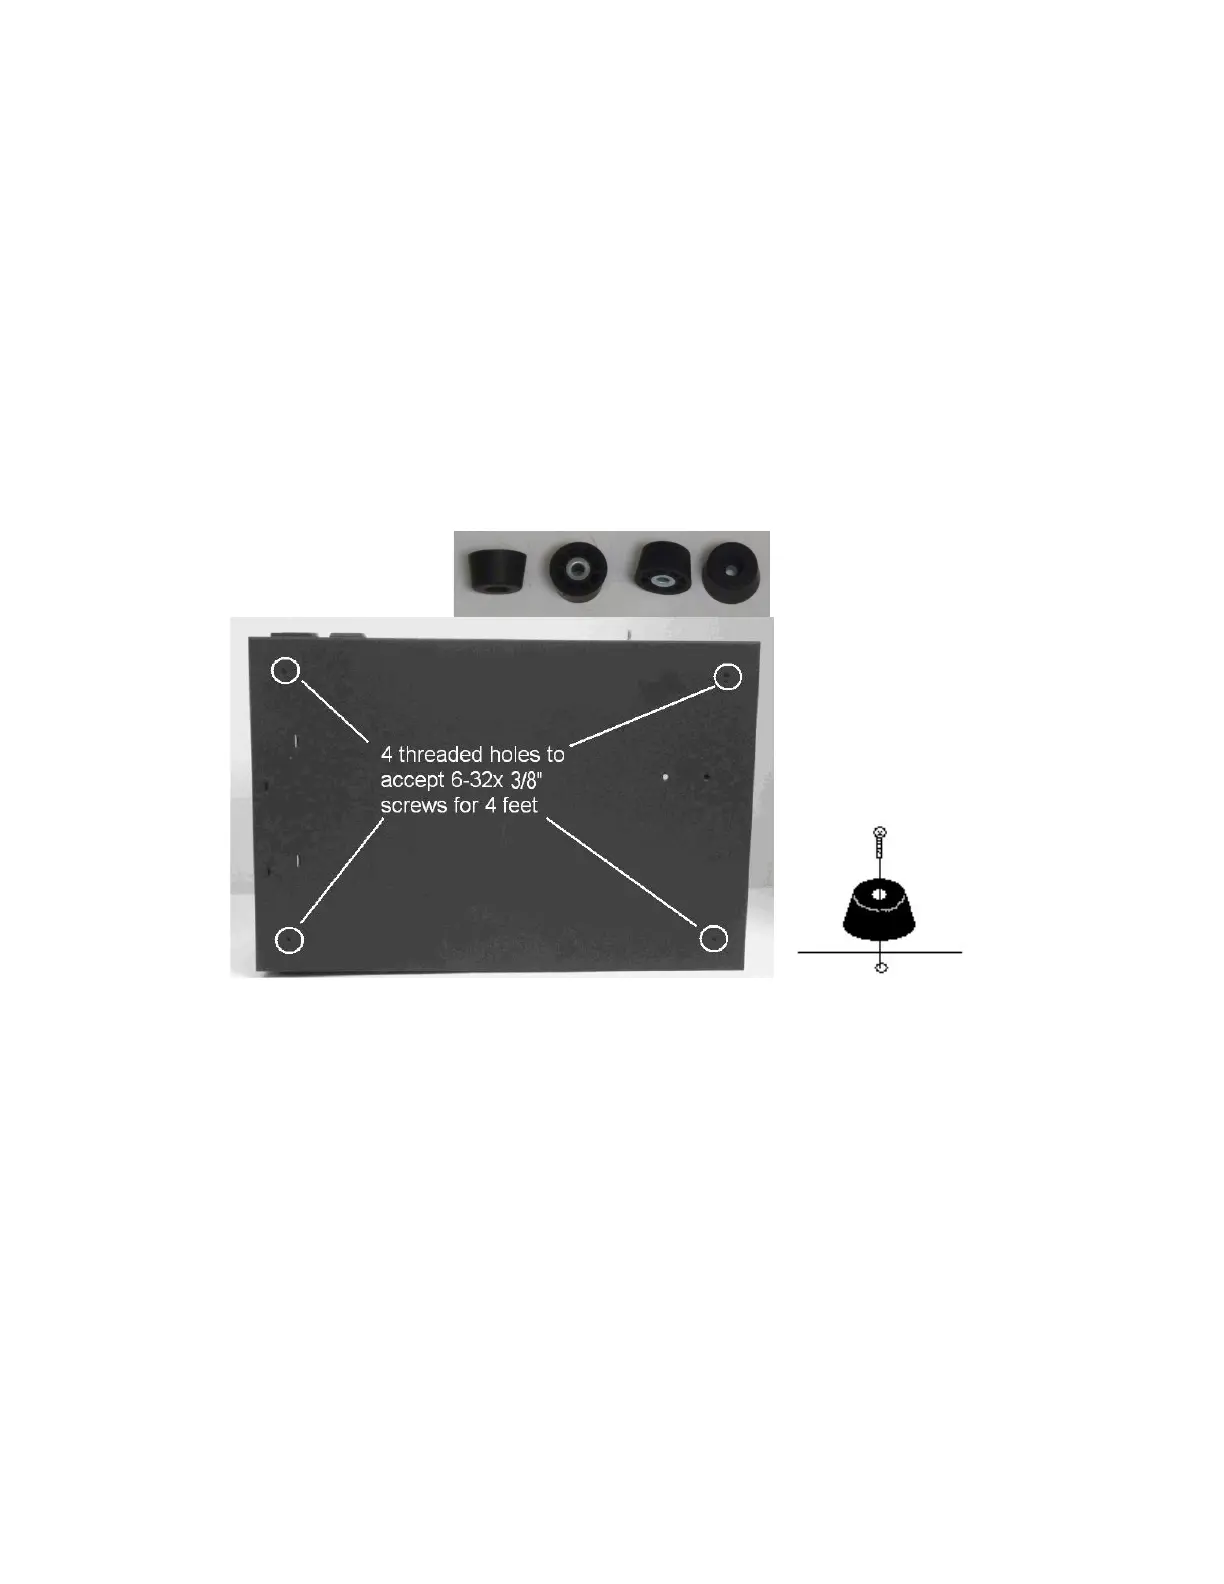
Install the feet
Install the four feet into the corners of the bottom of the chassis using 6-32 x 3/8” Phillips
head screws (these are zinc-plated, so will look silver). Snug the screws, but don’t over-
tighten. Installing the feet will protect the bottom of the chassis from damage.
Figure 11-Install 4 feet with 6-32x1/2" silver colored screws
Install the IR Detector Window
A black plastic window sits just behind the front panel. It allows light to reach the remote
control’s IR detector. You’ll find it shipped in its own pink-poly bag with a die-cut
mounting tape. Here’s how to install it:
1. Remove the chassis from the packing material. Use a small Phillips head
screwdriver to remove the 11 screws that hold the cover in place (8 on the top, 3
along the back edge). Make sure to save the screws someplace safe, like your
soup bowl.

 Loading...