Page 7 of 80
Section 1: About This Manual
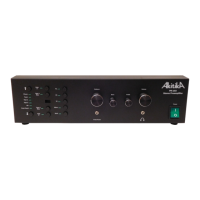
This manual gives the information needed to build and use Akitika LLC’s PR-102 Stereo
Preamplifier. It’s very similar to its predecessor, the PR-101, but it has the following new
features:
The F3 button is now named MONO. When the LED is ON, both left and right
channel inputs are combined into a monophonic signal.
The F4 button is now named HUSH. When the LED is ON, the output level drops
by about 14 dB.
This latest version of the PR-102
1
has some changes in the tone volume board:
It allows a wider range of volume control. In particular, it delivers more
granularity in the volume control settings at low volumes. You can tell that your
PR-102 has this change because the volume control shaft is D-shaped, rather than
an 18-tooth knurled shaft.
The combined activation of the MONO and balance controls differs from the
previous tone volume board.
o In the previous design, the balance control comes before the mono switch.
Changes in the balance control change the relative weighting of left and
right channels from the source. That combined signal is applied equally to
both channels.
o In the new design, the mono control combines the Left and Right channels
with equal weighting. That combined signal is applied to the balance
control, controlling its relative loudness in the left or right speaker.
The presence of this new tone volume board is coupled with a change from silver
to black knobs on the front panel.
The tone control was designed to go away from the Baxandall topology to a new
topology that is based on a graphic equalizer, using a gyrator in the bass control.
Who Should Attempt this Project?
You can build this kit if you can:
1. Solder (using normal rosin core solder and a soldering iron).
2. Use simple hand tools like screwdrivers, wire cutters, and pliers.
3. Read and follow directions.
It helps if you:
1. know a bit about electronics, or
2. have a friend who knows a bit about electronics
3. can get to YouTube to watch a few helpful videos about the assembly process
(none are posted as of this version of the manual).
Tools you’ll need
You’ll need the following tools:
1. Phillips screwdriver (#1 and #2)
2. Pliers or nut drivers suitable for #4 and #6 hardware
3. needle nose pliers (helpful, but not strictly necessary)
1
Shipping after September 2021.

 Loading...