EasyManuals Logo

Alcatel-Lucent OmniPCX Office Installation Manual

Alcatel-Lucent OmniPCX Office
230 pages
To Next Page IconTo Next Page
To Previous Page IconTo Previous Page
Page #71 background imageLoading...
Page #71 background image
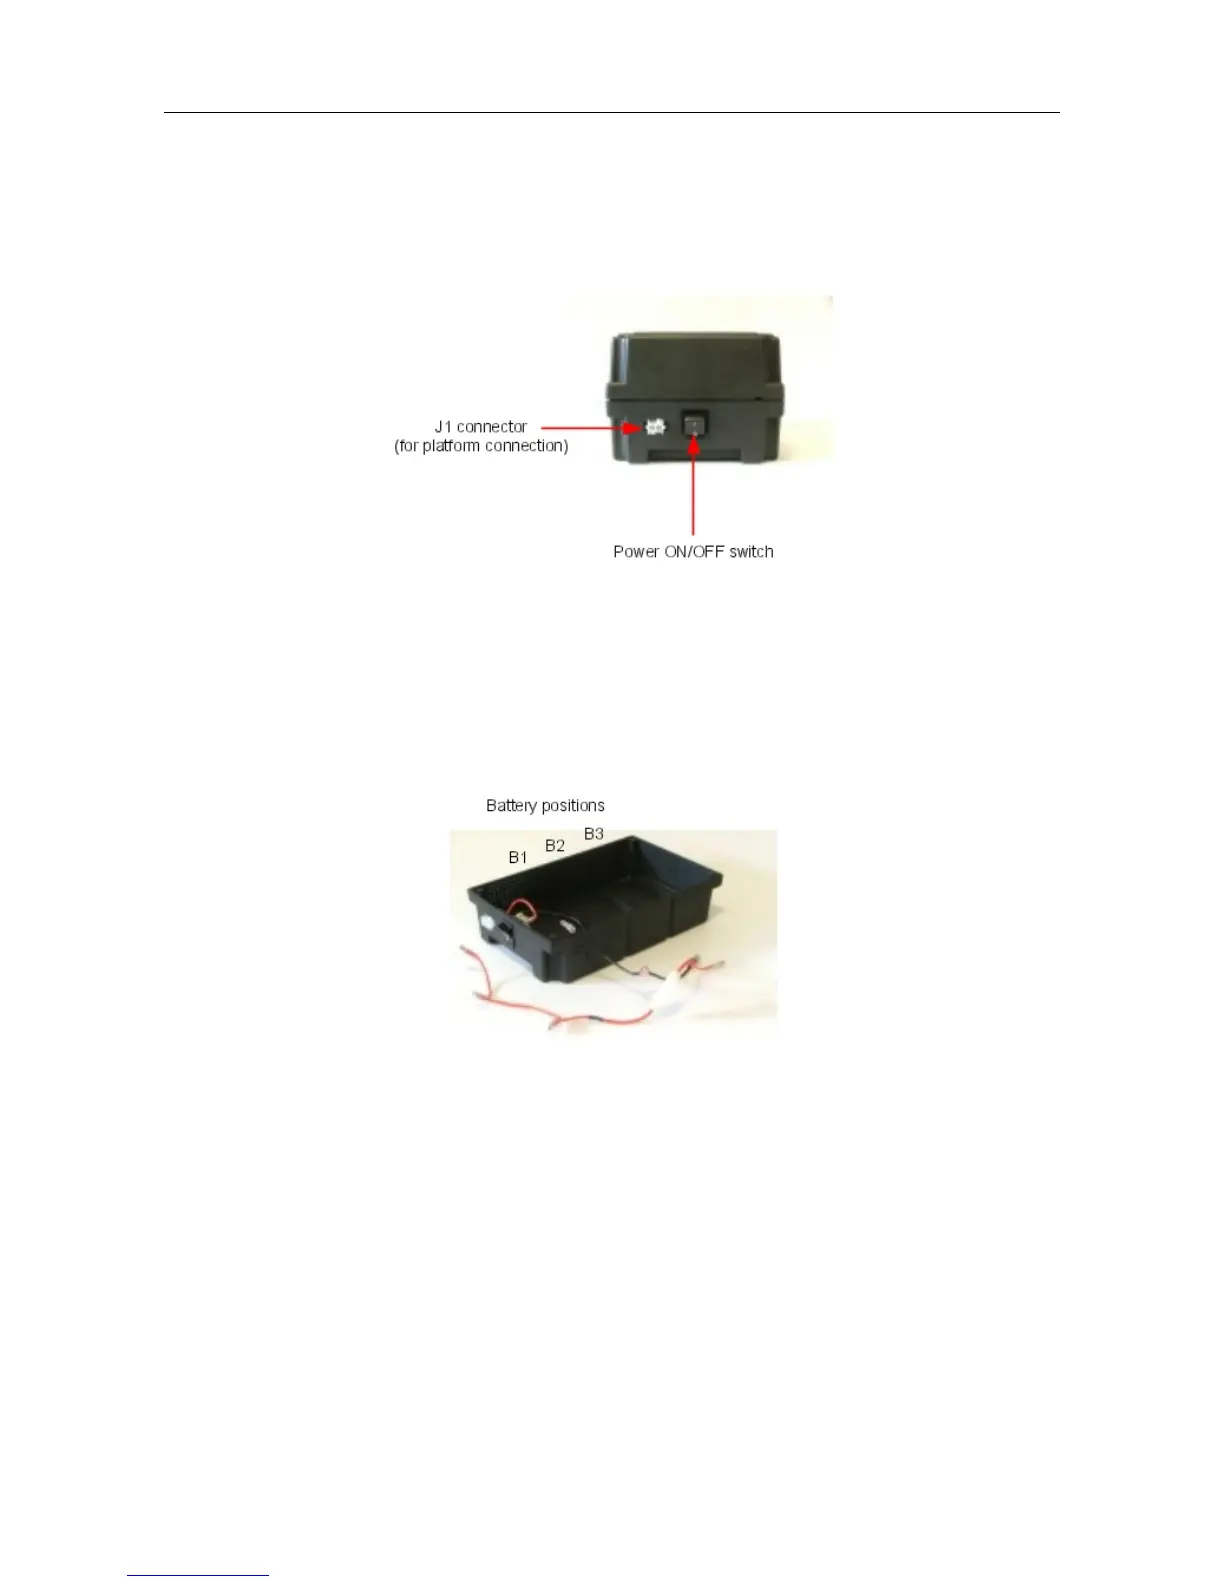
black) and that there is no cable connected to the J1 connector (see the figure below).
2. Open the unit by removing the four screws (ST3.5x32) with a screwdriver (Phillips PH2).
3. Insert the batteries in the open unit as follows (also see the figure below):
a. Place the first battery in the middle position (battery B2).
b. If three batteries are to be used, place these batteries in the remaining positions
(batteries B1 and B3).
4. Connect the negative (black) terminals of the batteries as described below (and shown in
the figure below).
a. Connect the middle connector of the black wire to the negative (black) terminal of
battery B2.
b. If required, connect the other connectors of the black wire to the negative (black)
terminals of batteries B1 and B3.
  ()
       
4-23

Table of Contents

Other manuals for Alcatel-Lucent OmniPCX Office

Questions and Answers:

Question and Answer IconNeed help?

Do you have a question about the Alcatel-Lucent OmniPCX Office and is the answer not in the manual?

Alcatel-Lucent OmniPCX Office Specifications

General IconGeneral
VoIP ProtocolsSIP, H.323
Power Supply100-240 VAC, 50/60 Hz
Humidity10% to 90% non-condensing
TypeIP PBX
Maximum TrunksUp to 60
Voice codecsG.711, G.729
Network Interfaces10/100 Ethernet
WeightVaries depending on the model/configuration

Related product manuals