26 Rockwell Automation Publication 6181X-UM001C-EN-P - July 2015
Chapter 2 Installation
10. Repeat this process at least three times until the clips are properly torqued,
making sure the gasket is compressed uniformly against the panel.
Mount the Non-display Computer on a Wall
Use the four supplied screws to secure the non-display computer to a metal wall,
such as a steel panel in an enclosure or equipment room.
Follow these steps to mount a non-display computer.
1. Verify that the power is disconnected.
2. After you decide where to mount the computer, drill holes in the wall to
accommodate the four supplied M4 pan head screws.
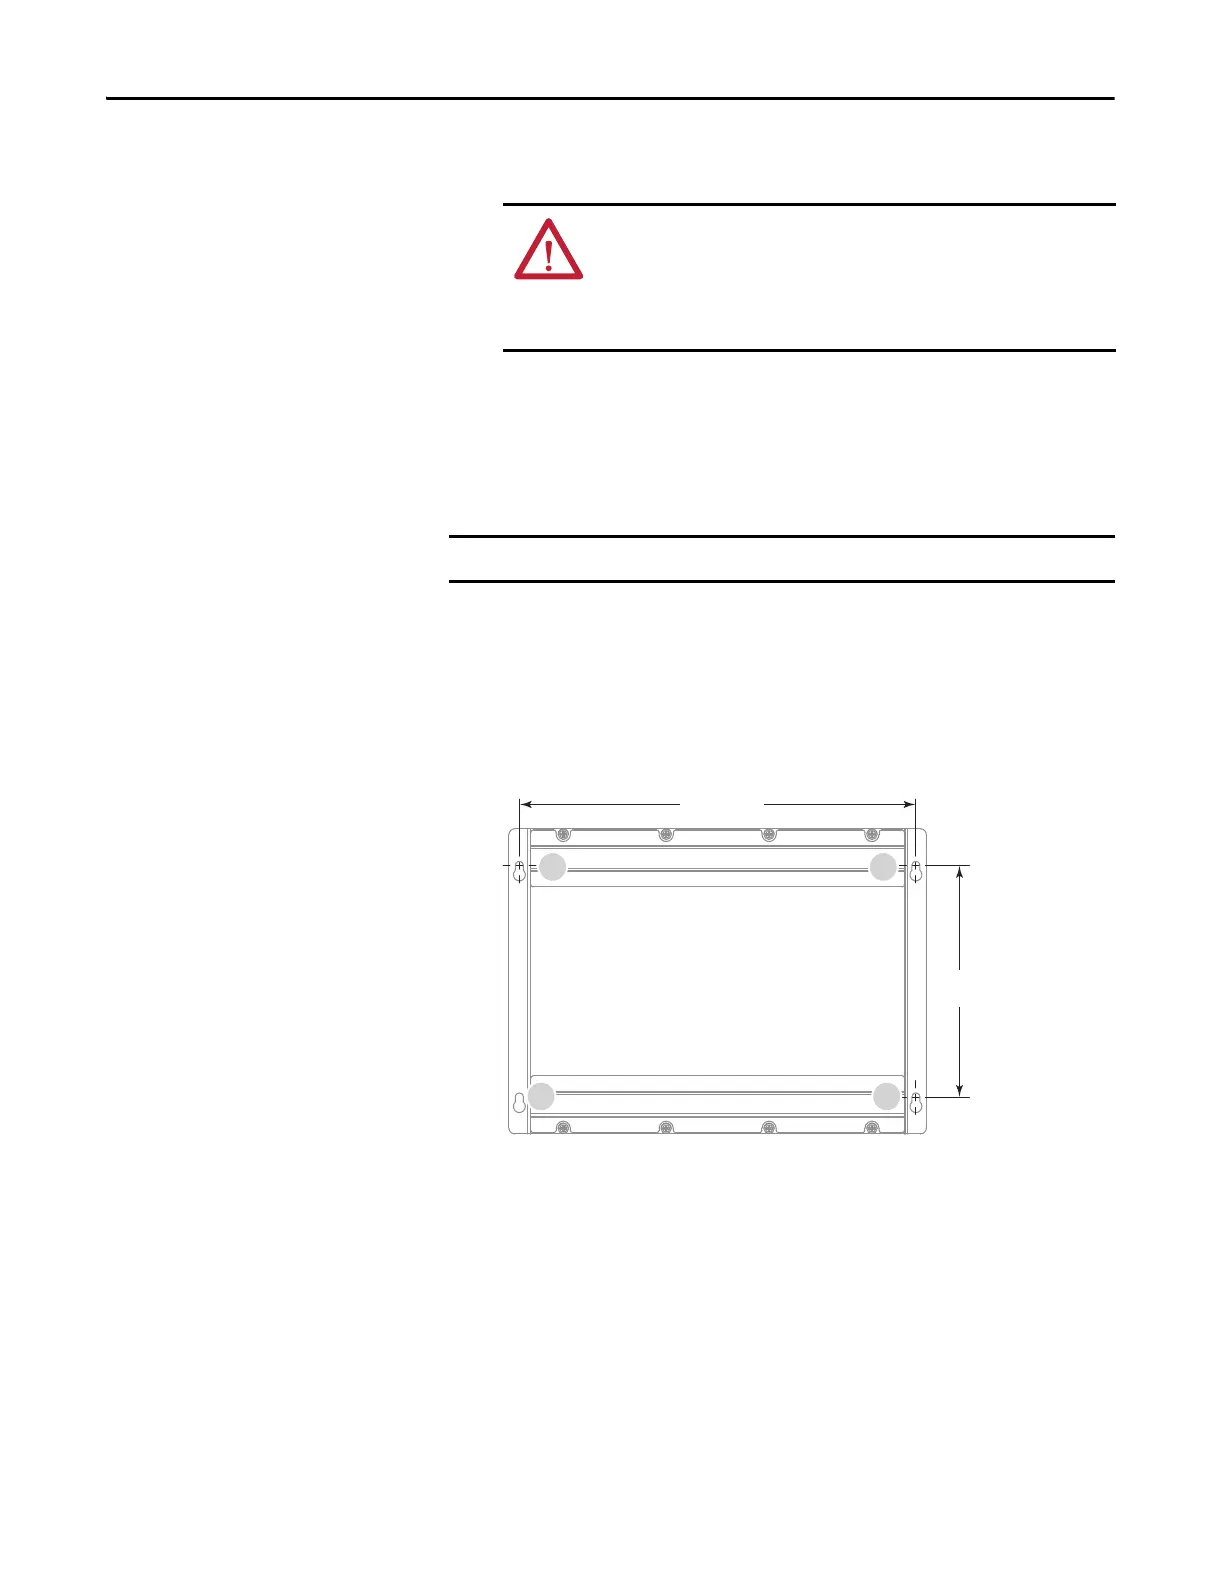
The illustration shows the mounting hole locations with dimensions in mm (in.).
3. Attach two of the supplied screws with grommets to positions 1 and 2.
4. Mount the computer to the wall.
5. Attach the remaining two supplied screws with grommets to positions 3
and 4.
6. Tighten to a torque that is appropriate for the screw and wall material.
The recommended torque in steel is 1.13…1.36 N•m (10…12 lb•in).
ATTENTION: Tighten the clips to the specified torque to provide a
proper seal and help prevent damage to the computer. Rockwell
Automation assumes no responsibility for water or chemical damage to
the computer or other equipment within the enclosure because of
improper installation.
Do not mount the non-display computer on a horizontal surface.
335.3(13.2)
190.5
(7.5)
43
21
 Loading...