Rockwell Automation Publication 6181X-UM001C-EN-P - July 2015 37
Component Replacement Chapter 4
Post-configuration
Follow these steps after you install or remove a hardware component.
1. Make sure all components are installed according to instructions.
2. Make sure that no tools or loose parts are left inside the computer.
3. Reinstall any expansion boards, peripherals, and system cables that were
previously removed.
4. Reinstall the cover according to the instructions on page 38
.
5. Reconnect all external cables and power to the computer.
6. Press the power switch to start the computer.
Required Tools
The following tools are required for component replacement:
• #2 cross-head screwdriver
• Antistatic wriststrap
• Side cutters (to cut cable ties, if necessary)
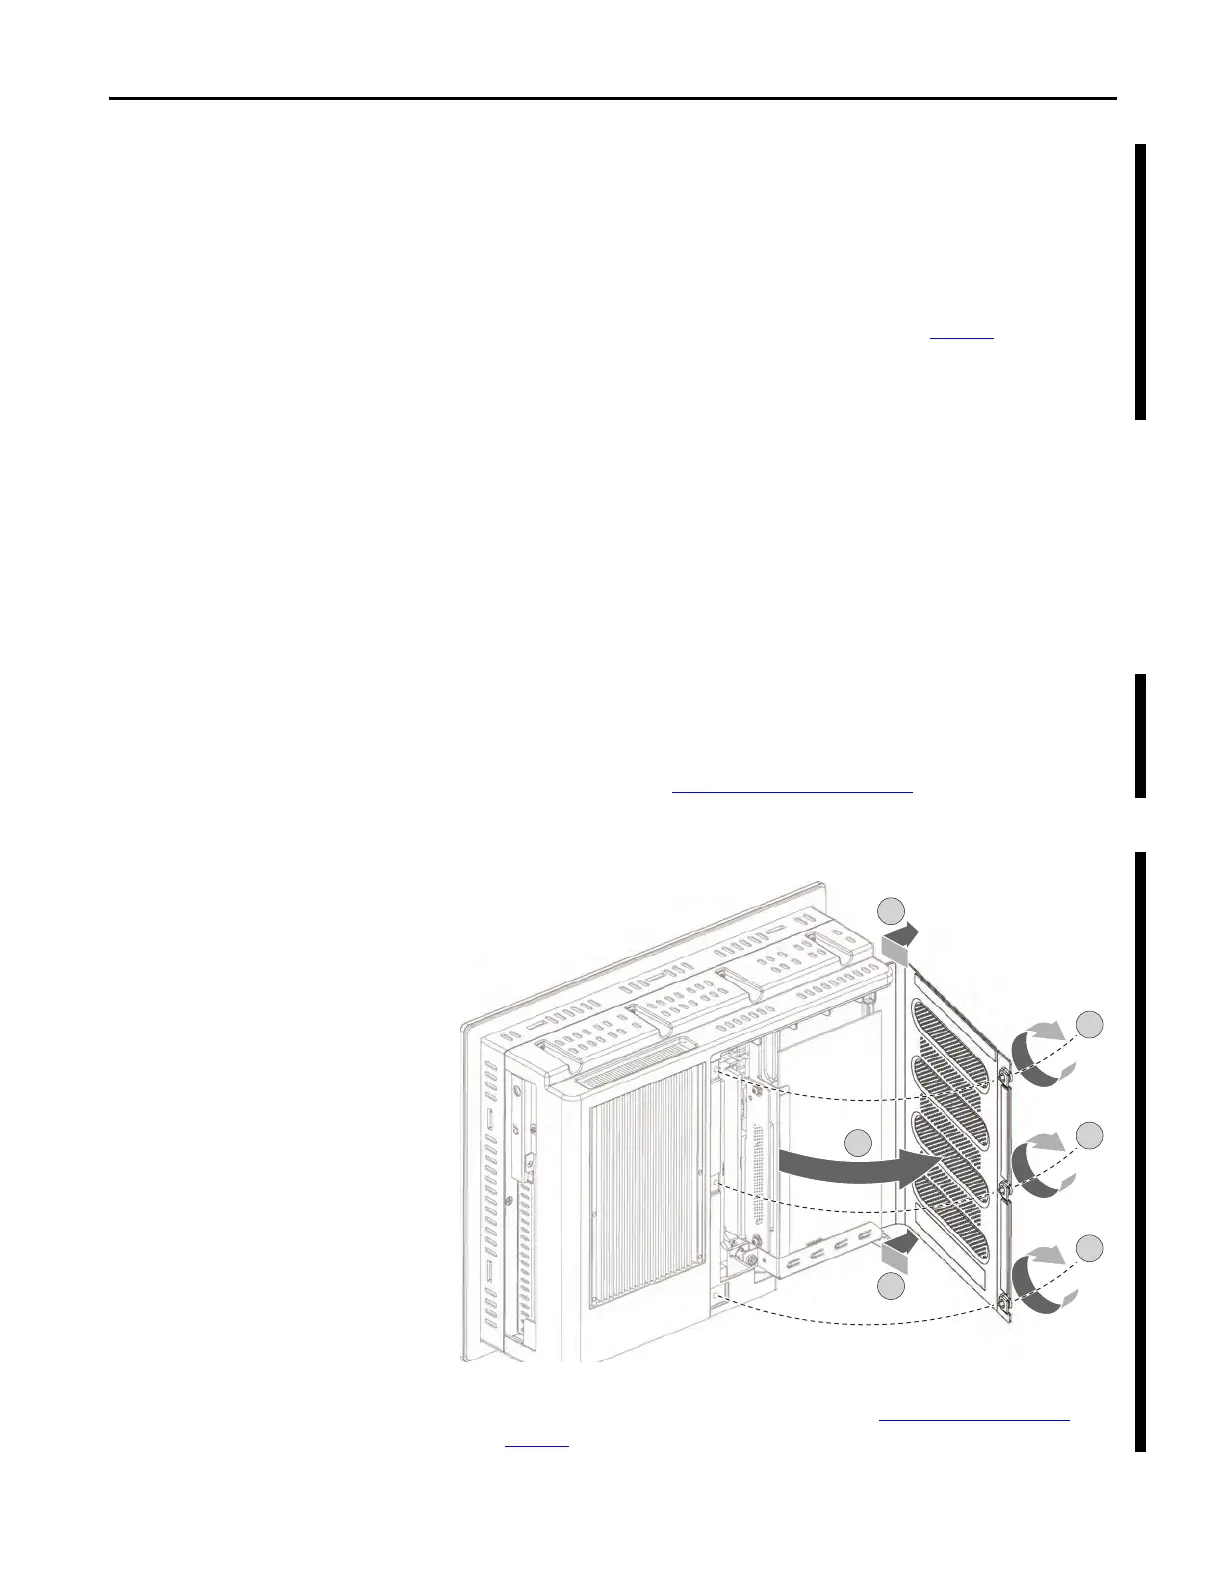
Remove the Cover
To install, replace, or upgrade internal computer components, you must first
remove the cover.
Follow these steps to remove the rear cover (the display computer is shown).
1. Follow the steps for Pre-configuration
on page 36.
2. Loosen the three screws that secure the rear cover (A).
3. Open the cover (B) and detach it from the chassis (C).
4. After you have installed, replaced, or upgraded internal computer
components, reinstall the cover as detailed in Reinstall the Cover
on
page 38.
 Loading...