IMPORTANT: It is of upmost importance that the ma-
chine is placed level, from side to side as well as front
to back. If the machine is not properly levelled, it may
result in out-of-balance error without a real out of bal-
ance in the drum.
NOTE: Only put the feet on a solid surface. Do not use
shock absorbing mats underneath.
NOTE: Two self-adhesive rubber stop-blocks are sup-
plied with the machine. They may be applied as paint
protection when opening the door
.
Mounting Bolt Installation
NOTE: Machines do not have to be mounted by means
of anchoring bolts. If anchoring is necessary, perform
the following steps:
1.
Drill 2 holes for the anchoring bolts, refer to Figure 7 . Hole
diameter in machine's base is 0.47 in. [12 mm] .
2. Place the machine adjacent to the foundation. Do not attempt
to move it by pushing on the sides, always use the bottom of
the frame of the washer-extractor to lift and move the whole
machine.
3. Place the machine carefully over the two drilled holes.
4. Check that the machine is seated in a perfectly level manner.
Adjust leveling legs as needed.
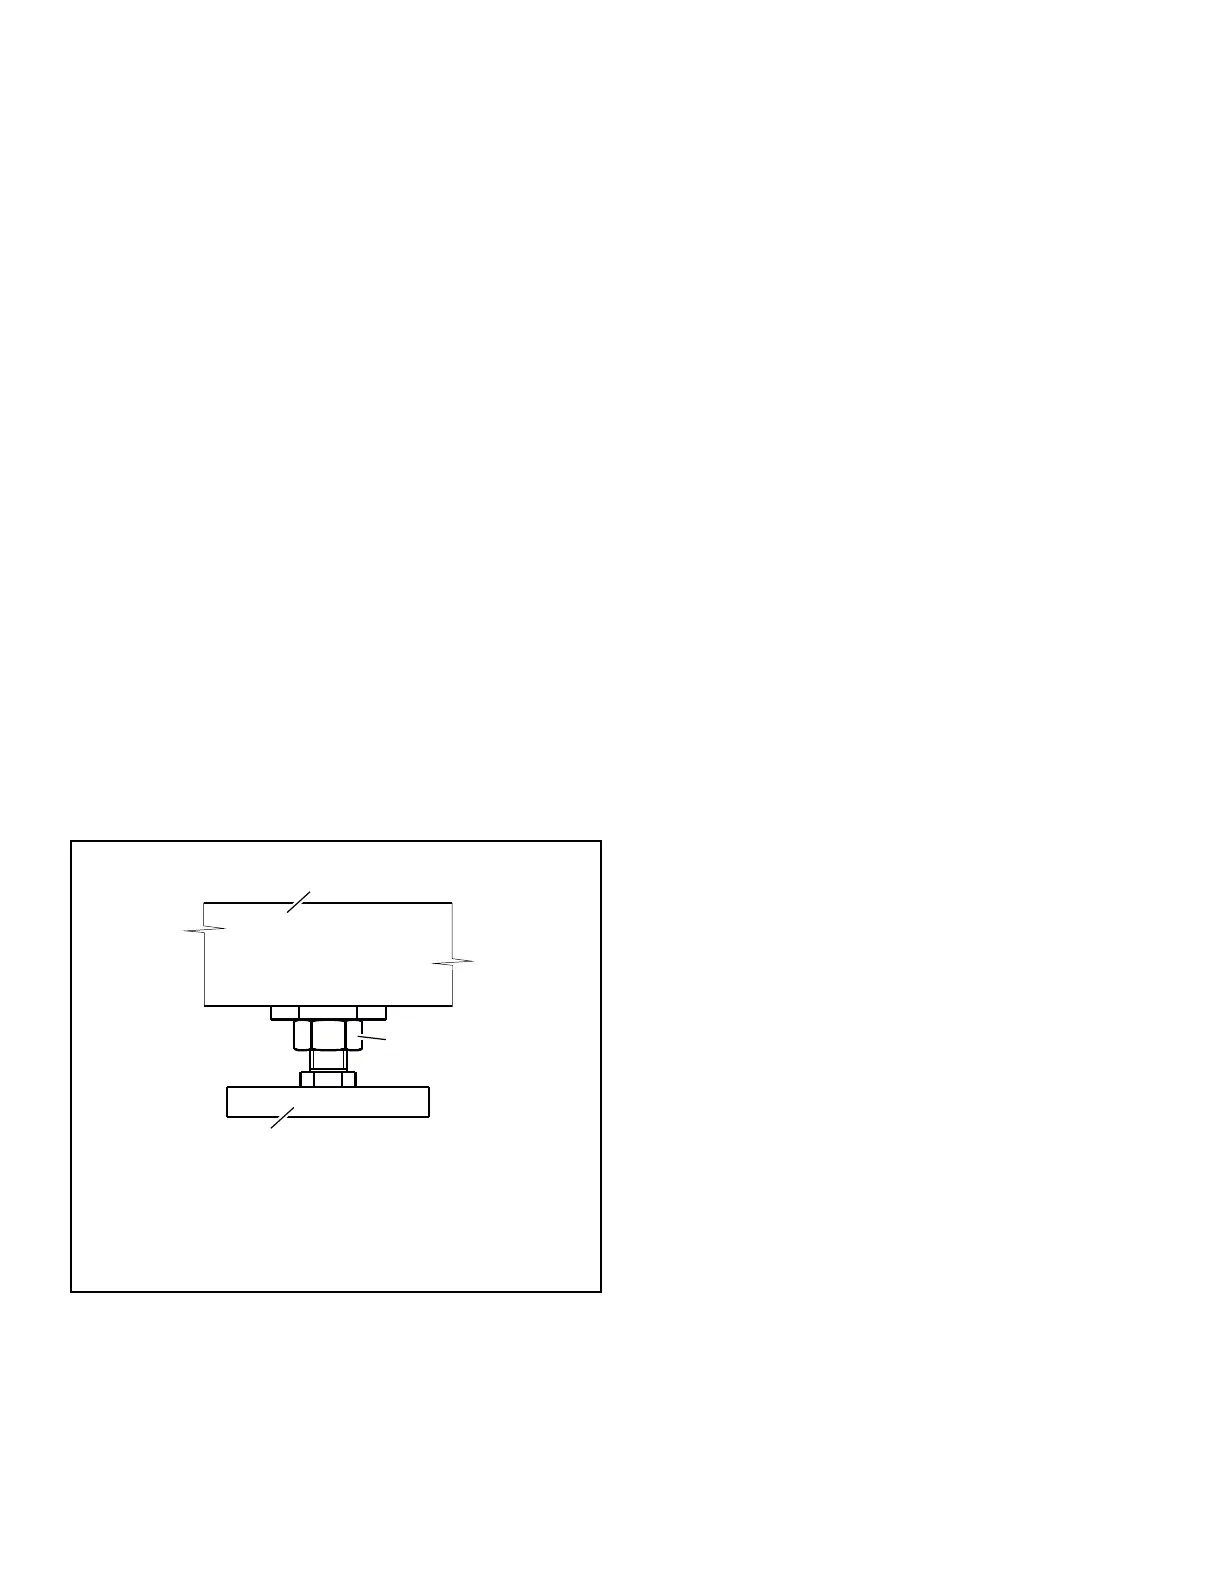
IMPORTANT: After leveling is complete, tighten the
nut securely against the machine's base. Refer to
Figure 11 .
1. Machine
2. Nut
3. Leveling Leg
Figure 11
5. Mount the anchoring bolts in the holes drilled in the floor.
6. Position washers and locknuts on machinery anchor bolts and
finger-tighten to machine base.
IMPORTANT: If necessary, prop up the machine
frame so that not deformation occurs during the
tightening of the anchoring bolts.
7. Remove the shipping braces which secure the moving compo-
nents of the machine during shipping. Refer to Shipping
Brace Removal
.
Installation
©
Copyright, Alliance Laundry Systems LLC -
DO NOT COPY or TRANSMIT
35 Part No. D2418ENR6




 To Next Page