4. Crimp a ring terminal to the protection conductor so it stays
fixed to the PE terminal.
Models outside of North America
5. Connect the supply cable conductors to the incoming termi-
nals of main switch [1]), marked with L1, L2, L3, N and the
terminal marked with PE. Refer to Figur
e 30 .
North American Models
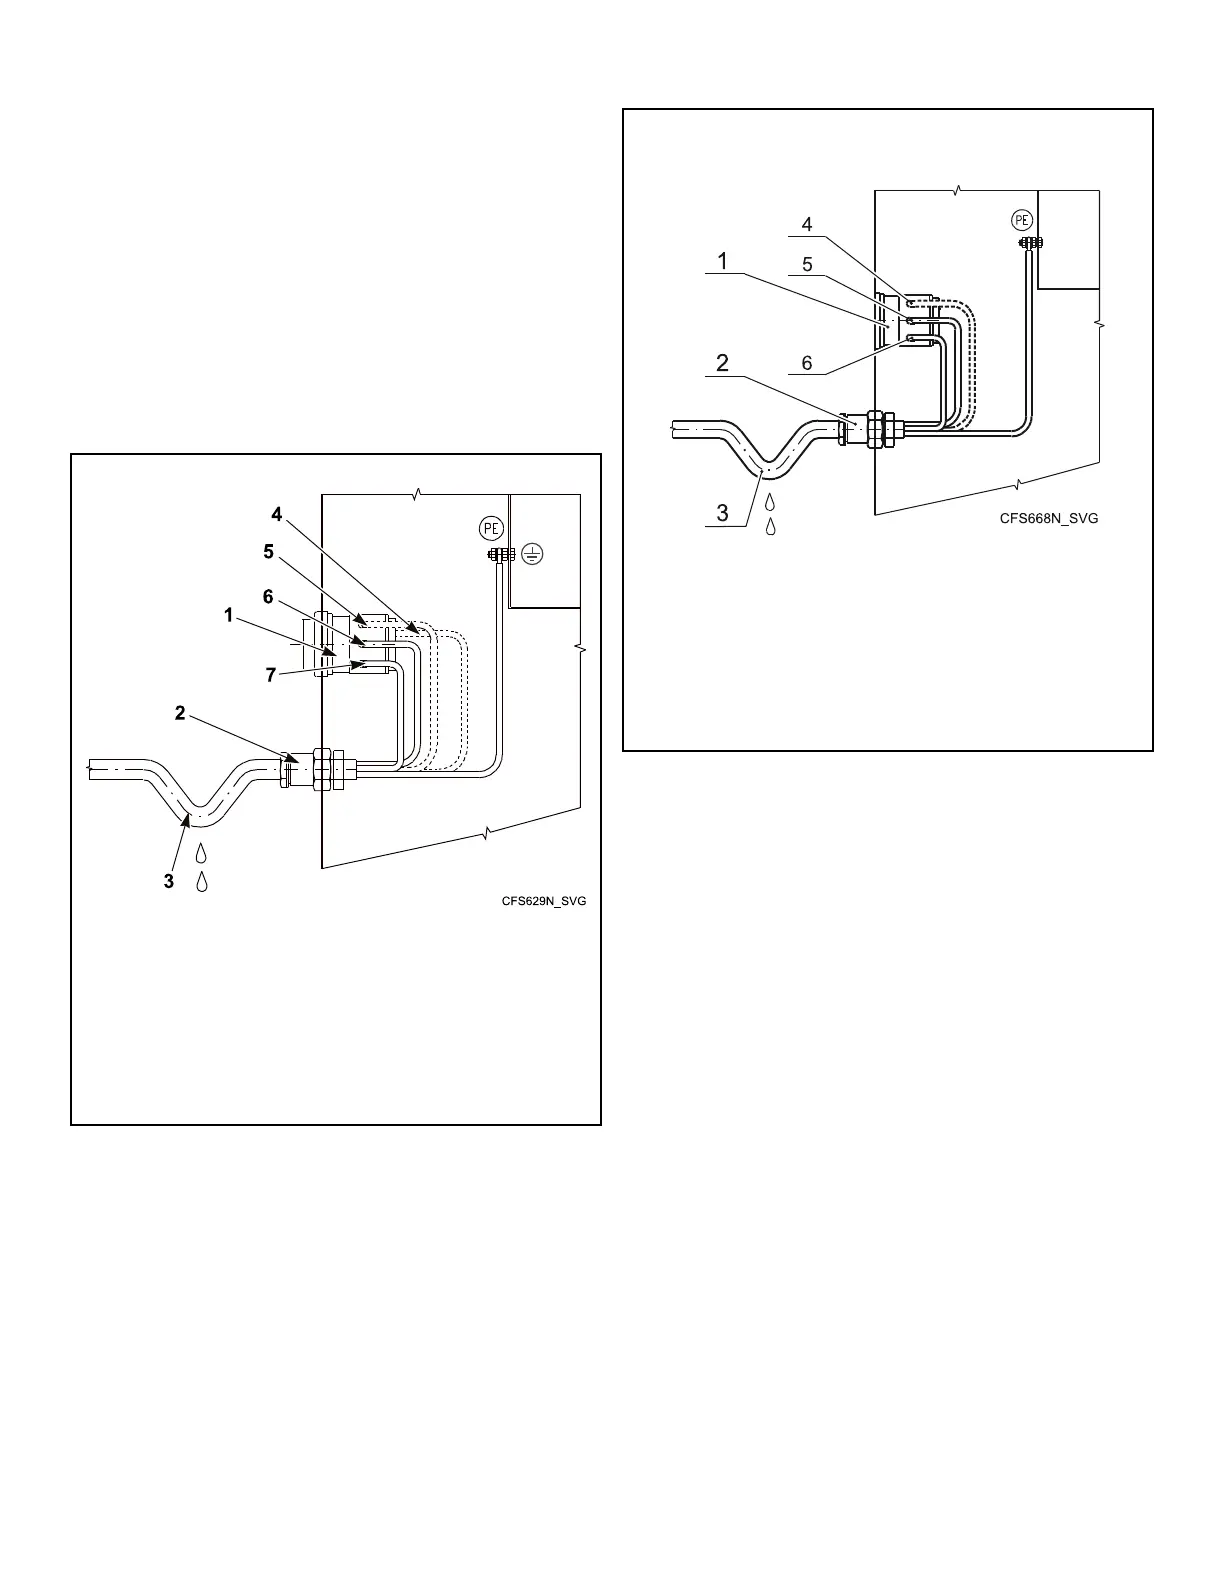
6. Connect the supply cable conductors to the incoming field
wire terminals [1] marked with L1, L2, L3, and the terminal
marked with the grounding symbol. Refer to Figure 31 .
7. Provide a sag in the cable, in front of the strain relief. This
will prevent condensed water from dripping into the machine.
Refer to Figure 30 or Figure 31 .
Models outside of North America
1. Main switch
2. Strain relief
3. Sag of inlet cable
4. N (for models outside North America)
5. L3
6. L2
7. L1
Figure 30
North American Models
1. Input Terminal
2. Strain relief
3. Sag of inlet cable
4. L3
5. L2/(N)
6. L1
Figure 31
Machine Protective Earth Connection and
Equipotential Bonding
If there are other washers or appliances with exposed conductive
parts, which can touch simultaneously, make sure to make equi-
potential bonding between all these appliances. The external pro-
tective terminal for this purpose is located on the rear panel of the
machine frame. The minimum protection conductor's cross sec-
tion depends on the supply cable cross section (refer to Table
16 ). However, for the protection purposes, with the supply cable
cross section of a min. 4 mm
2
, select a larger conductor section,
i.e., 6 mm
2
.
Installation
©
Copyright, Alliance Laundry Systems LLC -
DO NOT COPY or TRANSMIT
53 Part No. D2418ENR6




 To Next Page