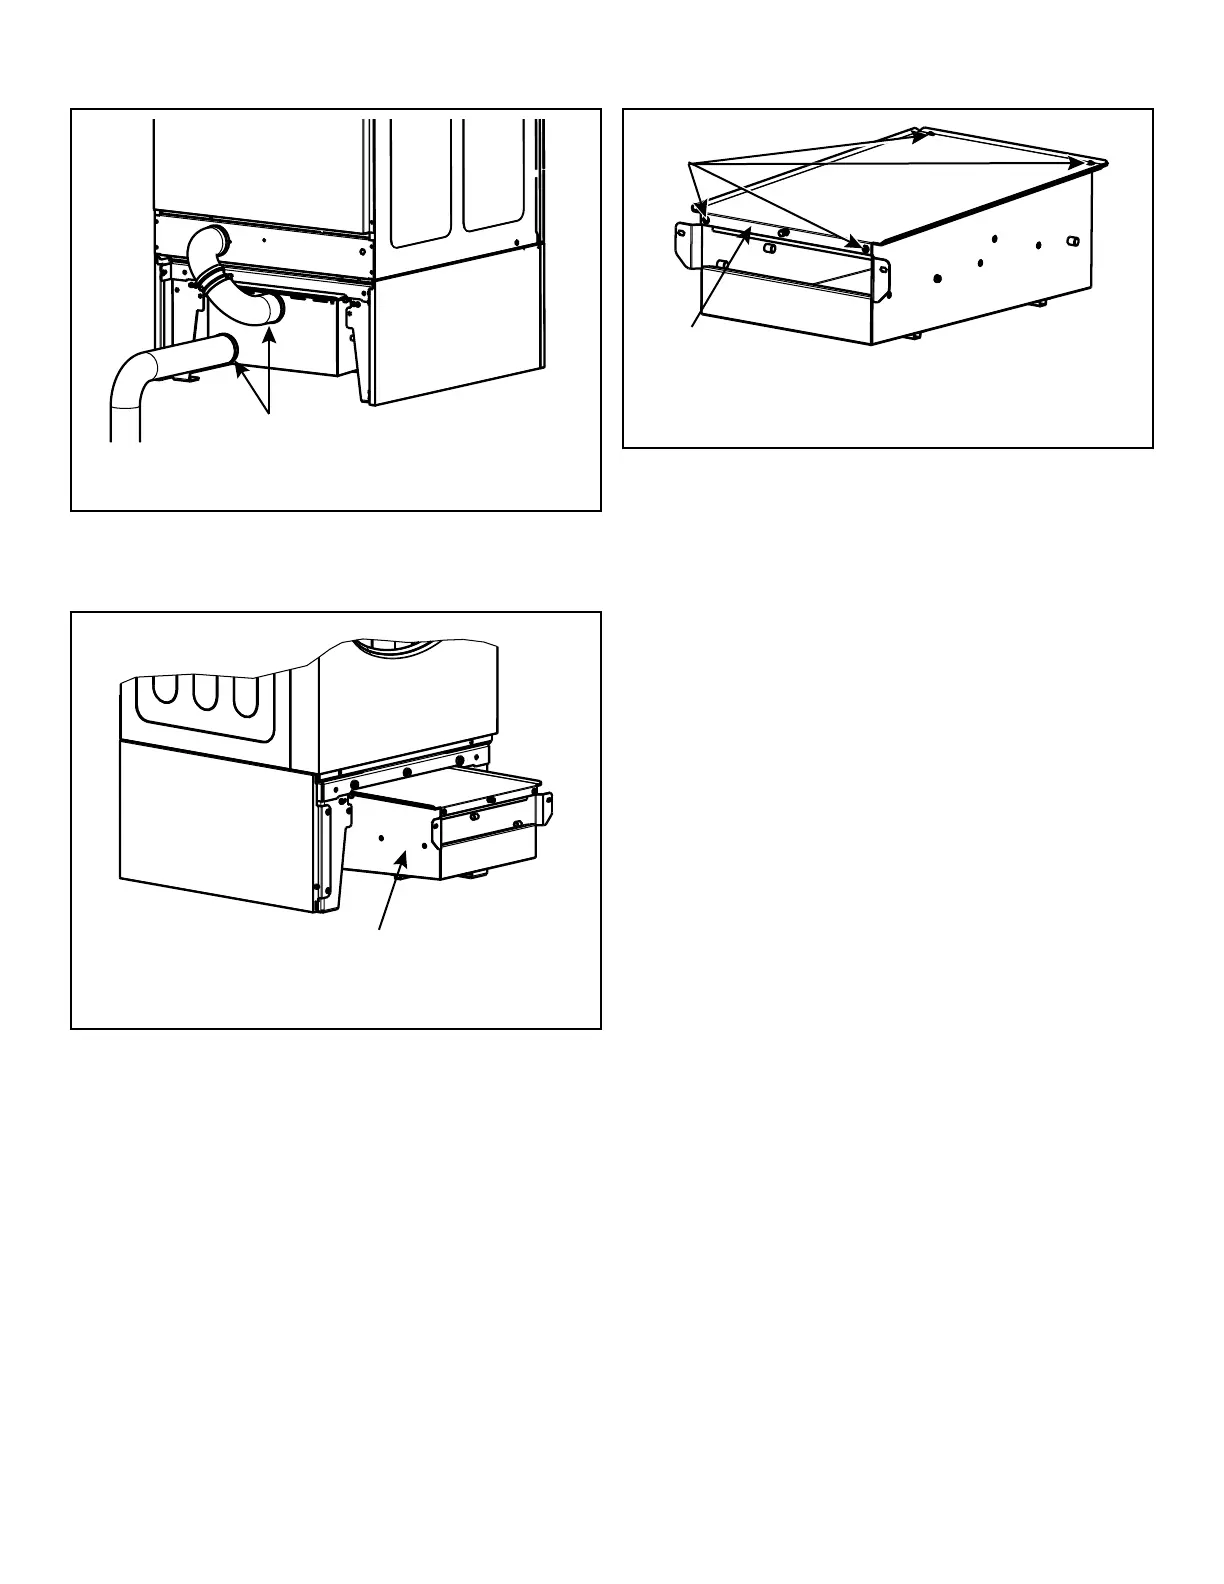
1. Waste hoses
Figure 46
5. Carefully push the box forwards along the line to remove it.
Refer to Figure 47 .
1. Filter box
Figure 47
6. Clean the box. Refer to Figure 48
. The box lid (2) is also re-
movable using the four M6 bolts (1).
1. Bolts M6 (4 pc)
2. Filter box lid
Figure 48
7. Reattach the lid and return the box to its original position. Re-
connect the clamps and waste hoses. Reinstall the screws that
hold the filter box in place. Reinstall the front cover of the fil-
ter base frame. Reinsert the filter.
Quarterly
1. Check the bearing house for leakage.
2. Verify that the drain valve is operating and that the drain sys-
tem is free from obstruction. If water does not leak out during
the first wash segment, the drain valve is closed and function-
ing properly.
3. Visually check all hoses and connections inside machine for
leaks.
4. Make sure that control components are protected against
moisture and dust during the clean up. Wipe and clean the
machine inside.
5. For models with electric heat, check the tightening of the con-
tacts of heating elements terminals and other power terminals
(main switch, fuse disconnectors, contactors).
6. In order to increase the service life of the door gasket, apply a
glycerine-based impregnating agent.
7. Open the door approximately 15-20°.
a. Try to move the door up and down. If the door is able to
be moved, add a .5mm thick washer to the fixed lower
hinge pin. The washer was included when the machine
was delivered, but can be ordered from Alliance Laundry
Systems manufacturer under part number 571642.
b. Try to turn the door in a clockwise or counterclockwise
rotation. If the door can me moved clockwise or counter-
clockwise, replace the door hinges.
Maintenance
©
Copyright, Alliance Laundry Systems LLC -
DO NOT COPY or TRANSMIT
74 Part No. D2418ENR6




 To Next Page