Supply Cable
The supply cable is not delivered with the machine. The supply
cable must have the following specifications:
• Conductors with copper cores (For wire size details, refer to
Electrical Specifications or
Electrical Specifications - North
American Models)
• Stranded conductors (flexible wiring) that can withstand vi-
bration from machine
• For crossection size, refer to Table 16
• Route the supply cable as short as possible, directly from the
supply protection device to the washer without branching off
Determining AWG Sizes
Power supply protection device nominal current
Min. phase conductor
section, A
WG [mm
2
]
Min. protection conduc-
tor section, AWG [mm
2
]
Automatic circuit break-
ers Fuses
16A (15A) 10A (10A) 15 [1.5] 15 [1.5]
20A (20A) 16A (15A) 13 [2.5] 13 [2.5]
25A (-) 20A (20A) 11 [4] 11 [4]
40A (40A) 32A (30A) 9 [6] 9 [6]
63A (-) 50A (50A) 7 [10] 7 [10]
80A 63A 5 [16] 5 [16]
100A 80A 3 [25] 5 [16]
125A 100A 2 [35] 3 [25]
Table 16
To connect the supply cable, the following steps must be per-
formed:
1. Insert cable through opening on rear panel. Insure a strain re-
lief is used so the supply cable can not move.
2.
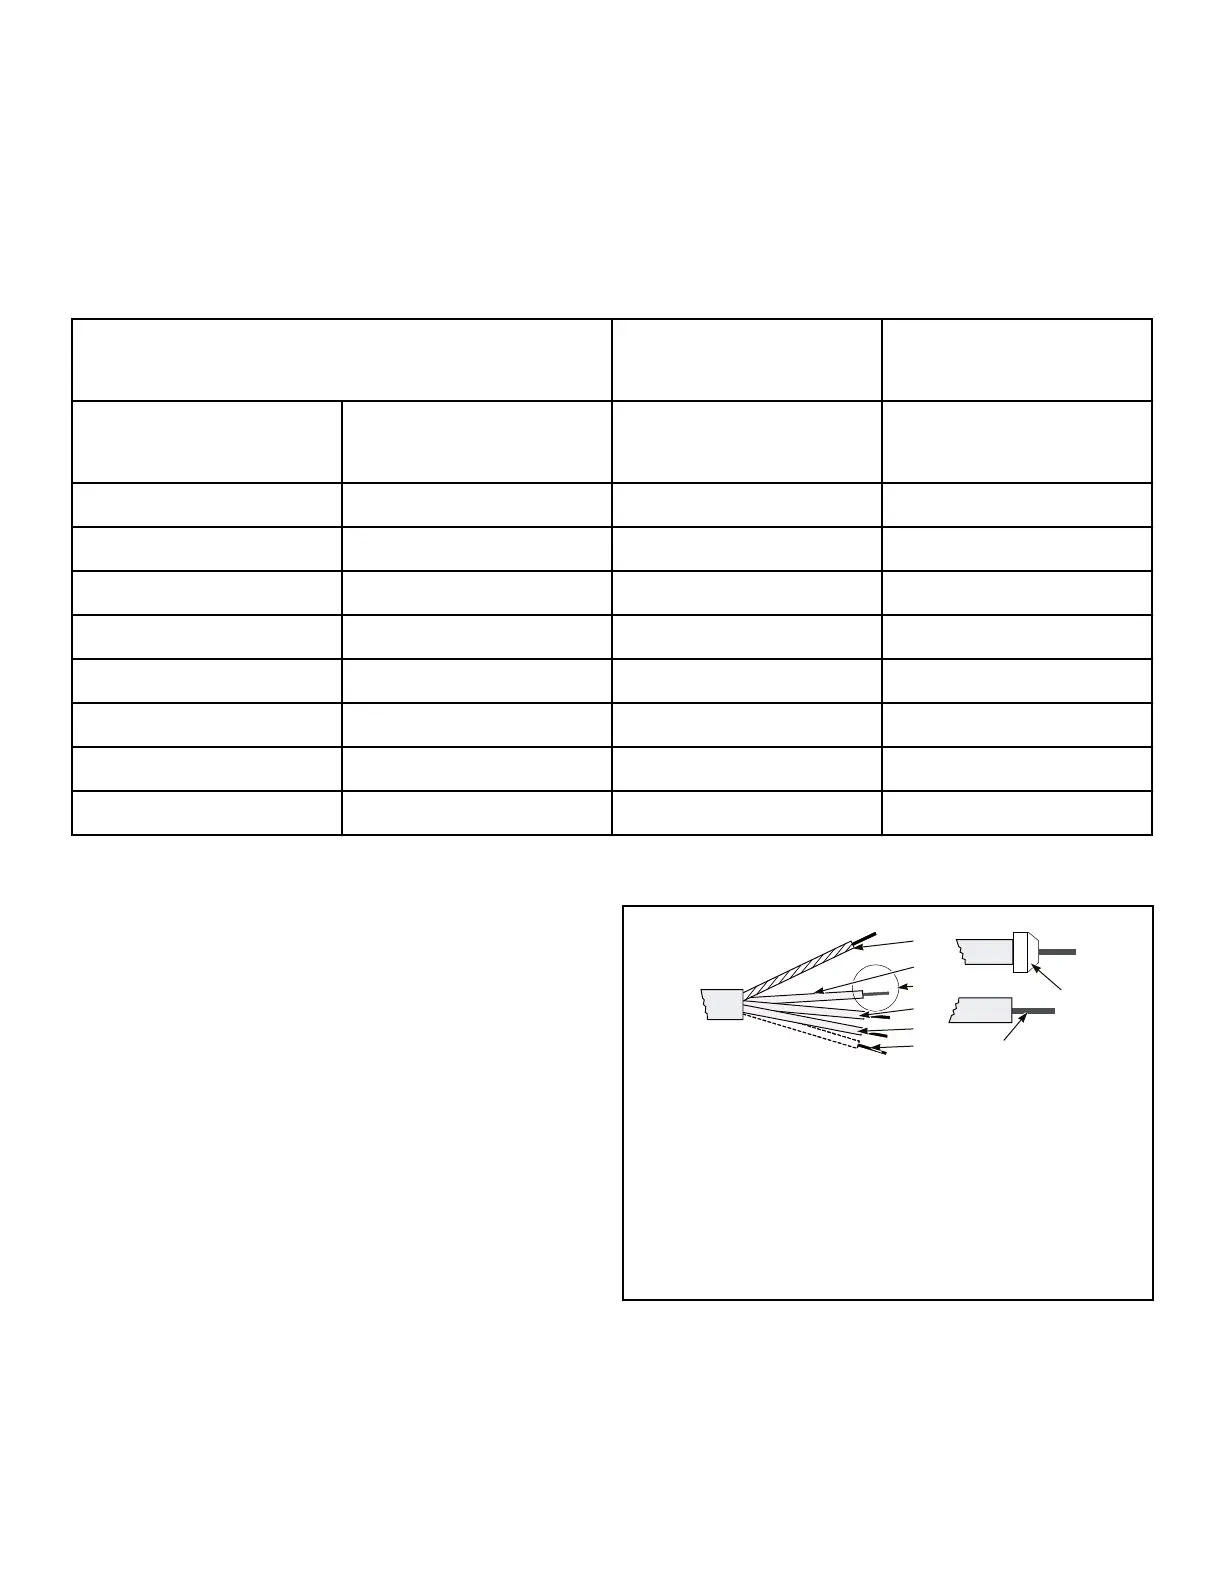
Strip the conductor ends. Refer to Figure 29 . The protection
conductor must be longer so it can be routed to the machine
without tension.
1. Protection conductor
2. Phase conductor
3. Phase conductor
4. Phase conductor
5. Neutral conductor
6. Molded tube
7. Stripped length of conductors
Figure 29
3. With stranded conductors, use wire end tubes with an insula-
ted sleeve (6) for L1, L2, (L3), (N) conductors. Make sure
there is no accidental contact, since the supply cable stays un-
der voltage even when the main switch is off.
Installation
©
Copyright, Alliance Laundry Systems LLC -
DO NOT COPY or TRANSMIT
52 Part No. D2418ENR6




 To Next Page