Repairs
4 - 34
Motor Assembly
NOTE: Disassembling the motor while it’s still under
its warranty period immediately invalidates the war-
ranty. If the motor malfunctions before its warranty
period expires, please contact Allied Systems Com-
pany fi rst before attempting to repair it.
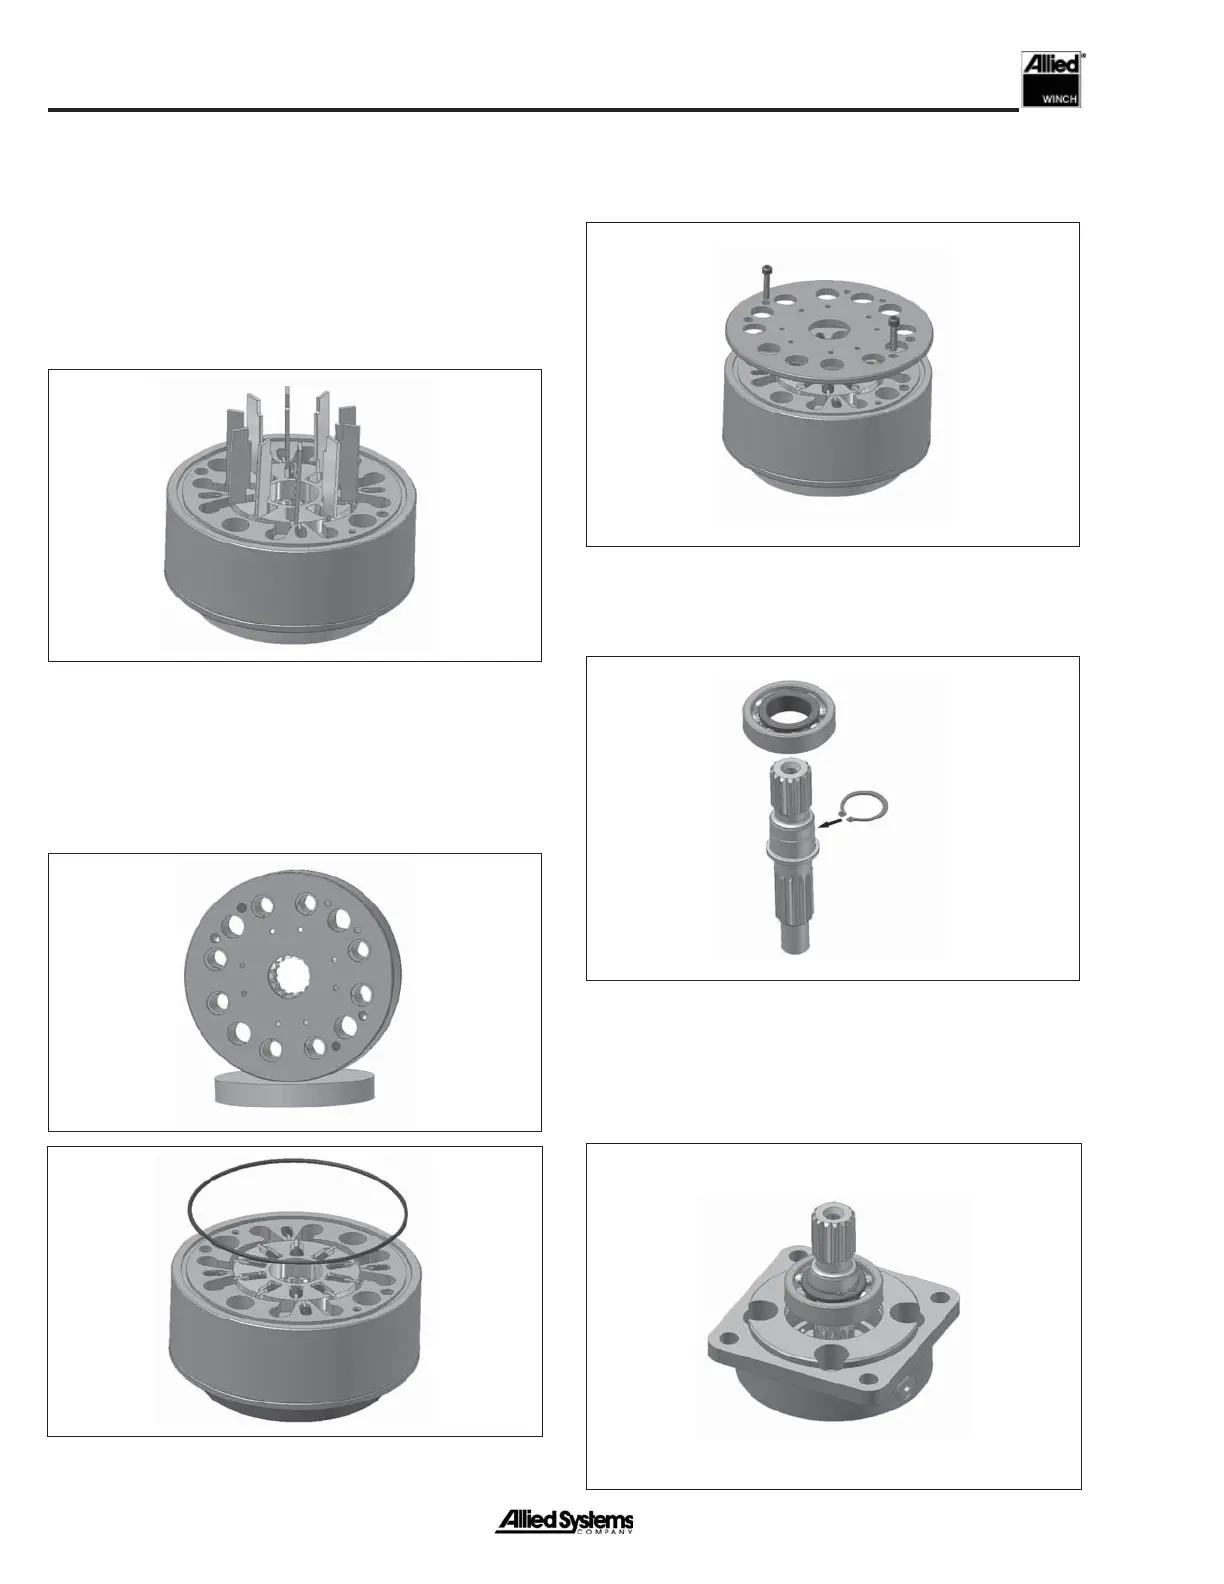
1. Install the rotor and stator vanes. Install the rotor.
NOTE: Make sure that the radiused edge of each
stator vane points to the rotor and the radiused
edge of each rotor vane points to the stator.
3. Place cartridge on any object which will hold it off the
table. Install screws and timing plate.
2. Replace timing plate on rotor/stator cartridge. Install
O-ring and springs, and install dowels pins. Turn plate
over and repeat.
NOTE: Make sure springs are seated in the bottom
of the spring pocket in both the rotor and stator.
4. Press bearing onto shaft. Install snap ring.
5. Press shaft and bearing assembly into front housing
by pressing on the outer race of bearing.
- Motor Assembly
 Loading...