7
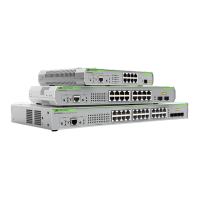
Figure 1: Front Panels of the AT-GS924MX and AT-GS924MPX Switches.........................................................................19
Figure 2: Front Panels of the AT-GS948MX and AT-GS948MPX Switches.........................................................................20
Figure 3: Back Panel of the AT-GS924MX Switch ...............................................................................................................21
Figure 4: Back Panel of the AT-GS924MPX and AT-GS948MPX Switches ........................................................................21
Figure 5: Back Panel of the AT-GS948MX Switch ...............................................................................................................21
Figure 6: AT-GS900MX Series Management Panel.............................................................................................................22
Figure 7: Stacking Transceiver.............................................................................................................................................33
Figure 8: LEDs for the Twisted Pair Ports on the AT-GS924MX and AT-GS948MX Switches ............................................35
Figure 9: LEDs for the PoE Twisted Pair Ports on the AT-GS924MPX and AT-GS948MPX Switches................................37
Figure 10: LEDs for the Combo Twisted Pair Ports..............................................................................................................39
Figure 11: SFP Slot LEDs ....................................................................................................................................................40
Figure 12: Switch ID LED .....................................................................................................................................................41
Figure 13: Switch ID LED Not in Low Power Mode ..............................................................................................................42
Figure 14: Switch ID LEDs in Low Power Mode...................................................................................................................42
Figure 15: Stacking Transceiver...........................................................................................................................................49
Figure 16: Stack of Two Switches in the Linear Topology....................................................................................................50
Figure 17: Stack of Four Switches in the Linear Topology ...................................................................................................51
Figure 18: Stack of Two Switches in the Ring Topology ......................................................................................................52
Figure 19: Stack of Four Switches in the Ring Topology......................................................................................................53
Figure 20: PORT Parameter in the Command Line Interface...............................................................................................56
Figure 21: Components of the Switches...............................................................................................................................65
Figure 22: Components of the AT-GS924MX Switch ...........................................................................................................66
Figure 23: Turning the Switch Upside Down ........................................................................................................................71
Figure 24: Removing the Rubber Feet .................................................................................................................................71
Figure 25: Installing Brackets on the AT-GS924MX Switch ........................................................................
.........................72
Figure 26: Attaching Brackets to the AT-GS924MPX, AT-GS948MX, or AT-GS948MPX Switch........................................73
Figure 27: Attaching Brackets to the AT-GS924MPX, AT-GS948MX, or AT-GS948MPX Switch (Continued) ....................74
Figure 28: Mounting the Switch in an Equipment Rack........................................................................................................75
Figure 29: Connecting the Management Cable to the Console Port ....................................................................................79
Figure 30: User Exec Mode Prompt .....................................................................................................................................80
Figure 31: Moving to the Privileged Exec Mode with the ENABLE Command .....................................................................80
Figure 32: Moving to the Global Configuration Mode with the CONFIGURE TERMINAL Command ..................................80
Figure 33: Activating VCStack with the STACK ENABLE Command...................................................................................81
Figure 34: Returning to the Privileged Exec Mode with the EXIT Command .......................................................................81
Figure 35: Saving the Change with the WRITE Command ..................................................................................................81
Figure 36: Rebooting the Switch with the REBOOT Command ...........................................................................................81
Figure 37: Removing the Dust Plug from the S1 Slot ...........................................................................................................83
Figure 38: Removing the Dust Cover from the Transceiver .................................................................................................84
Figure 39: Installing the Transceiver in Slot S1 ....................................................................................................................84
Figure 40: Removing the Dust Plug from the S2 Slot ...........................................................................................................85
Figure 41: Installing the Transceiver in Slot S2 ....................................................................................................................86
Figure 42: Installing the Retaining Clip .................................................................................................................................88
Figure 43: Plugging in the AC Power Cord...........................................................................................................................90
Figure 44: Lowering the Retaining Clip.................................................................................................................................91
Figure 45: SHOW STACK Command...................................................................................................................................94
Figure 46: Moving to the Global Configuration Mode with the CONFIGURE TERMINAL Command ..................................95
Figure 47: Returning to the Privileged Exec Mode ...............................................................................................................96
Figure 48: Saving the Priority Values with the WRITE Command........................................................................................96
Figure 49: Switch Initialization Messages.............................................................................................................................97
Figures
 Loading...