3. BASIC ITEMS FOR SERVICE
Distortion
Noise
Volume too low
Volume too high
Volume fluctuating
Sound interrupted
See the table below for the items to be checked regarding audio.
Item to be checked regarding audio
Items to be checked after servicing
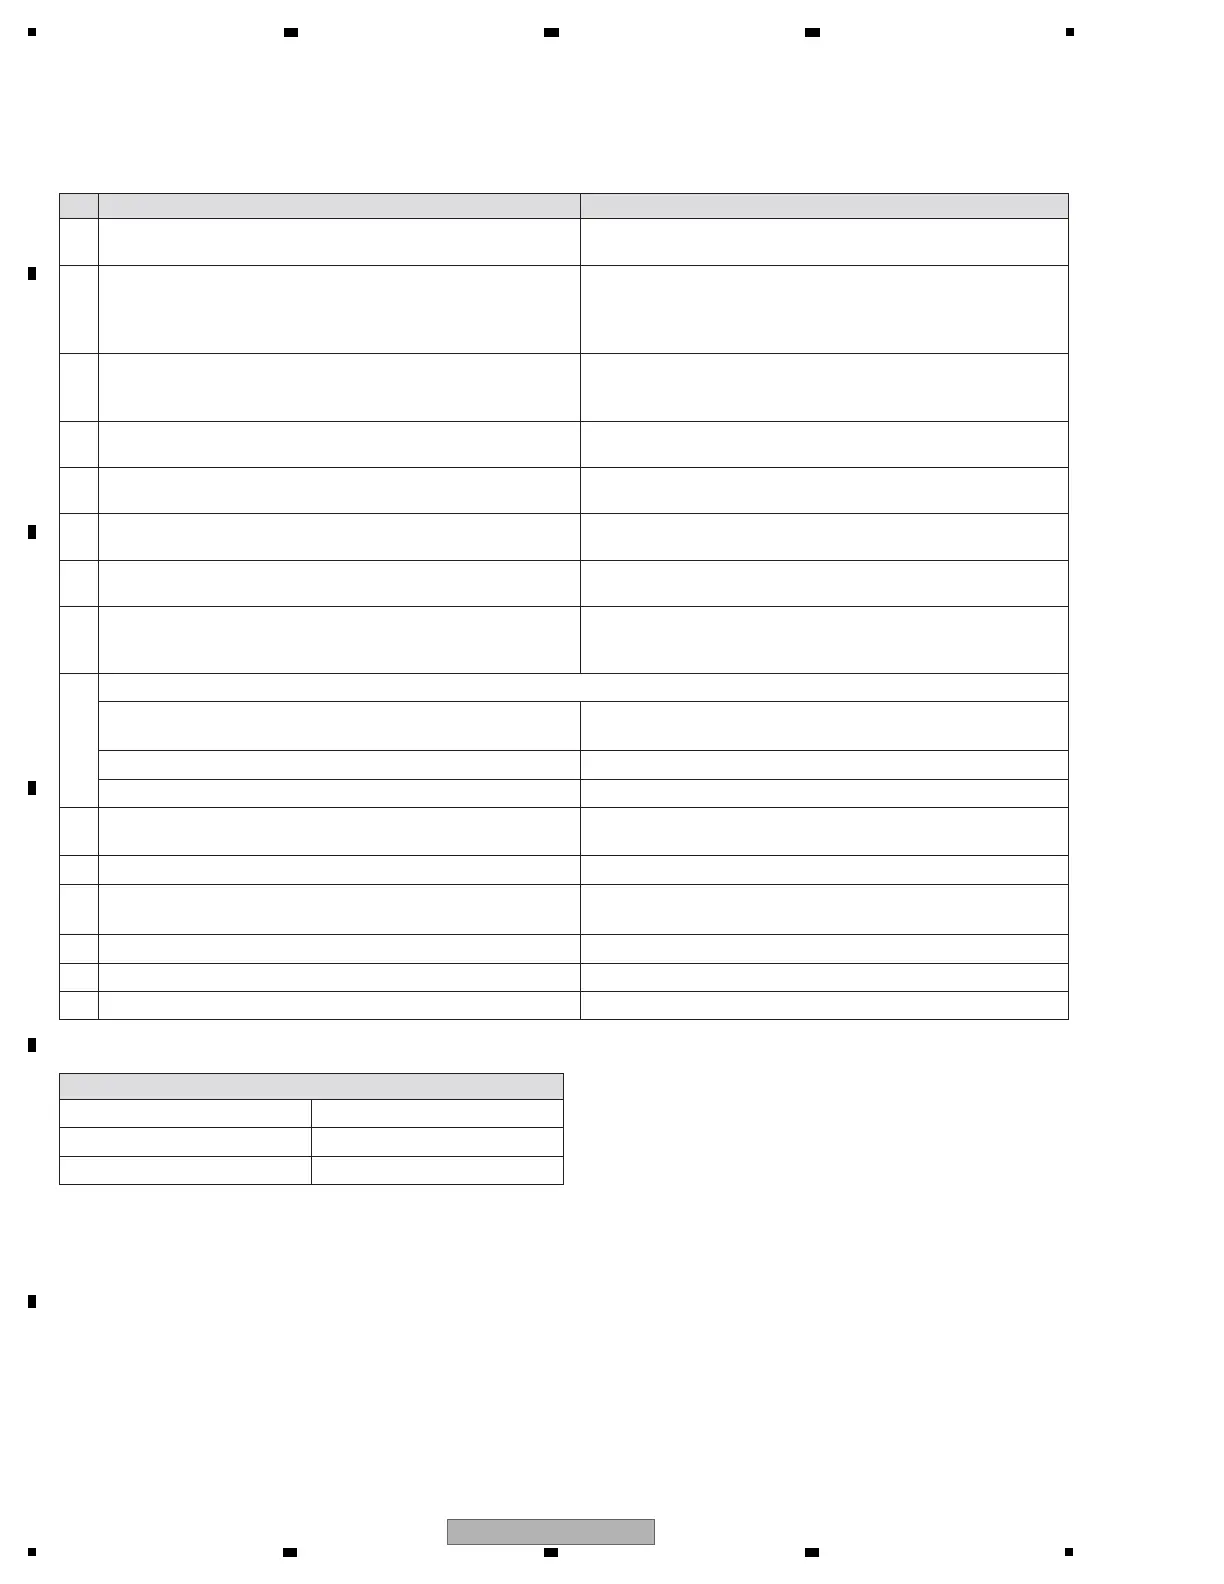
No. Procedure Check points
To keep the product quality after servicing, confirm recommended check points shown below.
1 Confirm the firmware version in Test mode. The version of the firmware must be latest.
Update firmware to the latest one, if it is not the latest.
2 Confirm whether the customer complaint has been solved.
If the customer complain occurs with the specific source, such as
Mic, each Input, Fader, Equalizer, and Trim, input that specific
source for checking.
The customer complain must not be reappeared.
Audio and operations must be normal.
3 Check the analog audio input (each channel, MIC1, MIC2 and
RETURN). (Make the analog connections with CDJ player,
analog player and MIC.)
Audio and operations must be normal.
5 Check the digital audio input. (Make the digital connections with
AES/EBU input equivalence device.)
Audio for each channel and operations must be normal.
6 Check the digital audio output.
(Make the digital connections with CDJ player.)
Audio and operations must be normal.
7 Check the headphones output.
(1/4” stereo phone plugs and 3.5 mm stereo mini plugs)
There must be no errors, such as noise, in the audio output.
8 Check playback, using the fader function.
(Select the fader function then check operations of each channel
with audio signals via the DSP.)
There must be no errors in audio output and operations of each
channel.
4 Check the analog audio output (MASTER1, MASTER2, BOOTH
and SEND). (Make the analog connections with CDJ player.)
Audio and operations must be normal.
Plug in a USB memory device and check that the USB connection
indicator light on.
The device must be properly recognized by the PC.
10 Check the buttons and controls. Make sure that all buttons and controls on the main unit
function properly.
11 Check the LCD display. Check that there is no dirt or dust trapped inside the LCD display.
12 Check the Touch panel. Touch the Touch panel in Test mode and check that it operates
properly.
13 Check the LEDs. Check that all the LEDs light on in Test mode.
14 Confirm user setting contents. Being repaired to the contents before repairing.
15 Check the appearance of the product. No scratches or dirt on its appearance after receiving it for service.
9 Check the connection of each interface.
MULTI I/O terminal
USB A, USB B terminal
The Main unit being conected to LAN normally in Test mode.
LINK