While holding the LINK CUE button, CH1 CUE A button and SEND button (SHORT DELAY) pressed, press the u button
to turn the unit on.
(Be sure to hold the u button pressed until the unit starts up.)
Then press TAP button once to switch to "Crossfader setting mode".
(Refer to "6.1 TEST MODE" for the details.)
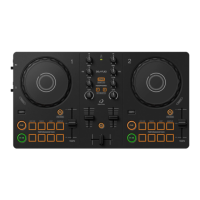
This mode is for performing calibration of the crossfader.
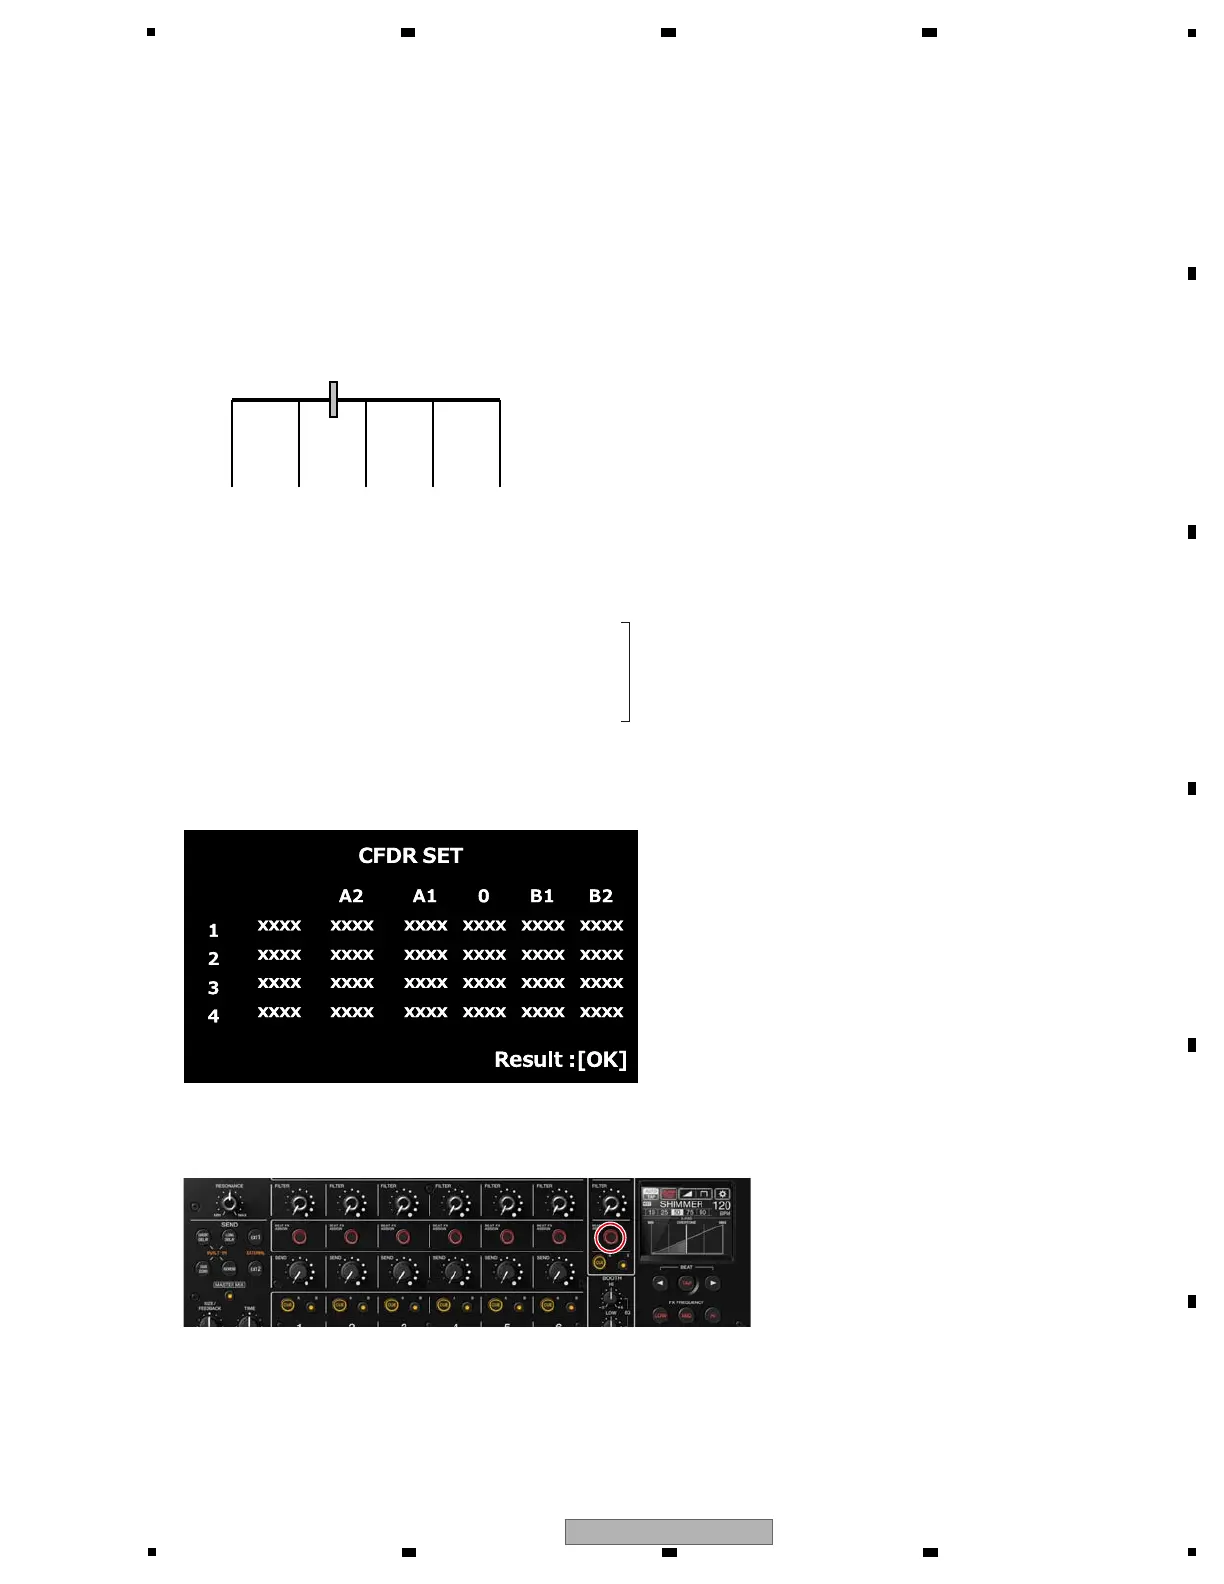
Record the position information for the five locations (the AD value output from each four sensors) shown in the figure below.
"Crossfader calibration position setting jig (GGF1731)" is required to get the position information of A1, 0 and B1.
! xxxx is the AD value
! The most left column displays the current AD value, and the other columns display the AD values stored in flash memory.
If there is no stored AD value, "0000" is displayed.
! [BEAT FX ASSIGN MASTER LED] lights on in the initial state.
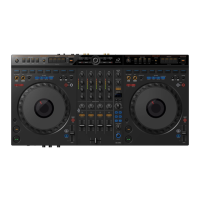
Touch display
[Functional overview]
[Display]
[BEAT FX ASSIGN MASTER button] (Lighting) : Set the AD value / Save the set value
[BEAT FX ASSIGN CH1 button] (Lighting)
[BEAT FX ASSIGN CH2 button] (Lighting)
[BEAT FX ASSIGN CH3 button] (Lighting) : Start the setting
[CUE A CH1 button] (Lighting)
[CUE A CH2 button] (Lighting)
[TAP button] (Lighting) : Mode change (to next mode)
[BEAT FX ON/OFF button] (Lighting) : Mode change (to previous mode)
[Element]
A2 B2B10A1