Caution:
For positioning, be sure to use "Crossfader calibration position setting jig (GGF1731)" in Step (2), (3) and (4).
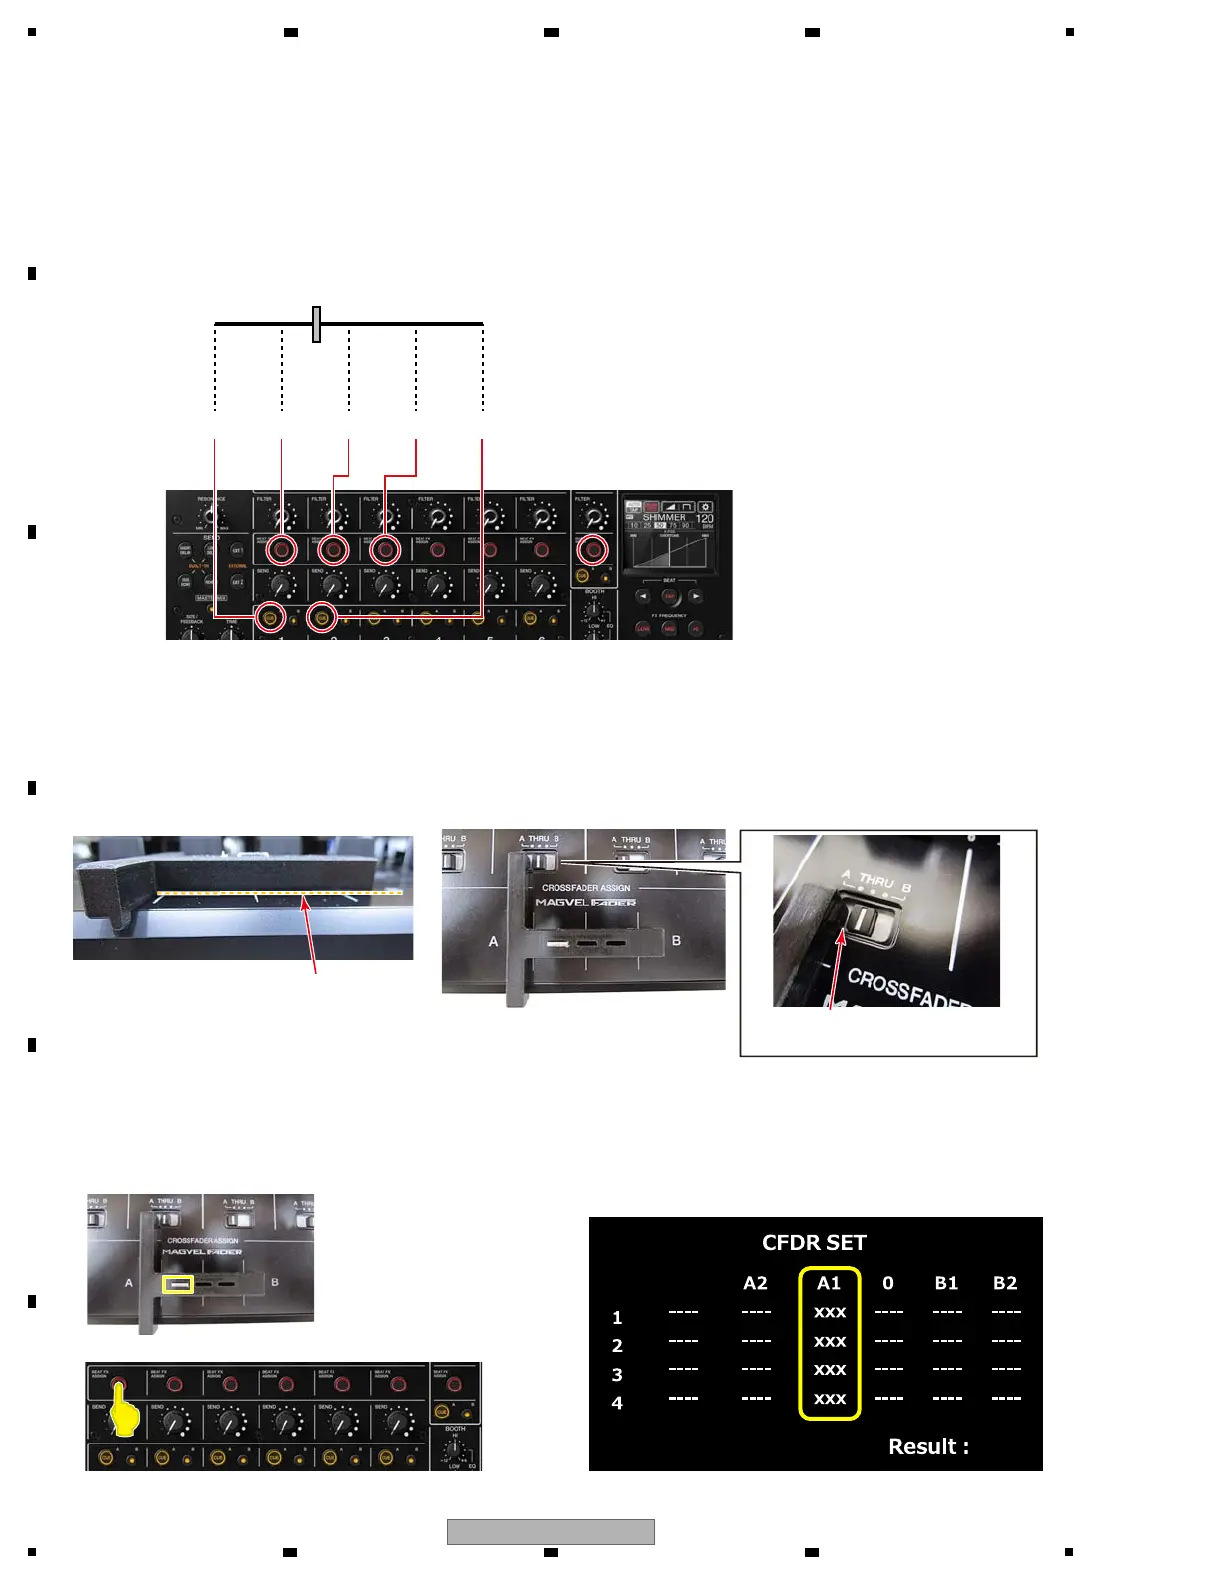
Please confirm that Jig is grounded to the panel surface as shown below. Otherwise, it cannot be accurately calibration.
Also confirm that Jig is caught in [CROSSFADER ASSIGN (A, THRU, B) selector switch 3CH] indentation.
At that time, set [CROSSFADER ASSIGN (A, THRU, B) selector switch 3CH] to "THRU" or "B".
If set it to "A", it will interfere with Jig.
Check that Jig comes in contact
with a panel surface.
Touch display
(1) Start the settings
Press [BEAT FX ASSIGN MASTER button].
[BEAT FX ASSIGN MASTER LED] lights off, and [BEAT FX ASSIGN CH1 LED], [BEAT FX ASSIGN CH2 LED],
[BEAT FX ASSIGN CH3 LED], [CUE A CH1 LED] and [CUE A CH2 LED] light on.
All AD values are displayed as "−".
The following steps (2) to (6) do not need to be performed in order.
(2) The setting of A1
Move Crossfader to A1 and press [BEAT FX ASSIGN CH1 button] button.
When AD value is confirmed, it is displayed in the A1 column.
[BEAT FX ASSIGN CH1 LED] light off.
[Details of Operation]
A2 B2B10A1
Confirm that Jig is caught in
the switch indentation.