P54x/EN SC/La4 SCADA Communications
(SC) 13-8
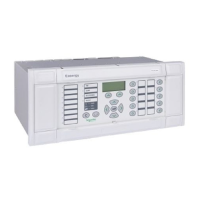
MiCOM P543, P544, P545 & P546
SC
1.2.5 Connections to the Ethernet port (option)
Connection for Ethernet communication can be made either by standard RJ45 electrical
connections or by multi-mode optical fibers suitable for 1300 nm transmission and
terminated with BFOC/2.5 (ST) connectors.
1.3 Configuring the communications ports
Cou
rier works on a master/slave basis where the slave units contain information in the form
of a database, and respond with information from the database when it is requested by a
master unit.
The relay is a slave unit that is designed to be used with a Courier master unit such as
MiCOM S1 Studio, PAS&T or a SCADA system.
1.3.1 Configuring the front courier port
The fro
nt EIA(RS)232 9-pin port supports the Courier protocol for one-to-one
communication. It is designed for use during installation, commissioning and maintenance
and is not suitable for permanent connection. Since this interface is not intended to link the
relay to a substation communication system, not all of the features of the Courier interface
are supported; The port is not configurable and the following parameters apply :-
Physical presentation EIA(RS)232 via 9-pin connector
Frame format IEC 60870-5 FT1.2 = 11-bit (8 Even 1)
Address 1
Baud rate 19200 bps
Note: As part of the limited implementation of Courier on the front port,
neither automatic extraction of event and disturbance records, nor
busy response are supported.
1.3.2 Configuring the first rear courier port, RP1
The
port is configured using the relay’s communication setting. These are accessed using
the front panel user interface keypad, display, and associated menu software. Using the
menu software firstly check that the ‘Comms. Settings’ cell in the ‘CONFIGURATION’
column is set to ‘Visible’, then move to the ‘COMMUNICATIONS’ column.
Move down the ‘COMMUNICATIONS’ column from the column heading to the first cell down
which displays the communication protocol of the first rear port:
RP1 Protocol
Courier
The next cell down the column assigns the address of the relay on the first rear port:
RP1 Address
1
Since up to 32 devices can be connected to one EIA(RS)485/K-bus spur, as indicated in
Figures 1 and 2, it is necessary for each device to have a unique address so that messages
from the master control station are accepted by one device only. Courier uses an integer
number between 0 and 254 for the device address, which is set with this cell. It is important
that no two devices have the same Courier address. The Courier address is then used by
the master station to communicate with the device. The default value of the address is 255
and must be changed to a value in the range of 1 to 254 before use.
The next cell down controls the inactivity timer:
 Loading...