USING THE OTOWAVE 302+
22 OTOWAVE 302+ INSTRUCTION FOR USE
4.2. SWITCHING THE INSTRUMENT ON AND OFF
Select the on/off button for 1 second to switch the instrument on. You will see a small hourglass in the
middle of the display indicating that the instrument is powering on. No warm-up time is required,
although a short diagnostic routine will run for a few seconds. During this time the internal pump will
operate.
To switch the instrument off again, hold the button for approx. 2 seconds and the instrument and LED
b will turn off.
Please note: The power indicator (LED a) will be illuminated as long as the instrument is connected
to the mains.
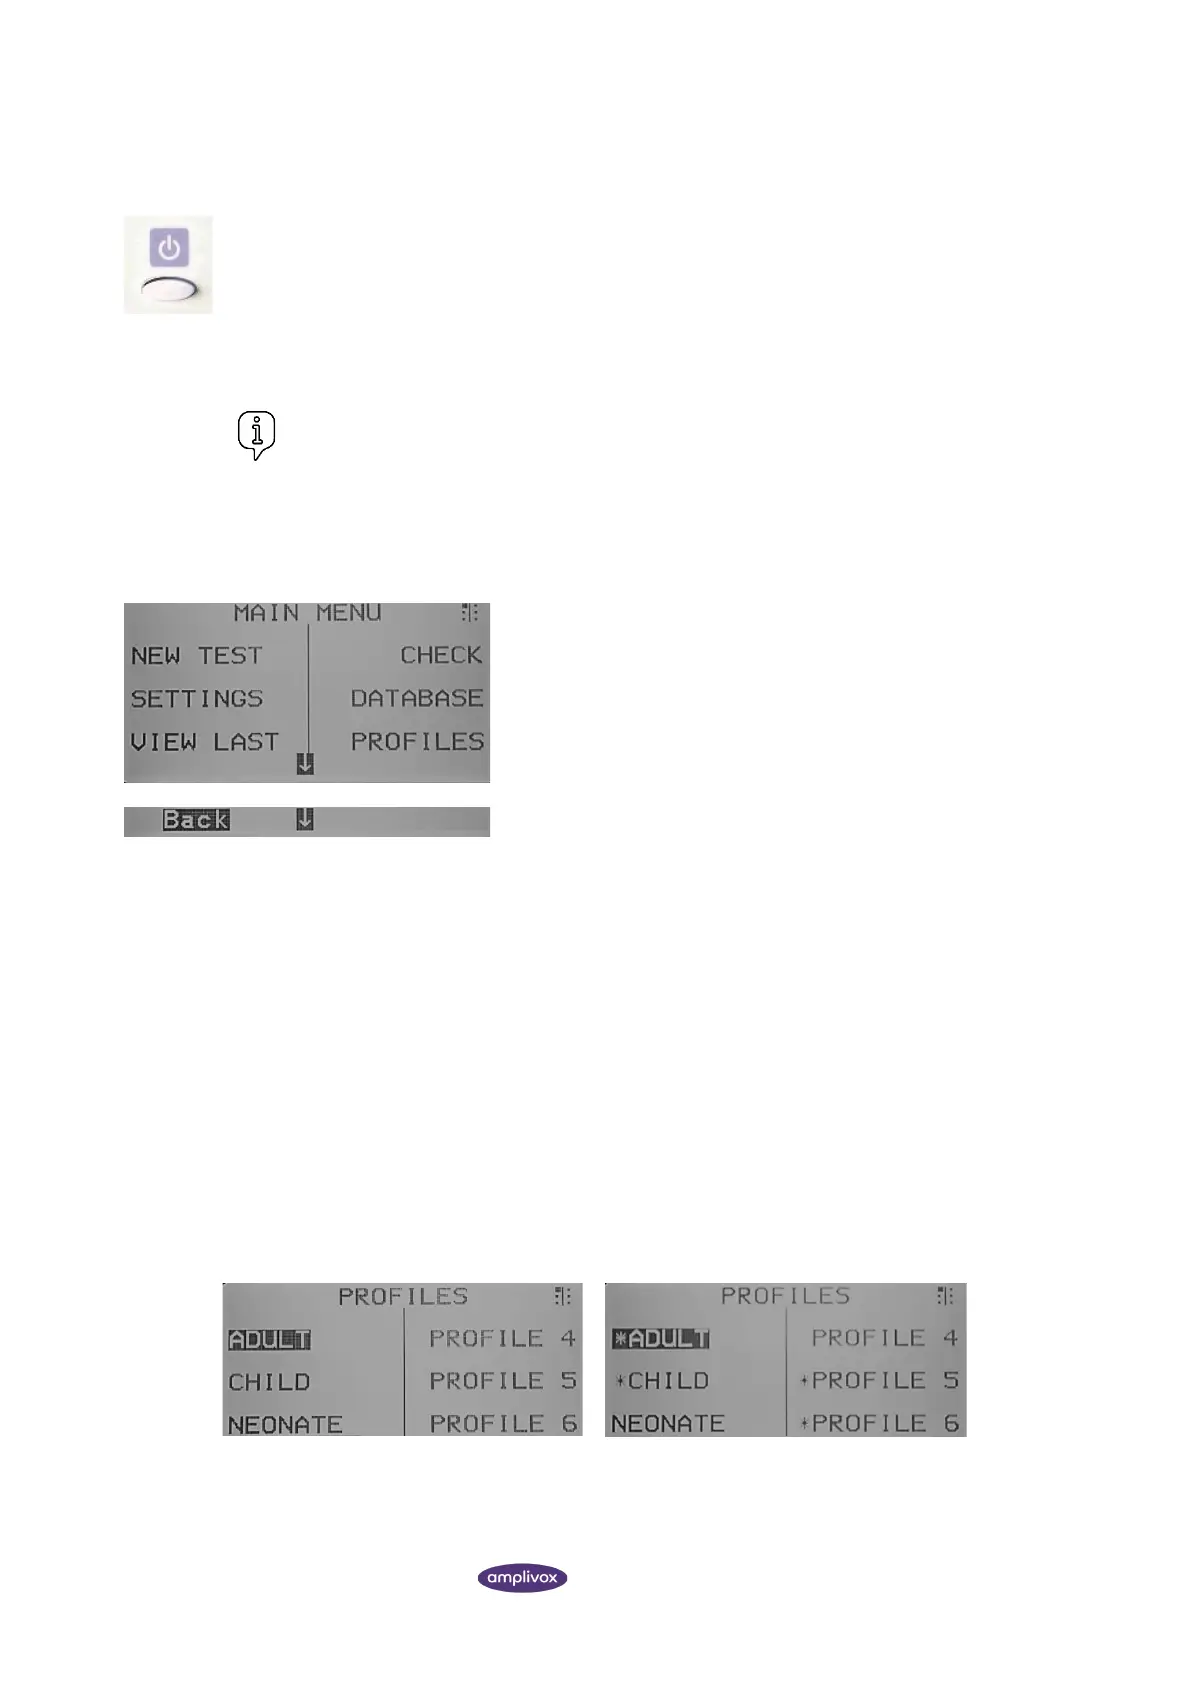
From the MAIN MENU, you can reach different submenus. Use the
navigation keys (up ▲ and down ▼) or the Softkeys (S1 to S6) to
navigate the options and select submenus.
To be brought one menu back, push the left navigation key ◄.
The following submenus can be reached from the MAIN MENU:
• New Test
• Settings
• View last (test)
• Check (Daily Check)
• Database
• Profiles
• System
• Sys. Info (System Information)
4.4. PROFILE STRUCTURE
4.4.1. GENERAL
The Otowave 302+ offers the possibility of creating and customising profiles. In total, 6 profiles are available.
By default, the Otowave 302+ comes with 3 pre-defined profiles offering the ideal test settings for either adults, children
or nenoates. It is possible to change these 3 factory profiles and in addition 3 further profiles can be defined by the user.