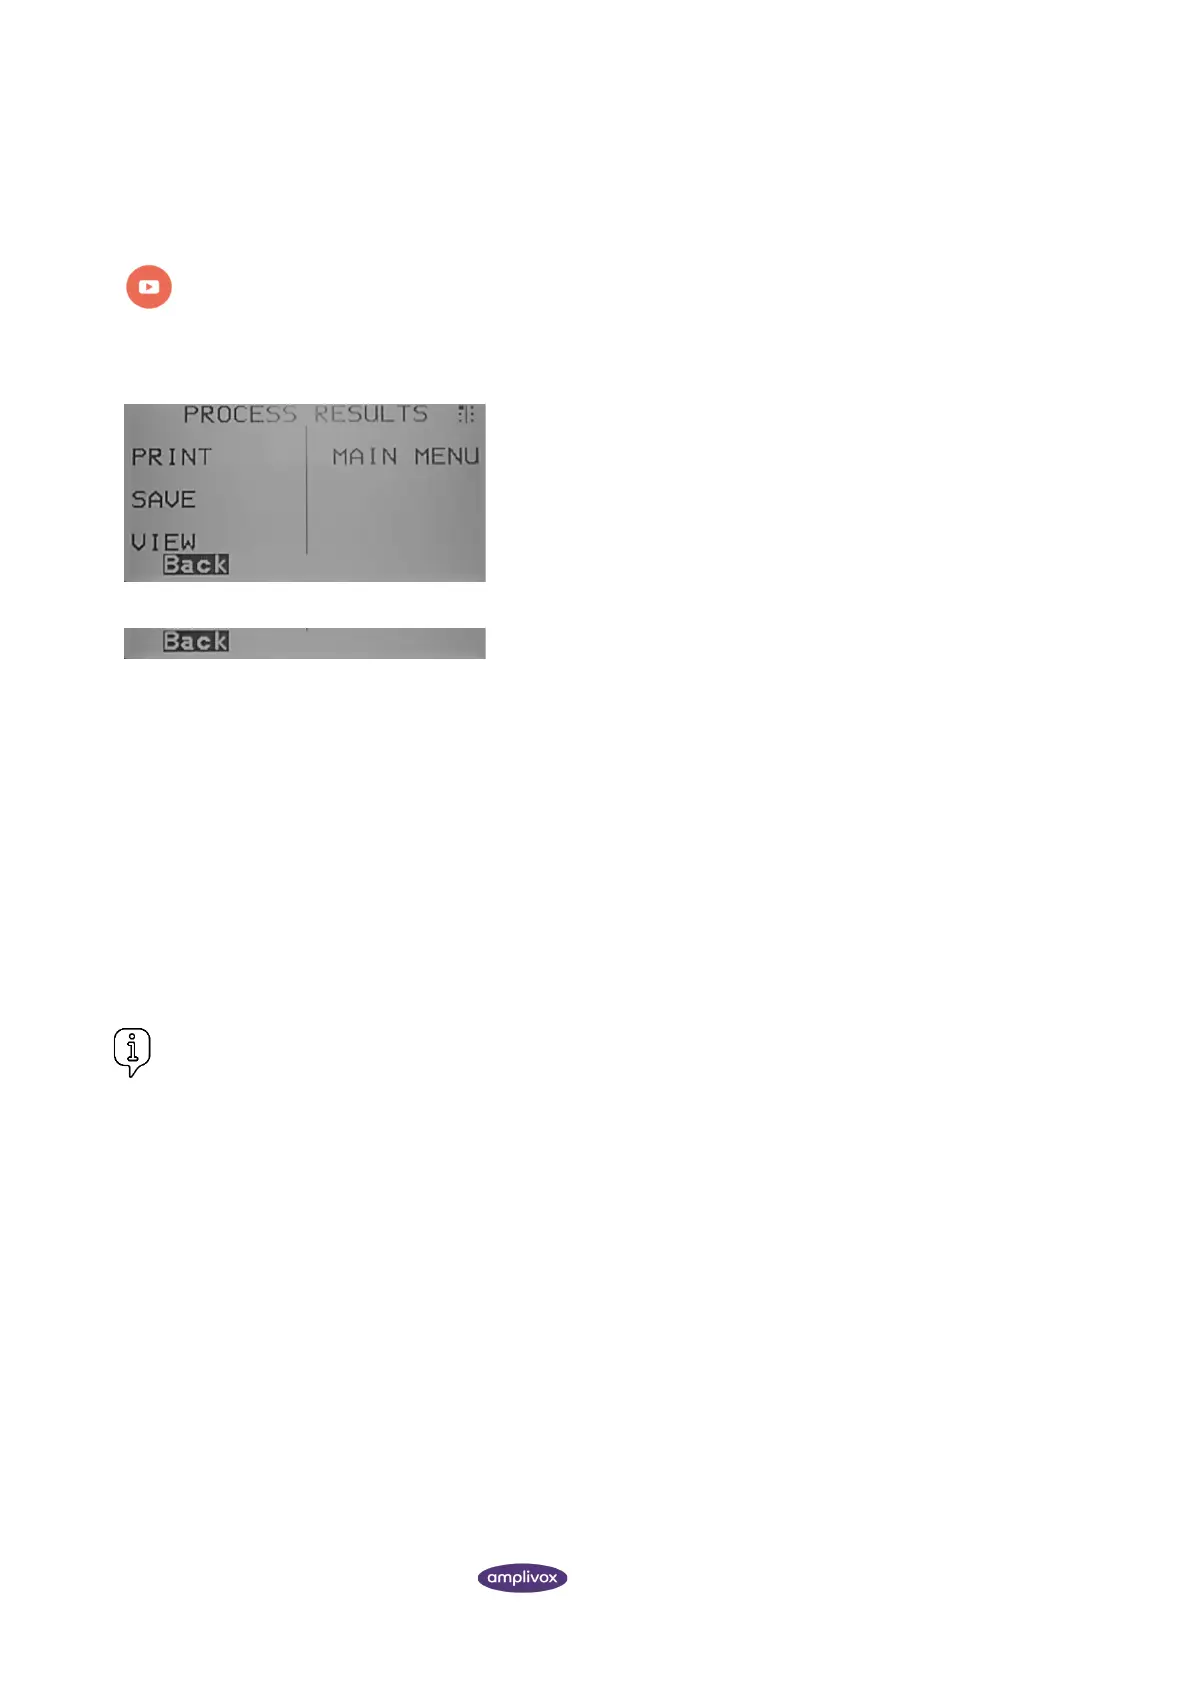
From the test result screen select the right navigation key ► until
the PROCESS RESULTS screen is reached.
From here the following options are given:
• Print the current record (S1)
• Save the current record (S2)
• View the record again (S3)
• Return to the MAIN MENU (S4)
4.10.2. SENDING RESULTS TO A PRINTER
To print the results of the last test select SEND TO PRINTER from the PROCESS RESULTS menu on completion of the
test. The printing process must be confirmed by pressing SELECT again. The Otowave 302+ will then attempt to connect
to the printer.
To stop the print operation (for example if a printer is not connected) press ◄ to select Cancel.
The printout consists of the three characters printed in the NAME field followed by the Otowave 302+ graphical displays,
the analysis and the results. There is space for additional details to be handwritten by the clinician (patient’s full
name/age, operator & comments). Also, the name of the hospital, the department, and the calibration dates for the
instrument may also be printed if required (refer to section 4.6).
After successful printing the PROCESS RESULTS menu is displayed.
Please note:
• When printing one test result, the printout will contain the last selected baseline mode.
• When printing several test results, the printout will contain the stored baseline mode.
• Thermal paper printouts can fade with exposure to light or heat. Consider transferring the data to a computer
for permanent storage.
4.10.3. SAVING RESULTS TO THE INTERNAL DATABASE
Up to 36 tests can be stored in the Otowave 302+ internal database.
To save the results of a test select SAVE RESULTS from the PROCESS RESULTS menu that is displayed on completion of
a test. This option can also be accessed by selecting VIEW THE LAST TEST from the main menu and scrolling through the
results using the ► key as long as the test results have not already been saved or deleted (e.g. by starting and then
aborting a new test).