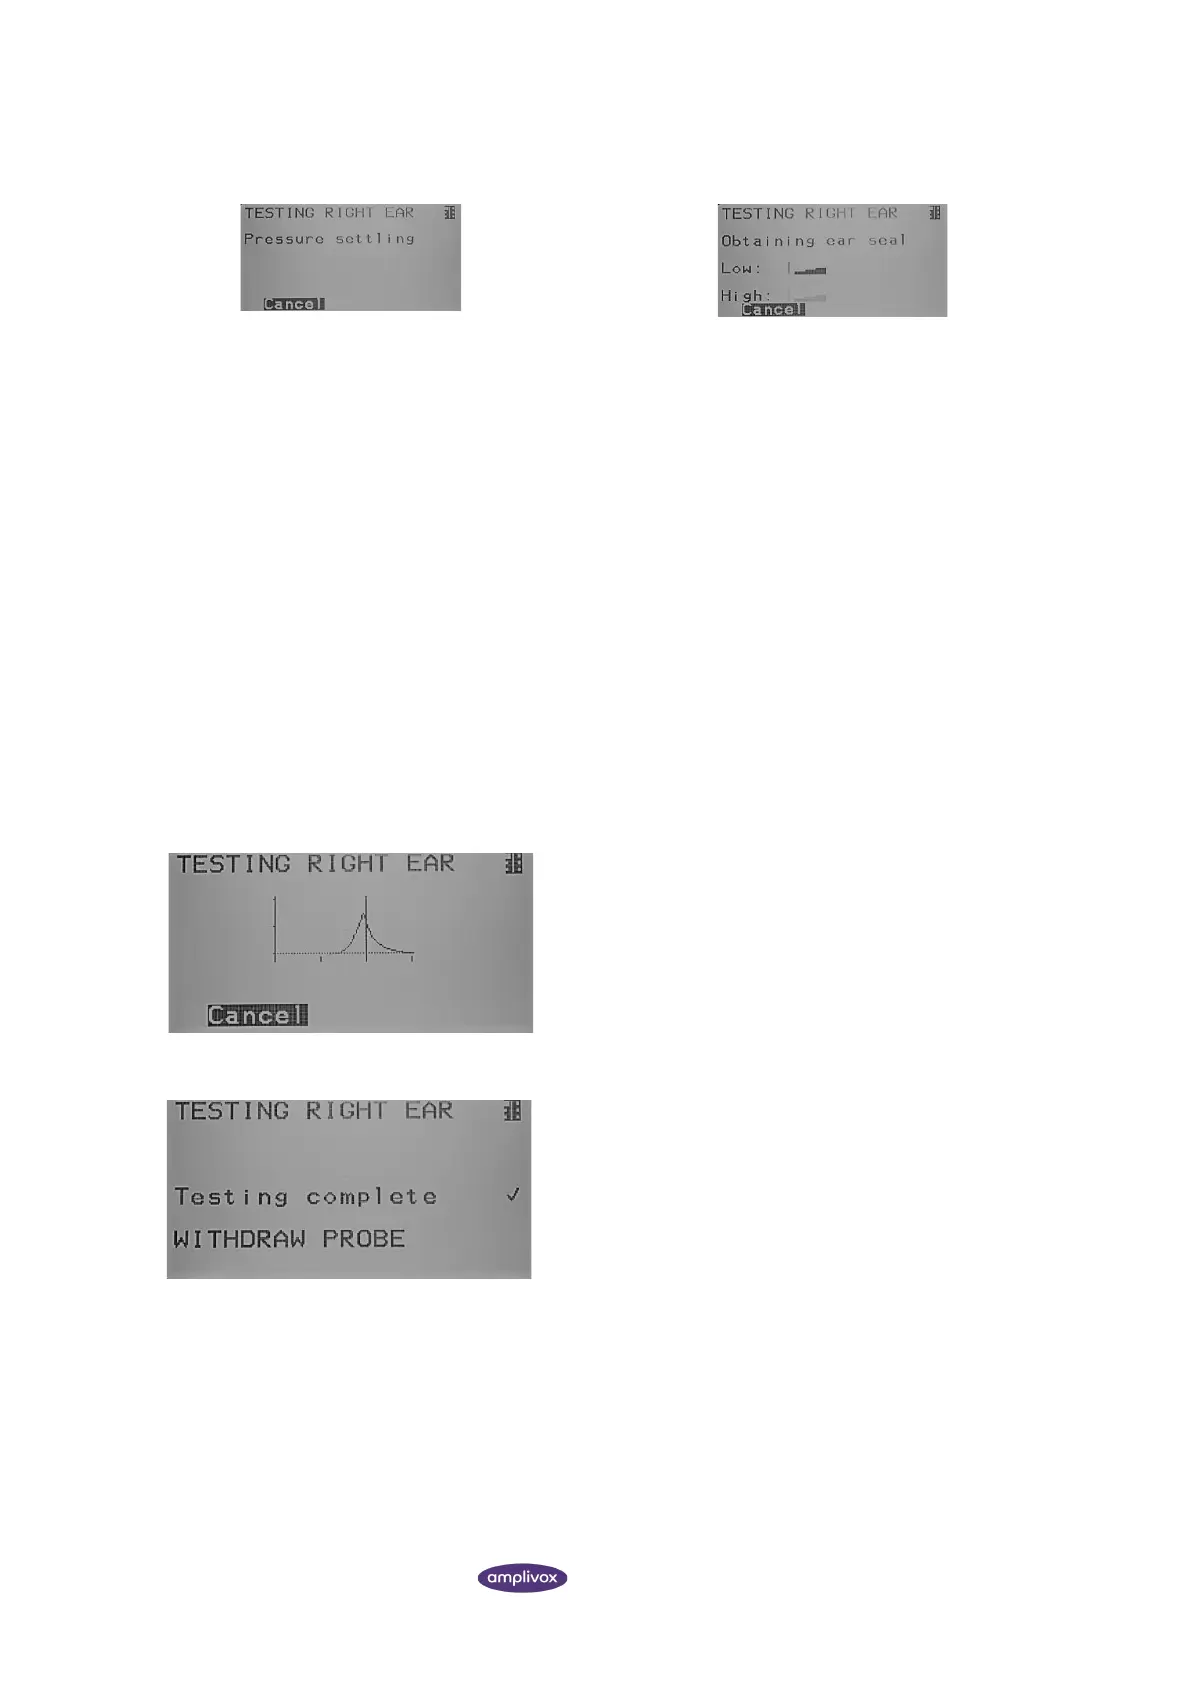
The EXTENDED EAR SEAL CHECK shows a number of bars
indicating the level of the seal.
The probe should be adjusted in the ear until two or more
bars are shown for LOW and HIGH.
LOW: The pump is moved by a fixed distance in an
attempt to reduce the pressure in the ear and is held in
that position. If the measured pressure reduces by a
minimum amount, and remains low (within present
tolerances), the seal is considered OK.
HIGH: The process is repeated, at a pressure higher than
ambient. Otherwise, the process restarts. If the higher
pressure is sufficiently above the ambient pressure, and is
held, the seal is good, and the pump goes just above the
starting pressure
The method used for the extended ear seal check places
a maximum limit on the ear canal volume of ~4.5 ml.
As soon as the pressure can be established, the
tympanometry measurement will be performed. On
screen, you can follow the real-time tympanogram.
When the test sequence is completed, LED b on the device and
the indicator light on the probe will be a solid green colour. Also,
the instruction on the screen will ask you to remove the probe
from the patient’s ear.