13
Operation
You can switch between Fast and Normal mode in the Menu/MeasMode sub-menu. The actual-
ly selected measuring mode is displayed in the first line of the LCD. You can change the mode by
pressing either the Normal or the Fast button. Pressing OK will store your change and return to
Main Menu. Choose the mode you would like to use and follow the instructions in the referring
section (4.5.1. and 4.5.2.). In the upper line in the main menu on the right hand side the number
of measurements is displayed, that had been done since the meter has been switched on.
There is no further special operation needed to calibrate the instrument before starting the daily
routine urinalysis. It is recommended to use urine controls at least daily to check the system.
4.5.1. Measuring in Normal mode (single readings)
Day-to-day operation of the CombiScan
®
100 is easy and will be explained below. For this type
of reading, “Normal Mode” should be selected from the Menu/MeasMod sub-menu by pressing
the Left button (Normal).
Have the urine test sample tube(s) prepared.
Optional: You can enter a single patient ID’s with the help of a connected external key-
board or barcode reader. (see section 4.2. for details)
Dip an unused test strip in the urine sample and carefully wipe off any excess urine.
Briefly dab the side edge of the strip on a clean, absorbent surface (for example kitchen
roll).
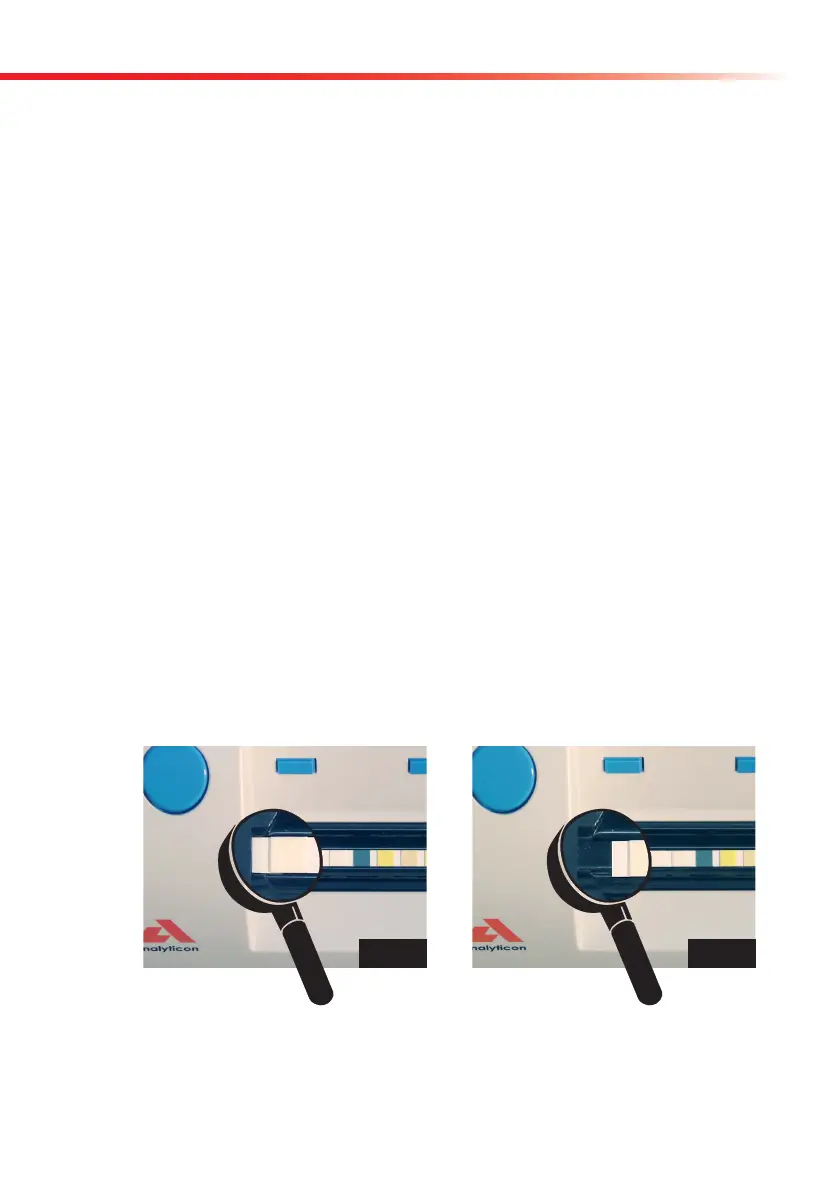
Place the test strip, with the test pads facing upward, on the tray.
Make sure that the top end of the strip is touching the edge of the area for the test strip
on the tray (see picture). Wrong positioning may cause wrong results.
right
wrong
Fig. 4 Correct positioning of the urine strip: The top end of the strip has to touch the top
edge of the area for the test strip on the strip holder tray, as shown in Fig. 4a. Wrong
positioning is shown in Fig. 4b.
Fig. 4a Fig. 4b