14
Operation
Warning!
It is important that the strip is correctly positioned on the tray, and the Start button
pressed within 5 – 10 seconds of dipping the strip.
To start the measurements without patient ID for identification press the Start button.
(If you have entered patient ID’s in a worklist the instrument measures samples accord-
ing to the sequence of ID’s of the worklist. You can start measuring ID’s from worklist
direct from worklist sub-menu or from Main Menu. To enter a worklist please see sec-
tion 4.2.)
60 seconds after the Start button is pressed the first test pad is measured followed by
the others. After evaluation of the last pad the tray returns to start position and the
equipment will display Main Menu options.
Remove and dispose the used test strip. Wipe any urine residues from the tray with a
lint-free cloth.
The result will be printed out automatically after evaluation, if the printer is enabled (see
section 4.4.1.1.)
The next test strip can be dipped, wiped off, placed in the tray and read by pressing the
Start button or you can finish evaluating.
Note: All instructions must be followed thoroughly to get accurate results!
4.5.2. Measuring in Fast mode (serial readings)
You can also perform serial readings suggesting that the strips are dipped and incubated for
about 55 seconds outside the CombiScan
®
100. For this type of reading, “Fast Mode” should
be selected from the Menu/MeasMod sub-menu by pressing the Middle button (Fast). To com-
plete measurements in Fast mode follow the instructions below:
Place dipped test strips with the test pads facing upward on the tray after allowing
them to incubate for approximately 55 seconds.
Optional: You can enter single patient ID’s. with the help of a connected external key-
board or barcode reader. (see section 4.2. for details)
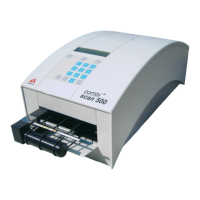
Make sure that the top end of the strip is touching the edge of the area for the test strip
on the tray (see picture). Wrong positioning may cause wrong results.
Warning!
It is important that the strip is correctly positioned on the tray, and the Start button
pressed within 5 – 10 seconds after positioning.