9
Operation
4.4. Setup menu
The Setup menu is adapted to customize the CombiScan
®
100 according to your individual
requirements or working methods. By selecting this menu, you can configure the communica-
tion with your host computer, the built-in printer and the printout format including the result
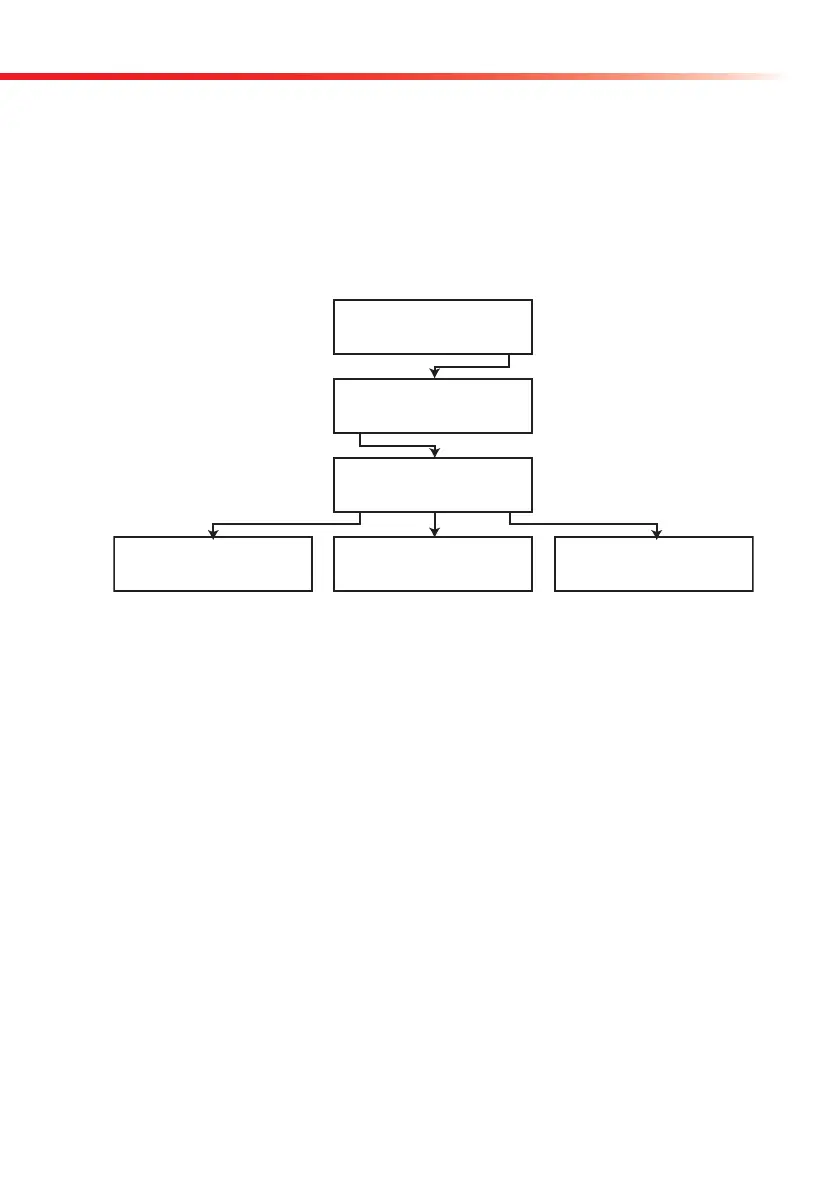
units, the sensitivity of different pads, etc. To get familiar with these features please follow
the flowchart below.
4.4.1. Output settings
4.4.1.1. Printer setting
The CombiScan
®
100 automatically prints out the results if the printer is switched on. You
can switch on and off the printer in the Menu/Setup/Output/Printer sub-menu by pressing the
“On” or “Off” buttons. The actual status of the printer is displayed in the first line of the LCD.
You can accept the desired state of the printer by pressing “OK”.
4.4.1.2. Serial port settings
You can connect the CombiScan
®
100 via the included USB cable to your computer’s USB port,
if you want to upload and collect data in a database on your PC. For serial communication the
CombiScan
®
100 offers two protocols: PC unidirectional protocol when upon a Start signal
the selected records are sent to the receiving computer in a data flow, or Network bidirectional
protocol when data is sent in blocks. In Network protocol the blocks also include an indicator
being able to sign if the sequence number (Seq) or patient ID (ID) identifies the result reports.
Enter the Menu/Setup/Output/Serial/Protocol sub-menu to set the desired serial communica-
tion protocol. Pressing the “Netw/PC” button you can choose between Network and PC proto-
2004/01/01 12:12:25
Worklist ChkMeas Menu
Menu
Setup MeasMode Memory
Setup
Output Strip Clock
Strip Settings
Unit Strip Clock
Output Settings
Printer Serial Language
2004/01/01 12:12:25
Set Display OK