4.4.1. Measurement
The day-to-day operation of the CombiScan
®
500 is easy, and will be guided by the fol-
lowing lines.
Have the urine test sample tubes prepared.
Press the START control key.
Insert an unused strip into the urine specimen, rinse it at the edge of the container,
briefly dap the edge of the test strip on a tissue paper and place it on the conveyor with
the test pads upside. Push the strip gently till it bumps against the strip-bumper. The
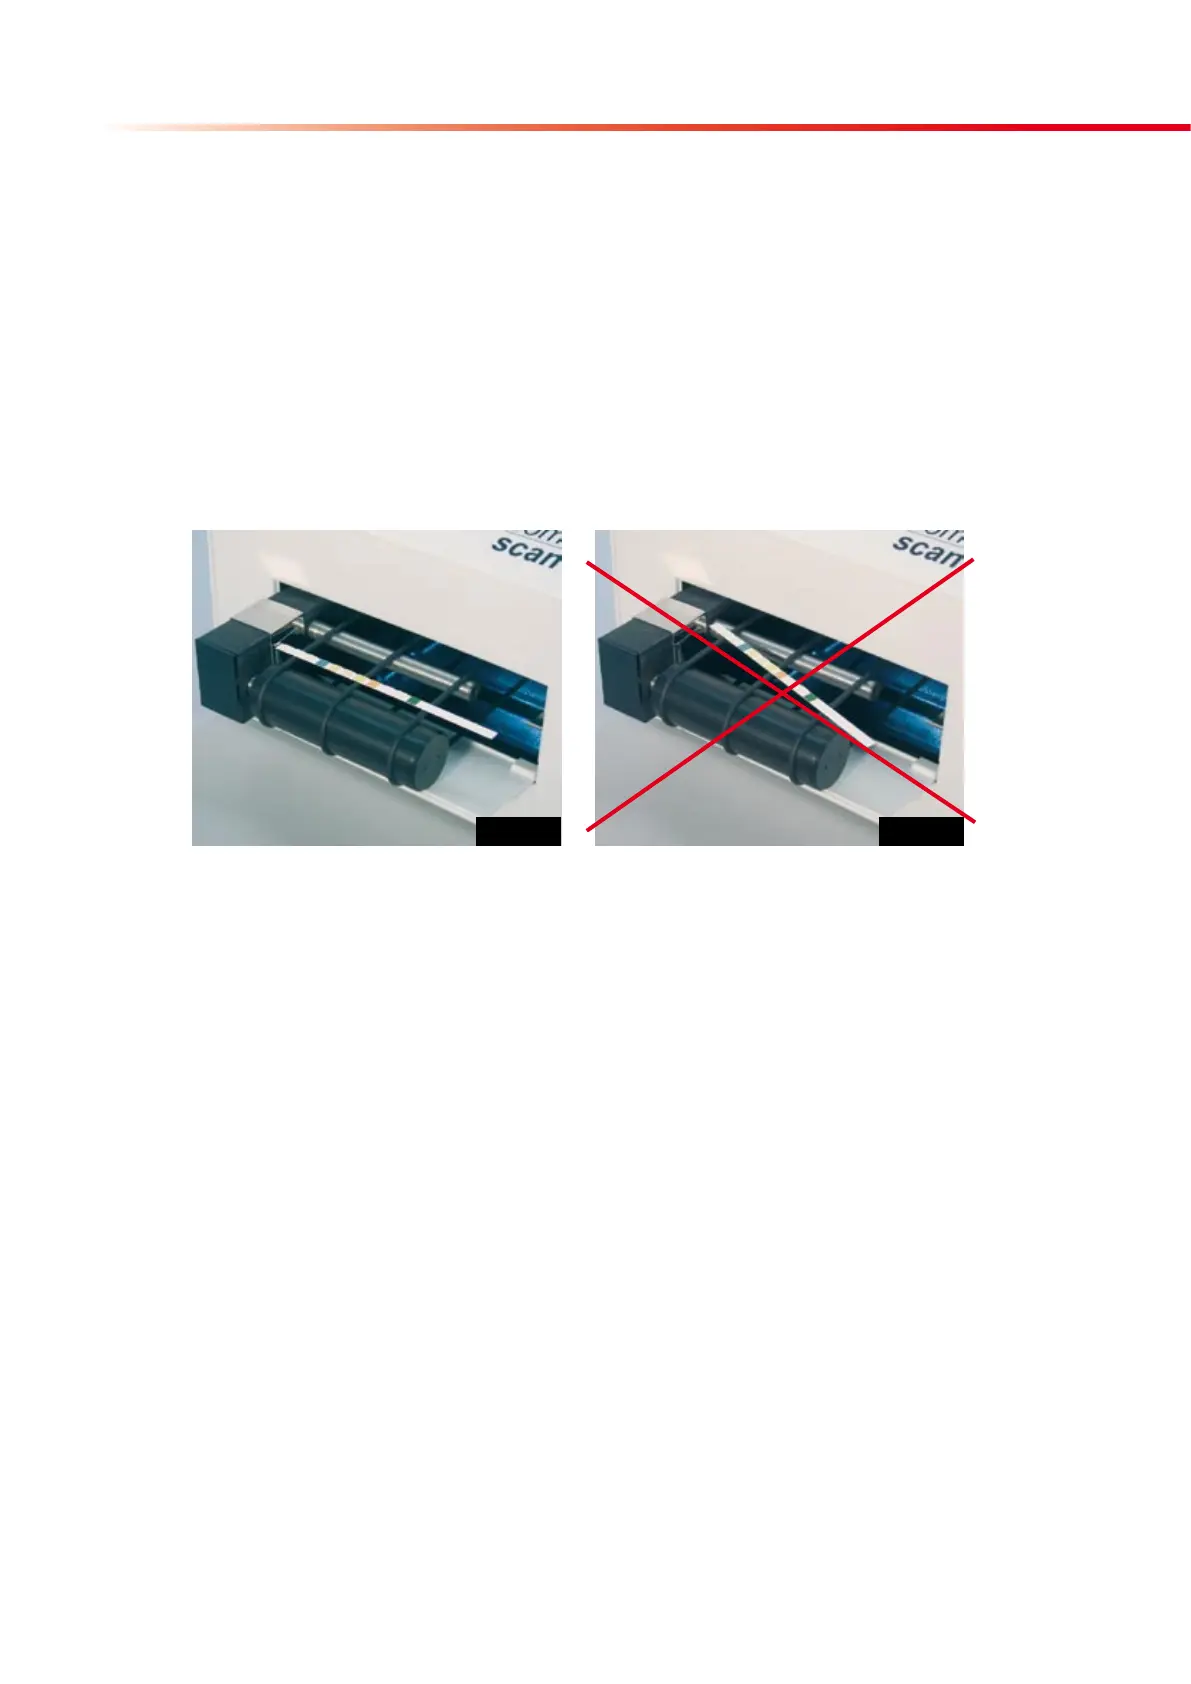
strips must be positioned at right angles to the conveyor (see Fig. 7a, 7b). However, the
system is able to compensate slight deviations. From this moment the testing process
is controlled automatically by the CombiScan
®
500.
If you are in „MANUAL“ mode, you can enter a alphanumeric, max. 13 digit patient ID to
be assigned to the next strip. You can enter the digits via the built-in numerical keypad
or by using a barcode reader or external keyboard. Using the WORKLIST mode the next
patient’s ID appears in the second row of the LCD.
When a strip has been evaluated, the results are sent to the serial port. If a computer
is connected to the reader, the data can be stored and displayed with the Analyti-
con CombiScanner Data Management software (see also section 4.6.). If the build-in
printer is turned on, the results are printed out, too.
After dipping the urine strips into the sample they can be placed on the conveyor. In a
minimum distance of approximately 3cm to the prior strip. This allows a throughput of
about 500 strips per hour.
If you would like to skip a patient ID from the worklist, just select the “SKIP” option and
the reader will delete the element and jump to the next item of the worklist or sequence
number in manual mode.
If during the work you reach the preprogrammed measurement counts (defined by the
calibration card), a warning message will be printed. In this case you are still allowed to
go on measuring an additional 1% of the named counts. Finish your work and perform
a calibration process with a new calibration card (see section 4.5.2.2.). If you do not
calibrate the instrument, it stops working until a new calibration is performed.
After having finished your daily routine press the “STOP” key. The conveyor will stop
running. Clean the instrument and emty the waste bin (see section 5.).
Fig. 7: Positioning of the reagent strip. Fig. 7a shows the right positioning. Fig. 7b shows
a wrong position.
Fig. 7a
Fig. 7b
 Loading...