7
Installation
3. Installation
The CombiScan
®
500 is shipped in a carton box. Prior to unpacking, clear the area where
the instrument is to be operated, a surface of about 30x50 cm will be needed. While
handling the package, please be cautious of the shipping marks on the box. Open the
box. Cut the tape only, leaving the carton material intact. It is recommended to keep the
packing materials for a while as well, in case the instrument needs to be moved to another
location or must be shipped to have it been repaired in the manufacturers’ service. Check
the packing list, if the shipment is complete (see section 2.1.). If it is complete follow the
instruction below otherwise please contact your distributor immediately.
Place the CombiScan
®
500 to its working position.
Optional: Connect the CombiScan
®
500 to your computers’ serial port, by using the
serial cable, if necessary.
Optional: Connect your keyboard or barcode reader optional to the interface connec-
tor.
Connect the power adapter first to DC connector then to the mains.
Switch the reader on by pressing ENTER on the built-in keypad.
In a few seconds the actual software version appears for a short moment on the LCD.
„CLEAR MEMORY“ appears on the display.
Press QUIT. Now you reach the MAIN MENU.
Select MENU by pressing the control key below the MENU sign.
Select SERVICE by pressing the control key.
Select CLEAN by pressing the control key. Now the door opens automatically and the
conveyor section moves out until the cleaning position is reached.
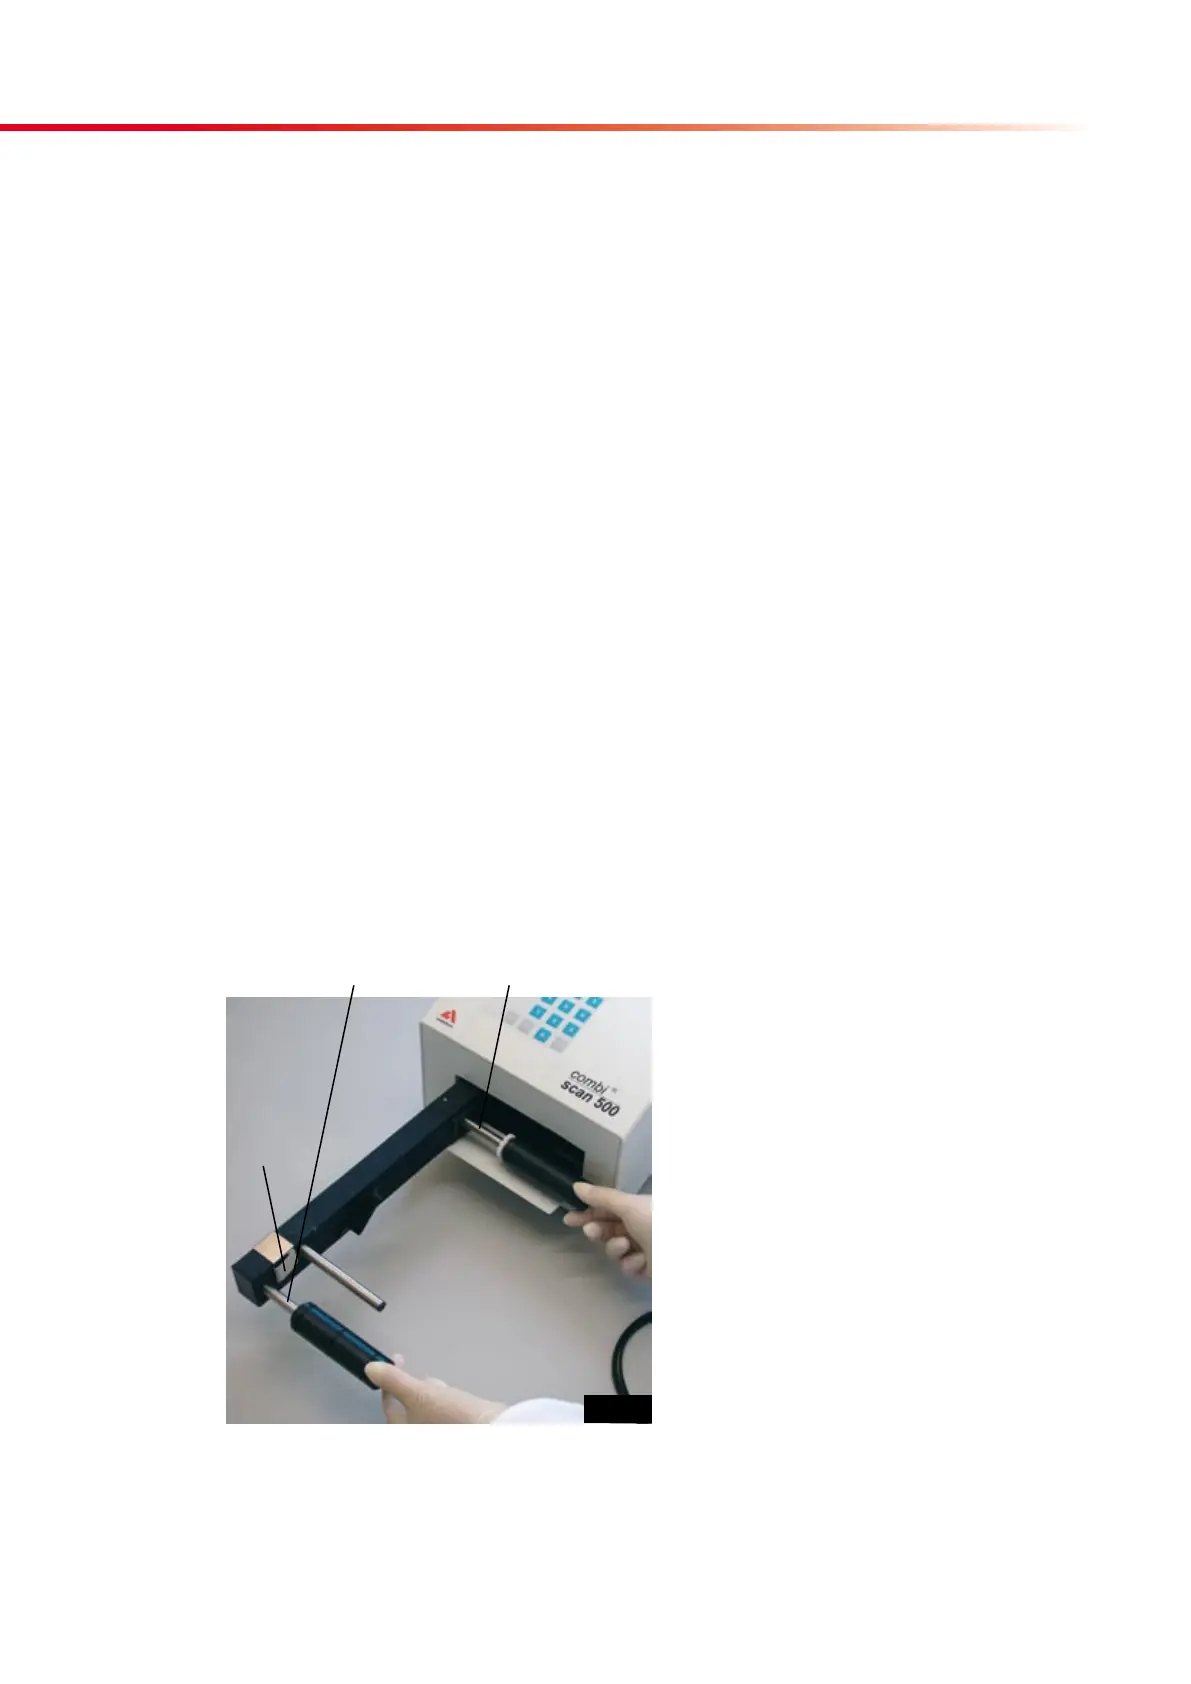
Install the cylinder 2 (with the gear-
wheel) onto the rear shaft until the
built in magnet fixes it in the proper
position (see fig. 4).
Install the cylinder 1 onto the front
shaft until the built in magnet fixes
it in the proper position (see fig. 4).
Front Shaft Rear Shaft
Strip
Bumper
Fig. 4 Installation of the cylinders
Fig. 4